It has been a short two weeks since my last post, but we have made a lot of progress on the bathroom. As mentioned in the previous post, we planned to hire someone to flatten the textured walls and ceiling in the bathroom. Since they would also be patching up any holes in the walls (and ceiling since we changed the exhaust fan). Therefore, our priority was to focus on anything that could affect the drywall. First – we changed the light fixture. With all the electrical work Jim has done – this was pretty easy. The hardest part was making sure it was level.
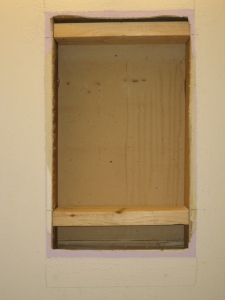
Next, we had to focus on the new medicine cabinet. We had a hole in the wall from the previous medicine cabinet that could used for the new one. The only problem was the new medicine cabinet was not the same length as the previous one, it was shorter. There was a lot of thought and discussion on how high the medicine cabinet (with the mirror) should go. We pretended to be people at different heights, including children and tall friends. We finally settled on the best spot. In order to make up for the smaller medicine cabinet, we added two 2 by 4’s between the two studs in the wall. This was the result:
We waited to install the medicine cabinet until after the walls and ceiling were done.
With the completion of the medicine cabinet, we were finished with all the wall and ceiling work for now. Next, we could start focusing on the floor. We needed to add new cement board to the subfloor. Since the space is small, we only had to use two cement board pieces. This made things go just a tad faster than when we did the kitchen cement board. The one thing that proved to be challenging was cutting out the hole in the cement board for the toilet’s waste pipe. The hole fell inside of the edge of the cement board. In order to start cutting the hole, Jim used a power drill to make a bunch of small holes in the outline of the circle. Then he connected the holes with a utility knife. In our first attempt, the hole turned out to be larger than what we needed. Luckily, we had another piece of cement board and we could give it a second try. The second time, the hole was just the right size.

Waste pipe hole – we took the flange (the piece that the toilet screws into) off to make it easier to lay the cement board and tile. We have the plastic bag there to stop fumes from escaping and to prevent anything from falling in the pipe
Before screwing down the cement board, we needed to add mortar to secure it into place. You may remember this from the kitchen post when we laid the cement board. After the mortar was spread on the subfloor, we placed the cement board in place, and screwed them down. In order to connect the two boards, we laid mortar in between the two pieces, placed this special type of tape over it, and finished it with one more layer of mortar. The work was still exhausting, but it went by a lot quicker since it was our second time around.

Jim showing his acrobat skills while screwing in the cement board (didn’t want to step on the board with the wet mortar underneath)!
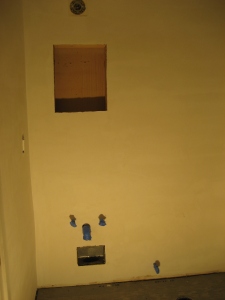
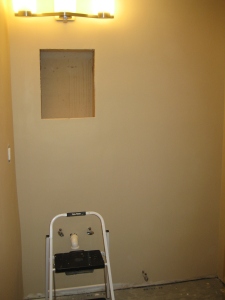
The next project was smoothing the walls and ceiling. Since we hired someone for this job, there isn’t much to say except that I love the new SMOOTH walls and ceilings. They completed the work in one day (last Tuesday). Here is how it looked once it was completed:
Even though two weeks have passed since my last post, we have not worked on the bathroom every night. When we were redoing the kitchen,we would try to get something done almost everyday. As much as we would like to finish the bathroom quickly, it is unnecessary to work every day since there is less to do. Plus during this project, Jim is playing in a volleyball league Wednesday nights and has his volunteering as an EMT on Thursday nights. I am also tutoring Tuesdays after work (I was tutoring Thursdays as well, but just recently cut back). These extra curricula activities eat into the bathroom remodeling time. So our bathroom walls and ceilings were smoothed out last Tuesday, but we didn’t get around to painting until Friday night.
Our trip to Home Depot to pick up some paint supplies on Friday evening reminded us that we should probably pick up a new flashlight while we were there. Hurricane Sandy was predicted to make landfall Sunday or Monday and although the bathroom was the first thing in our mind, we had to be prepared. We lost power for two days after the durecho in June, so we weren’t sure what to expect. We bought a “weapon-sized” (Jim’s words) flashlight and then tried to put Sandy in the back of our minds.
Since we are painting pros by now – we knocked out the painting job quickly on Friday. We chose a nice, neutral taupe color.
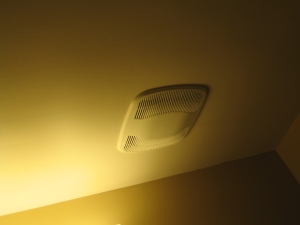
With the painting complete, we could now install the medicine cabinet. With a level and the power drill, this was easily completed. We also wanted to update the old and dirty electrical outlet and light switch. The exhaust fan cover could officially be put in place since the ceiling was painted as well.
We dedicated Saturday to painting touch-ups, tile placement, and Halloween costume shopping. We had to paint the ceiling and walls on Friday. Some of the blue tape we used to protect the new paint caused the paint to peel when we took it off. This led to a decent amount of touch-ups on Saturday. We also wanted to get moving on the tiles. When we re-tiled the kitchen floor, we ordered enough tiles so we could use the same tile in the bathroom. We ended up ordering the perfect amount of tiles which was great. We did all the tile placement and measurement with enough time to get in our costumes and celebrate Halloween with friends on Saturday night.
On Sunday, we were determined to get as much done in the bathroom before we lost power. We weren’t sure when the rain was going to start. Jim went to Home Depot early to rent the wet saw we needed to cut the tile. While he was there, I started bringing in the trash cans and patio furniture so Sandy wouldn’t wreak havoc in our yard. Since we already took the tile measurements, including the complicated section of tiles around the waste pipe, Jim was able to get started cutting the tile as soon as he got back from the store. We were both worried about the tiles surrounding the waste pipe, but thanks to careful measurement and planning, the cuts worked out perfectly on the first try. In about an hour and a half, Jim cut all the tiles and returned the wet saw to Home Depot. We worked so quickly – I never even got a picture! If you need a refresher about a wet saw – check out this old post.
We were both convinced we would lose power and did not know for how long, so even as the rain started to fall, we laid out the tile on the bathroom floor. Jim attached a new flange to the waste pipe since the old one was pretty gross and rotted. We were able to see that the flange fit perfectly in place with the laid out tile which was a relief. The new tile had to line up with the already existing tile in the kitchen. The biggest challenge with this was that we had to line up the tiles while also starting the new tile in the corner of the bathroom farthest from the kitchen. As soon as the mortar was down for the tile, we would not be able to walk or kneel on it, so we had to work out way out. To solve this problem, we traced pencil between all of the tiles to give us an idea of where they went. We also left the non-secured tiles in place while we put the mortar down. Luckily, our planning paid off and the tiles lined up. We managed to finish the mortar without losing power! We called it a day and prepared for Sandy.

Tile set in place with the mortar – look at the perfect hole in the tile for the waste pipe and the nice new flange!
On Monday, we woke up with power on in the house. The storm hadn’t gotten too bad yet, so we still were not convinced we were going to keep the power. We both did not have work that day, so we decided to take advantage of the extra time. The mortar was dry, which meant we could grout the tile. Grout is the stuff that fills in the space between each tile. It needs to be spread into the spaces and then wiped away with a “moist” sponge. This takes a lot of time. You cannot use the sponge to wipe more than once because you may spread the grout (which is like wet sand) and the grout can scratch your tile. You also need to wipe down each tile three separate times. It is not fun and it hurts your hands, knees, and back. Don’t let HGTV fool you into thinking it is easy. You may remember my injuries from the kitchen grouting experience. The storm was supposed to start getting bad at 2pm so we started early, hoping to get whatever we could done. Before we started the grout, we quickly installed the toilet paper holder. We knew we wouldn’t be able to walk on for a day once the grout was completed, so we did what we could beforehand. We also had to get any excess mortar off of the tiles. With a wet cloth and flat head screw driver, we were able to prepare the tile without incident. After grouting the bathroom tile, we did a few touch ups on the grout in the kitchen. There were a few imperfections that bothered us that others may have never noticed. Within a few hours, we finished the grouting. Sandy started really to pick up by then, so we hunkered down in the living room for the rest of the day/night.
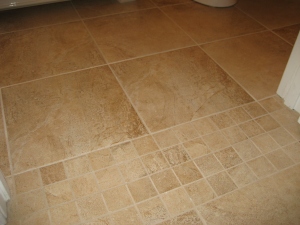
Close-up of the grout in the tile – you can see the mosaic tiles we added in the bathroom to match perfectly with the kitchen mosaic tiles!
After sleeping in our basement since we live near “large trees” (aka we have five huge oak trees in our backyard), we woke up Tuesday morning and still had power! We couldn’t believe we were one of the lucky ones who did not lose power throughout Sandy’s devastation. We lost it for a total of a minute the night before but that was it. Thankfully, most of our family and friend’s fared well throughout the storm also (evacuations and power outages aside).
Since the storm had calmed down on Tuesday, Jim was able to make a trip to Home Depot to pick up some new molding for the bathroom. We both did not have work again, so we dedicated the day to the bathroom. Jim measured and cut out the moldings while I spackled the walls where there were imperfections. We installed moldings and quarter moldings along the floor of the bathroom. Once installed, we painted them to match the trim throughout the house. Once we completed the molding, we installed the towel rack near the would be sink. We took the sink out and put it in place to measure the perfect location for the rack (we did the same for the toilet and toilet paper holder). With this complete, the only things left to install were the toilet and sink.

The new towel rack (it matches the toilet paper holder) – you can also see the new outlet in this picture!
We decided to install the toilet first. We already have a sink in the kitchen, but since the demolition, we have no toilet on the first floor so the toilet got priority. Using our “1,2,3 Plumbing” book as a guide, we installed the bolts on to our new flange.
Next, we added the wax seal to the bottom of the toilet. This ensures an airtight seal between the waste pipe and the toilet to prevent leaking.
Then we needed to put the toilet over the flange, leading the bolts into the holes on the toilet base. Once in place, we used washers to tighten the toilet into place. Then Jim had to saw off the tops of the bolts so the bolt covers could fit. Once this was set, we noticed that the toilet was not perfectly level. We used plastic shims to level the toilet (a shim is a piece of material used to fill up space and make something align). This luckily worked out very well and the toilet was leveled.
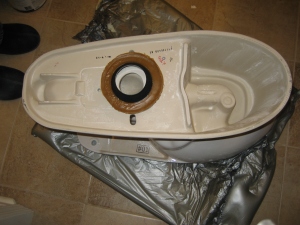
Next, Jim added the tank onto the toilet base. It required lining the tank and base just so (three points needed to be touching) to ensure the tank didn’t leak. Then they were bolted together. We also attached the toilet seat which was pretty simple.
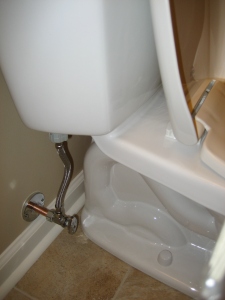
The last step was to hook up the supply pipe to the toilet and turn it on. Since we replace the supply pipe valves, it was very easy to connect the supply pipe.
We turned all the water and let the tank and toilet fill out. After a variety of tests, we concluded there was absolutely no leakage. The toilet was officially open for business. After two unexpected days off from work – we are now one sink away from a completely remodeled bathroom.










Great job. The tile floor looks fabulous.