Tag Archives: mortar

I’ve Got Tiling On My Mind

Posted on
It has been a long time since I updated you on our progress in the master bathroom.  I am sure you have been eagerly awaiting an update from me. I promise you that we have not been slacking off but slowly…very slowly….making progress on the bathroom.
We finished applying the KERDI in the shower shortly after my last post, but it wasn’t done in one more go like I expected. In addition to applying KERDI on the spots we hadn’t covered yet, we had to apply the corner KERDI that covers all the edges where to sheets of KERDI meet.
The last of the KERDI

The last of the KERDI

Floor of the shower all waterproofed

Floor of the shower all waterproofed

The half wall finished

The half wall finished

The step waterproofed

The step waterproofed

View of the shower all KERDI-ed up

View of the shower all KERDI-ed up

Since it has been weeks since I wrote, a lot of what we have done has blended into one.  The smaller things such as painting the walls and ceiling (we had only primed the last post), testing the waterproofing, and adding the medicine cabinet were pretty uneventful. To test the waterproof, we stopped the shower drain and poured water into the base of the shower.  Jim marked the top of the water line and we checked 24 hours later. The water was still at the line which meant our shower was completely waterproof.  Phew.
The painted wall - we used a shade of white, so it is hard to tell the difference from the primer

The painted wall – we used a shade of white, so it is hard to tell the difference from the primer

The outlet, light switches, and themometer for the heating floor all in place!

The outlet, light switches, and themometer for the heating floor all in place!

Medicine cabinet in place! (we haven't taken the protective sheet off the mirror yet)

Medicine cabinet in place! (we haven’t taken the protective sheet off the mirror yet)

Water resting in the base of the shower for the waterproofing - all set!

Water resting in the base of the shower for the waterproofing – all set!

At some point in the past few weeks, we started tiling. We ended up buying a wet saw. If you don’t remember from the kitchen tiling, a wet saw is similar to a table saw except it shoots out water while you are cutting to prevent the tiling from cracking and prevent sparks/fire (metal against stone at a very high-speed).  We have rented a wet saw in the past when we have had to tile. In order to ensure we only rented it for one day, we would measure out all the pieces that needed to be cut beforehand and then just quickly cut them all in one evening.  This time, we had gravity working against us.  We could not dry fit all the tiles to see which tiles needed to be cut where since we were tiling the shower walls. In addition, the tiles we ordered were 24″ by 12″ tiles, which meant we had to cut the majority of the tiles. It made more sense to buy a wet saw so we could take our time and be precise about each measurement.  Also so Jim could have another cool saw to add to his collection.
Since I have already written about tiling before, you may remember the steps – 1) apply mortar onto wall/floor 2) apply tile onto mortar 3) level tile 4) insert spaces 5) repeat.  Once all the tiles are in place, the next step is applying the grout – 1) apply grout 2) smooth out grout with damp sponge that can’t have any dripping water 3) wipe tiles of any extra grout. If only the actual steps were as quick to complete as they are to write.
Instead of boring you with all the details about our weeks of tiling, I’ll just list a few highlights and lessons learned.
1) When tiling vertically, gravity sucks.  Not only could we not dry fit all our tiles, when applying mortar on the wall, globs kept falling to the floor.
2) Shower spaces are tiny.  Jim and I normally split up the tiling jobs – he applies the mortar and then I add the tile and work on leveling. In this instance, Jim had to do both jobs and I just handed him the tiles.  I felt pretty useless for a lot of this.
3) Tiling around built-in shelves is HARD.  We created three built-in shelves for our shower. With the bigger tiles, Jim had to cut out squares on the tiles so they could fit around the shelves.  We also had to add trim on the edges of the tiles since they will show on the shelves.  In order to keep everything in place, we needed to use clamps and let it dry. It took us a long time to finally get all of these tiles up and in place.
Tile cut for the inside of the shelves are resting inside

Tile cut for the inside of the shelves are resting inside

The bottom row of tiles had to be put on before the next row

The bottom row of tiles had to be put on before the next row

Mosaic tile for the back of the shelves in place!

Mosaic tile for the back of the shelves in place!

Dry fitting the tile around the shelves - luckily these all stayed in place

Dry fitting the tile around the shelves – luckily these all stayed in place

The trim for the edges are cut and ready to be placed

The trim for the edges are cut and ready to be placed

Success!

Success!

One day of weekend day of work...it took a while.

One weekend day of work…it took a while.

4) Blue tape isn’t strong enough to hold dry fitted tiles in places.  We lost two tiles this way…gravity sucks.
5) 1″ by 1″ mosaic tiles and 24″ by 12″ tiles, do not require the same amount of mortar.  We knew this going into tiling. We had to buy a special trowel for the large tiles since they require more mortar to stay in place.  The amount of mortar that is underneath a tile helps to level it to the tile next to it. Since you use the same trowel, in theory, the mortar is level so the tile will be level.  The problem is that we decided to put a row of mosaics along the shower wall. Therefore these tiles, which require much less mortar and therefore a smaller trowel, would not be level to the larger tile if we did not use the same amount of mortar.  Our first attempt at this problem was to try to put the mosaics on using the same trowel and to try to level it ourselves. The end result did not turn out well. From far away it looked ok, but from up close, you could see that all the tiles were uneven.  Jim scraped all the mosaics off of the wall – which was no easy task. Then he came up with the idea to use the left over KERDI to level the tiles. The plan was to apply three layers of KERDI under the mosaics to help level the mosaics to the large tiles.  Unfortunately, three levels of KERDI has to be done over three days since the mortar needs to dry after each layer.  Luckily, my husband’s genius solution worked and our mosaic lines up well with the large tiles.
Before getting to the mosaics, we tiled a lot of the walls in the shower

Before getting to the mosaics, we tiled a lot of the walls in the shower

Second wall done to the mosaics

Second wall done to the mosaics

The third wall (Jim is a master at cutting tile, look at that square cut out of the MIDDLE of a tile piece)

The third wall (Jim is a master at cutting tile, look at that square cut out of the MIDDLE of a tile piece)

Top of the third wall complete up until the mosaics

Top of the third wall complete up until the mosaics

Half wall done

Half wall done

Our cute shower step all done!

Our cute shower step all done!

The outside wall of the shower complete

The outside wall of the shower complete

A little cut out in the tile for the toilet water supply pipe

A little cut out in the tile for the toilet water supply pipe

All the walls up until the mosaic complete

All the walls up until the mosaic complete

We had to run the heating wires into the shower, it worked out pretty well

We had to run the heating wires into the shower, it worked out pretty well

You can see the wire going out of the shower

You can see the wire going out of the shower

Mosaics up!  Along with the sills for the tops of the step into the shower and the half wall

Mosaics up! Along with the sills for the tops of the step into the shower and the half wall

Close up of mosaics with the rest of the tiles around it!

Close up of mosaics with the rest of the tiles around it!

All the walls completed!

All the walls completed!

6) These tile leveling clips are awesome.  We used them both on the walls and floor. They would have made our lives easier in previous tiling situations but we didn’t discover them until now.
7) It is super hard to cut 1″ by 1″ mosaic tile, especially if they need to be cut on a diagonal. The mosaic tile we used in the kitchen and first floor bathroom were 2″ by 2″, so Jim’s fingers were at as high a risk as cutting our new mosaics.  Jim needed to use a wrench to hold the tiles. We needed to cut a lot of mosaics since those are the only tiles on the shower floor.
Before we tiled the floor, we needed to put down the heating wires so we could have heated floors.  We super glued them to the floor in a zig-zag manner.  We also put them in the shower floor.  Other then one super glue incident (Jim leaned his hand on some steaming hot glue), the wires went down easily.  Now, we had a new challenge posed with the shower floor.  With such small mosaic tiles, the wires would throw off the balance of the tiles. This would make it unpleasant to step on the shower floor – not something we wanted.  We also want to keep the built-in incline of the shower base so water drains easily.  Jim decided to put a layer of mortar over the wires so he would have a smooth surface when placing the mosaics on the tile floor.  Since Jim is a perfectionist, this process took a few days. The mortar had to dry, then be sanded, then be tested for its draining abilities. There were some areas that didn’t drain as well as we would like, so more mortar had to be added and the process started all over again.  After about three tries, it was up to snuff.  After applying all the mosaics, all the tiles were in place!
Dry fitting the tile before we put the heating wires down

Dry fitting the tile before we put the heating wires down

Heating wires in place!

Heating wires in place!

The wires in the shower

The wires in the shower

Floors completed!

Floors completed!

We only need a few tiles under the vanity

We only need a few tiles under the vanity

Everything but the shower floor completed

Everything but the shower floor completed

The layer of mortar over the heating wires in the shower

The layer of mortar over the heating wires in the shower

Mosaic on the shower floor!

Mosaic on the shower floor!

The mosaic shower floor in place! (unfortunately, this is the best picture I got before the grout)

Another view of the floor and shower!

Our last step with the tiles was to grout – as always.  We kept our normal jobs of Jim applying the grout and myself smoothing it and wiping it away.  We were on top of each other when working in the shower, but we figured it out. Jim had to finish up some of the grouting without me since I went out of town for Memorial Day. In the end, all of this time and work was worth it.  The tile looks awesome.
Shower floor complete!

Shower floor complete!

The half wall and floor

The half wall and floor

Floor completed (with a lot of tools on it as well)

Floor completed (with a lot of tools on it as well)

View of the shower (I didn't take a full view picture because we started to do more work before I took the picture and didn't want to reveal the new work)

View of the shower (I didn’t take a full view picture because we started to do more work before I took the picture and didn’t want to reveal the new work)

Shower Prep

Posted on

Progress has been slow in the recent weeks with our bathroom renovation. This mainly had to do with conflicts in our schedules that made it difficult to work on the bathroom.  After my most recent post, Jim and I went to Rehoboth Beach, DE for a few days since it was my Spring Break from work.  It was nice to relax (even though it was cold at the beach) but it took away many days we could have worked on the bathroom.  We got back on Easter and celebrated the holiday with Jim’s family.

The Monday after Easter, we got back to work.  We needed to prime the new drywall.  We took to our standard painting jobs and that went off without a hitch.  During the week, we continued to work on the bathroom but were thwarted by volleyball, CPR certification, and dinner plans. One night Jim attached the light fixture above the sink – which looks great. Another night, we painted the ceiling and got the walls in the shower area ready for water proofing.

Light fixture above the sink!

Light fixture above the sink!

Ceiling painted and complete!

Ceiling painted and complete!

Close-up of recessed light covers

Close-up of recessed light covers

All primed!

All primed!

Another view with the ceiling

Another view with the ceiling

Wall primed and ready to go!

Wall primed and ready to go!

Friday night, we put together the cabinet for the sink.  Getting the cabinet has been an ordeal.  We ordered from a “ready-to-assemble” retailer online.  This is what we did for our kitchen cabinets and it worked out well, so we did not think it would be a problem. We did not go with the same company just because we liked a cabinet from another company better. We first ordered the cabinet at over a month ago (maybe two months). We started to put it together and the bottom piece of the cabinet did not fit into the grooves on the sides of the cabinet. Jim contacted the company and after supplying proof (pictures with a tape measure up to the grooves and bottom cabinet), they sent us a new bottom piece.  When the bottom piece arrived, we quickly realized it was the exact same size as the previous bottom piece – which did not solve the problem. At first, Jim was determined to shave the piece down to make it fit but I was able to talk him out of it.  He contacted the company again who said they would send us an entirely new cabinet (again after we supplied proof of the pieces not fitting). It took another week for the cabinet to arrive and it had the SAME problem.  We could not believe it. We were ready to just return both cabinets and be done with this company, but the woman convinced Jim to give them one more chance and promised they would check to make sure the pieces fit before sending the cabinet (that is, after we sent more proof that the cabinet pieces didn’t fit in the most recent one). We finally received the cabinet this past week.  Luckily, the pieces FIT! Turns out, the grooves on the side pieces were too small and the bottom piece was the right size.  The only problem with the new cabinet was that they clearly put the cabinet together beforehand and did not worry about scratches while taking it apart.  We did have three cabinets to choose from though so we just picked the best pieces out of the bunch.  Building the cabinet was relatively easy, although the directions left more to be desired. It was basically just a few pictures of the pieces of the cabinet going together. There was no text and absolutely no pictures of the 20+ different screws involved. We were left with about 8 screws at the end of assembly, but we are pretty sure we did everything right.  We did have to make a slight alteration of the bottom back of the cabinet to make sure it fit in place in the bathroom. Remember we pushed the wall by the sink back a few inches? Well the very bottom part of that wall is slanted, so the cabinet needs to be cut at an angle to go up against the wall. Jim is a math genius who figured out all the angles perfectly and cut the cabinet without issue.  We aren’t ready to put it in place yet, but it is now ready for when we need it.

The cabinet!

The cabinet!

Saturday morning we went to pick up the tile we ordered.  It did not take too long and got us prepared for the rest of the day’s work – prepping the shower for tile. Since showers are often wet (I know, you learn something new every day), you need to waterproof the walls of a shower. There are different methods of doing this like using cement board, etc, but we decided to use the Schluter-KERDI Shower Systems.  There are different materials you can order from the company. We got the shower base which already has a built-in slope to the drain, a shower step (think of that step you always have to go over when entering a shower), and its polyethylene waterproofing membrane (a big orange waterproofing sheet). The shower base also come with a drain as well.  In addition to adding the KERDI, Jim made sure to apply silicon to all of the sections the KERDI won’t cover (the tile redi built-in shelves, the shower step, and water supply valve box).  In order to keep the KERDI in place, you must first apply mortar to the drywall and then spread the KERDI on top of the mortar.  We knew we would need a step stool to get to the top areas of the shower and did not want to put the step stool on the shower base. The shower base is made of this unusual material – sort of like a very strong styrofoam.  Therefore, we started with the top walls of the shower and then installed the base.  It was relatively uneventful although Jim quickly discovered that applying mortar to a wall is not as clean as on a floor because gravity takes the mortar off of the trowel and brings it to the floor.  Before setting the shower base in place, Jim connected the last bit of PVC pipe to the drain and shower waste pipe.  Everything went pretty smoothly.

First section of mortar

First section of mortar

Smoothing the KERDI in place

Smoothing the KERDI in place

Again

Again

First day of KERDI in the shower

First day of KERDI in the shower

Shower base in place with the KERDI on it

Shower base in place with the KERDI on it

The step going into the shower - no KERDI on it yet.

The step going into the shower – no KERDI on it yet (that hole in the wall is for the shower step we are going to add).

We stopped working around 4pm on Saturday because Jim needed to volunteer at the Rescue Station that night.  He had not been feeling well that day or the night before so he decided to take a nap before his shift.  While napping, he took his temperature and saw he had a pretty high fever.  He called in sick to the Rescue Squad and has been recovering since. Yesterday he went back to work (the paying kind) so last night we got back to work on the bathroom (our own self-inflicted kind).  Jim did the majority of the work on his own because I was weeding and planting some dahlias in the front yard by the mailbox.  Jim almost finished the rest of the KERDI. We will definitely be done at our next opportunity and then we all ready for tile!

The view of the shower (see the shaving step we added? pretty cool!)

The view of the shower (see the shaving step we added? pretty cool!)

Inside the shower - you can see the water supply lines that are ready for the shower panel

Inside the shower – you can see the water supply lines that are ready for the shower panel

Another close-up shot of inside the shower

Another close-up shot of inside the shower

Building Walls and Laying Floors

Posted on

Spring has sprung, except no one told the weather. Since our beautiful day two weekends ago, the weather has been getting colder instead of warmer.  Just yesterday, we even had the biggest amount of snow fall this year!  With the weather being uncooperative, we took a break from working in the front yard and moved our focus back to the bathroom.

Part of the plan for our new shower is to have glass doors instead of a shower curtain.  We wanted to build a half wall to close off the shower and also allow for a place for the glass door to be connected to. We measured out how long the wall should be and Jim cut out the wood.  He nailed together the frame of the wall and then we screwed it into place, drilling a hole for the water supply line to come through.  We have a pipe coming through this wall since we plan to put the toilet up against the wall and it needs access to water.  We put up one side of drywall on the wall.

Jim nailing together the frame

Jim nailing together the frame

The wall in place with one side of drywall up!

The wall in place with one side of drywall up!

The view from the other side (standing "in the shower")

The view from the other side (standing “in the shower”)

The next day, before we added the rest of drywall, we had to do a little plumbing.  The water supply line need to have a 90 degree turn so that it came out of the wall.  Luckily, with all the practice we have had so far, Jim added the turn in the pipe without much trouble.  I continued to cut the pieces of drywall while Jim worked on the pipes.  We also wanted to make sure the wall was sturdy even at its point further away from its base, so Jim added a cross beam in the frame.  With the extra beam and drywall support, the wall turned out to be very sturdy.  The last step was to add the rest of the drywall.

Cross beam in place

Cross beam in place

New turn in the pipe - perfect and ready to go!

New turn in the pipe – perfect and ready to go!

Drywall up!

Drywall up!

Wall complete

Wall complete

We started this weekend with a trip to the tile store.  We used the same store for our kitchen floor tile and backsplash   We really liked them and their selection of tile, so it was a no-brainer for us to go there to find our bathroom tile.  We needed tile for the floor and shower. We weren’t sure if everything would be the same tile or different.  We ended up being at the store for over 2 hours (mind you, this is a small store, not a big warehouse), there were just so many decisions to make.  We got tile that we are both very excited about and it should be here in 5-7 business days. Phew.

Sunday started off with us focusing on the floor.  We needed to put cement board over the subfloor so it would be ready for the tile when it arrived. We did not plan to put cement board in the shower area because we bought a base that is meant to be tiled over. That area of the bathroom will need to be water proofed and down differently than anything we have done before. Luckily, placing down cement board is old news for us.  We cut out the pieces and laid them down.  We had to cut out a hole for the waste pipe for the toilet. I measured where the hole should be on the cement board and got to work cutting it out.  When I put the cement board back in place, I saw that I measure to the wrong section in one area and the hole was about 2 inches off.  I was able to fix my error, so it was no big deal in the end.  That is why you measure twice and cut once people!  Jim prepared mortar for us to put down to keep the cement board in place.  Once he spread out the mortar, we put down the cement boards and screwed them in.  We also needed to put mortar in between the joints of the cement board and put this special tape over it.  Once it dried, there was one more layer of mortar, then the floors were  all done!

Since the cement board was down, we could now add the toilet flange.  A toilet flange is needed in order to screw a toilet into place. At first, we had a flange that would not fit well as is.  It was too long and therefore would not rest flat with the floor. Jim was able to find a different toilet flange that fit perfectly. It needed to be attached with the primer and glue like the other PVC pipes and then screwed into the subfloor, after that, it was all ready to go!

Jim spreading out the mortar

Jim spreading out the mortar

Cement board in place

Cement board in place

Cement board in place 2

Cement board in place 2

Close-up of the toilet flange

Close-up of the toilet flange

The last thing we needed to do was cut out part of the corner of the shower for our “shaving step.”  This is a little step in the shower that is designed to make shaving your legs in the shower easier (how awesome is that ladies?).  We forgot to put it into place before we put up the drywall originally so we would have to cut out part of the drywall. We had to put the shower base down so we knew the exact height of the step.  I cut out the drywall but realized there was not a good place for us to screw the step into place, so I let Jim take over.  He opened the hole in the wall a little bit more and added some 2 by 4’s behind the wall so we could screw in the step.  Due to a slope in one of the walls (something we dealt with when putting up the drywall that I forgot to mention), it created a very frustrating situation in adding the step. It needed to be level with the wall with a little slope on the top so water would not pool on the step. Jim tried many times to get it perfect.  In the end, he got it as close as he could. We plan to even it out with mortar when we put up the tiles.

IMG_0971

Shower step!

Today, we have a drywall guy at the house.  He is flattening our textured ceiling. Since we already are hiring him for that, we also told him to connect the drywall joints for us as well.  It is a longer (and therefore more expensive) job than if he just did the ceiling, but it will ensure flat and even walls throughout the bathroom.  This is really becoming a room!

One last shot of the texture ceilling

One last shot of the texture ceiling

The room before the drywall guy came

The room before the drywall guy came

The FLAT ceiling after the drywall guy was done!

The FLAT ceiling after the drywall guy was done!

Finished walls!

Finished walls!

Two Weeks of Work

Posted on

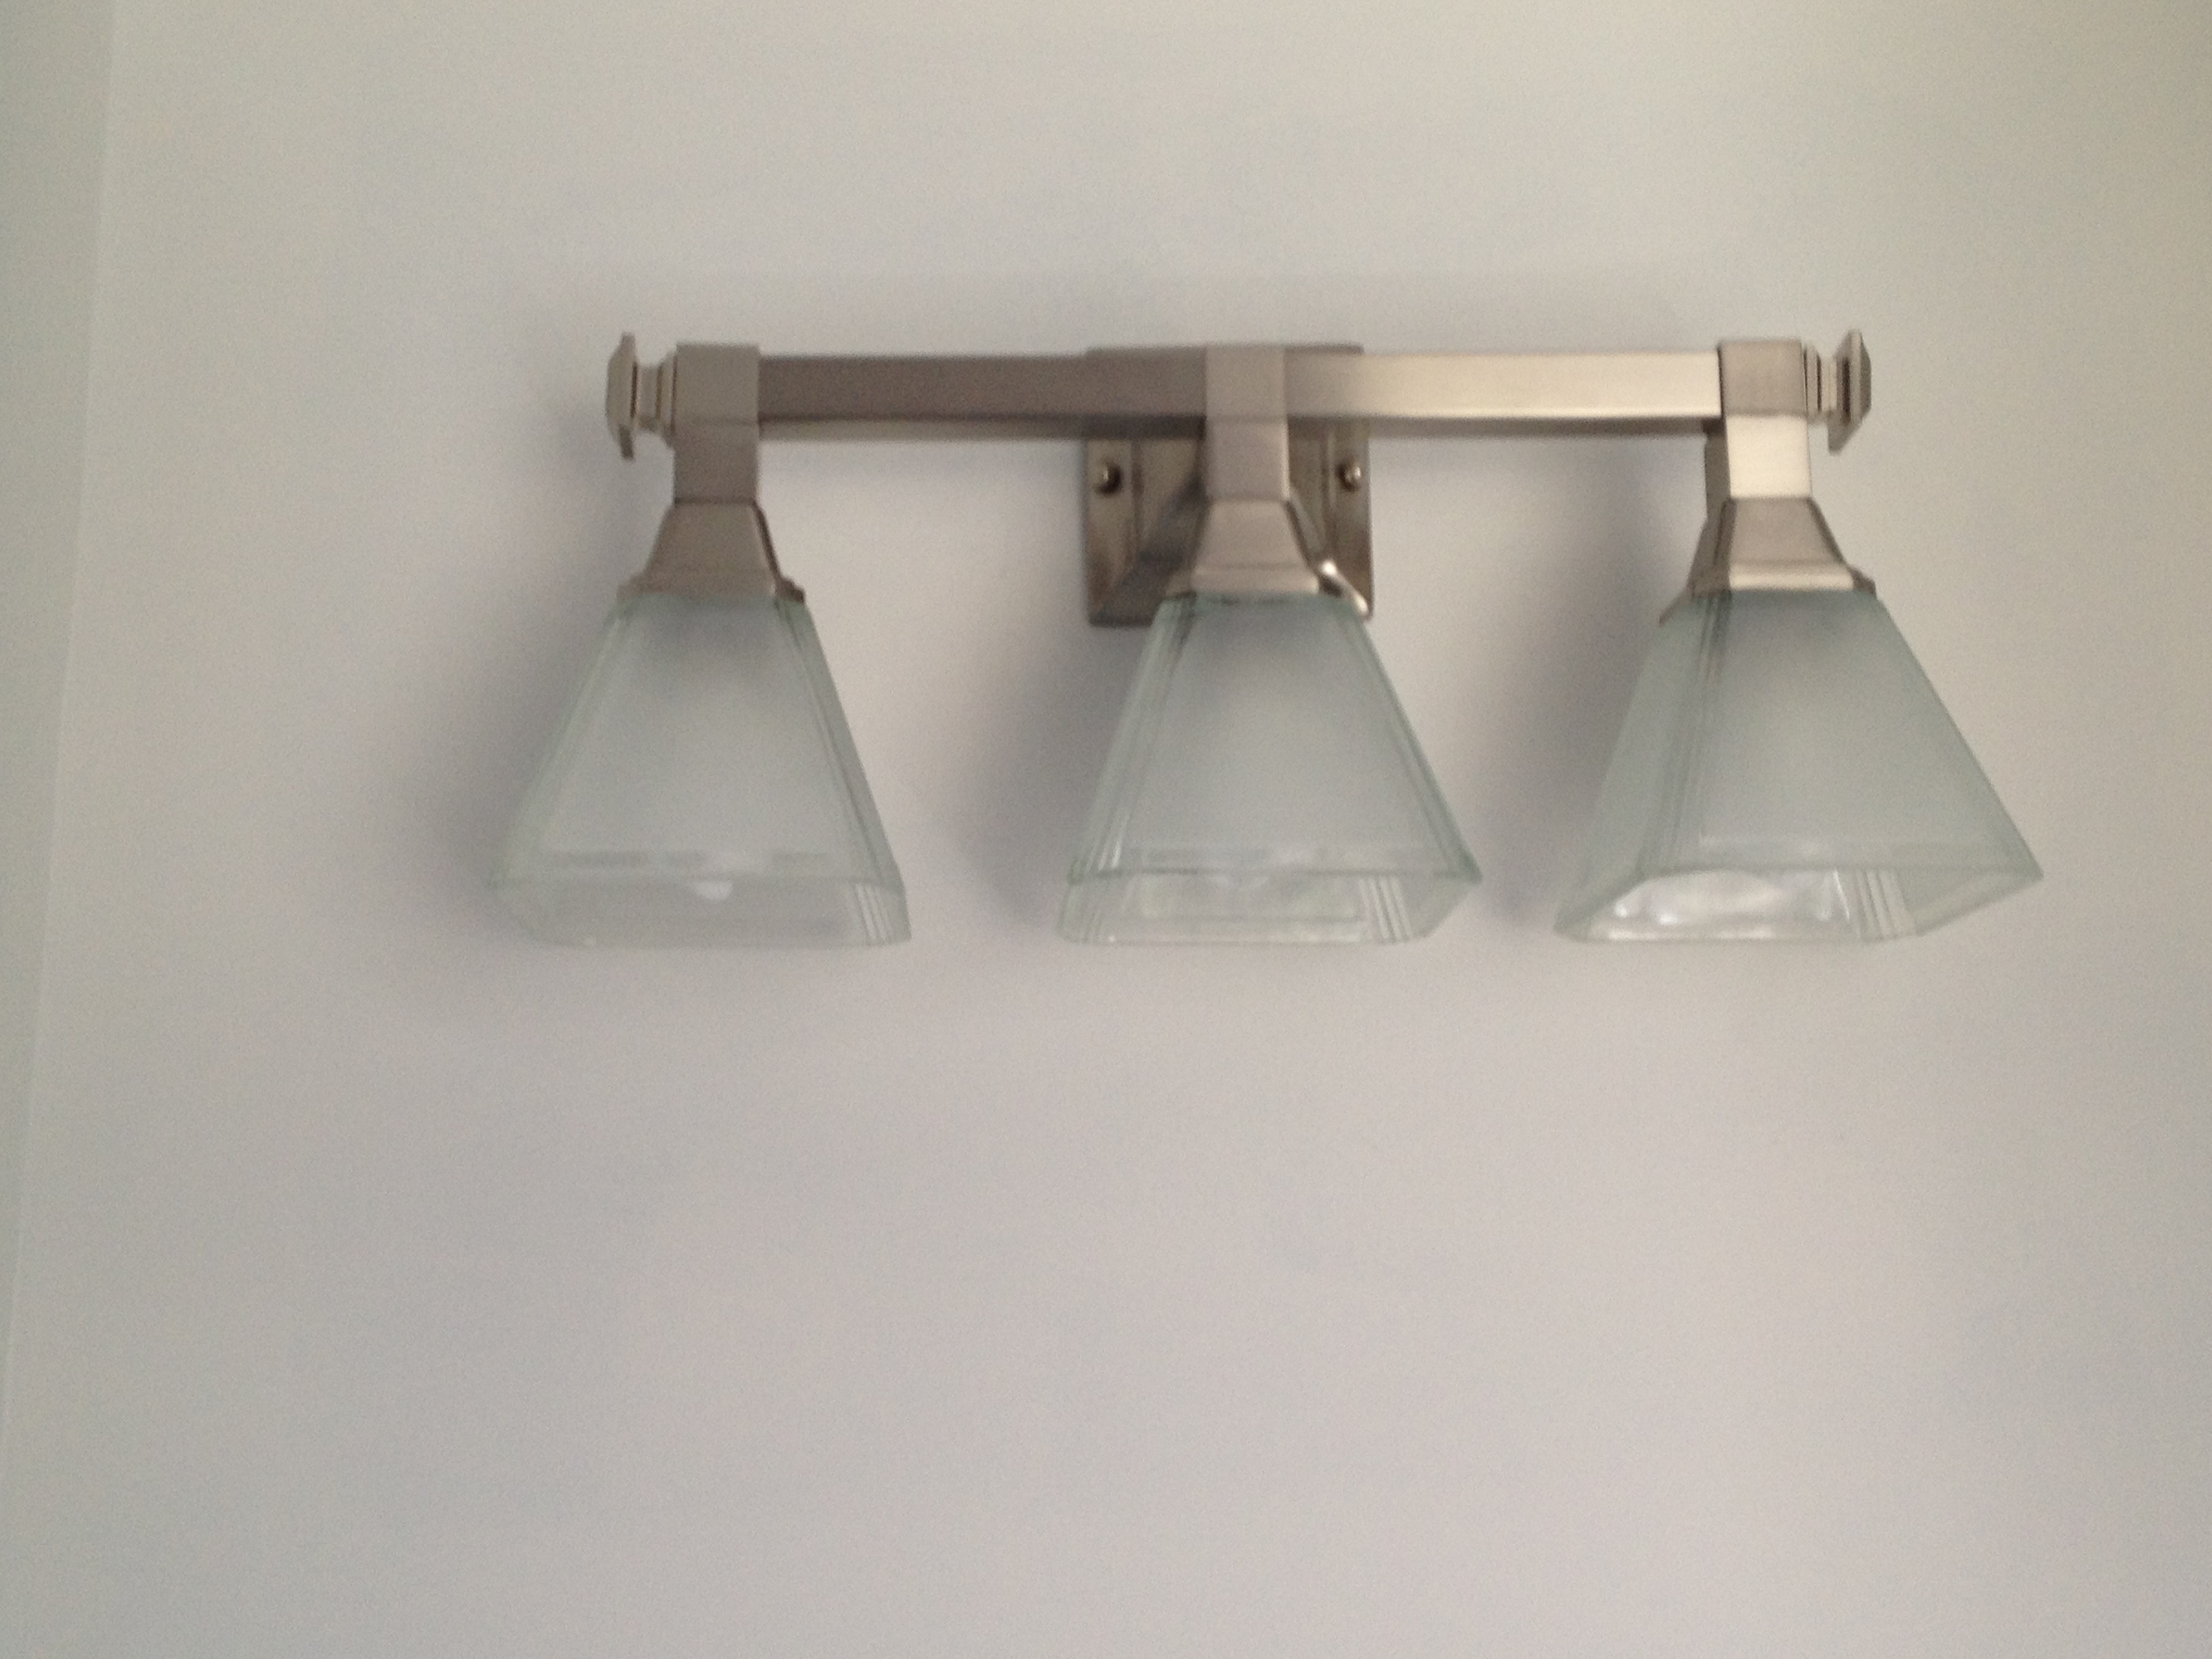
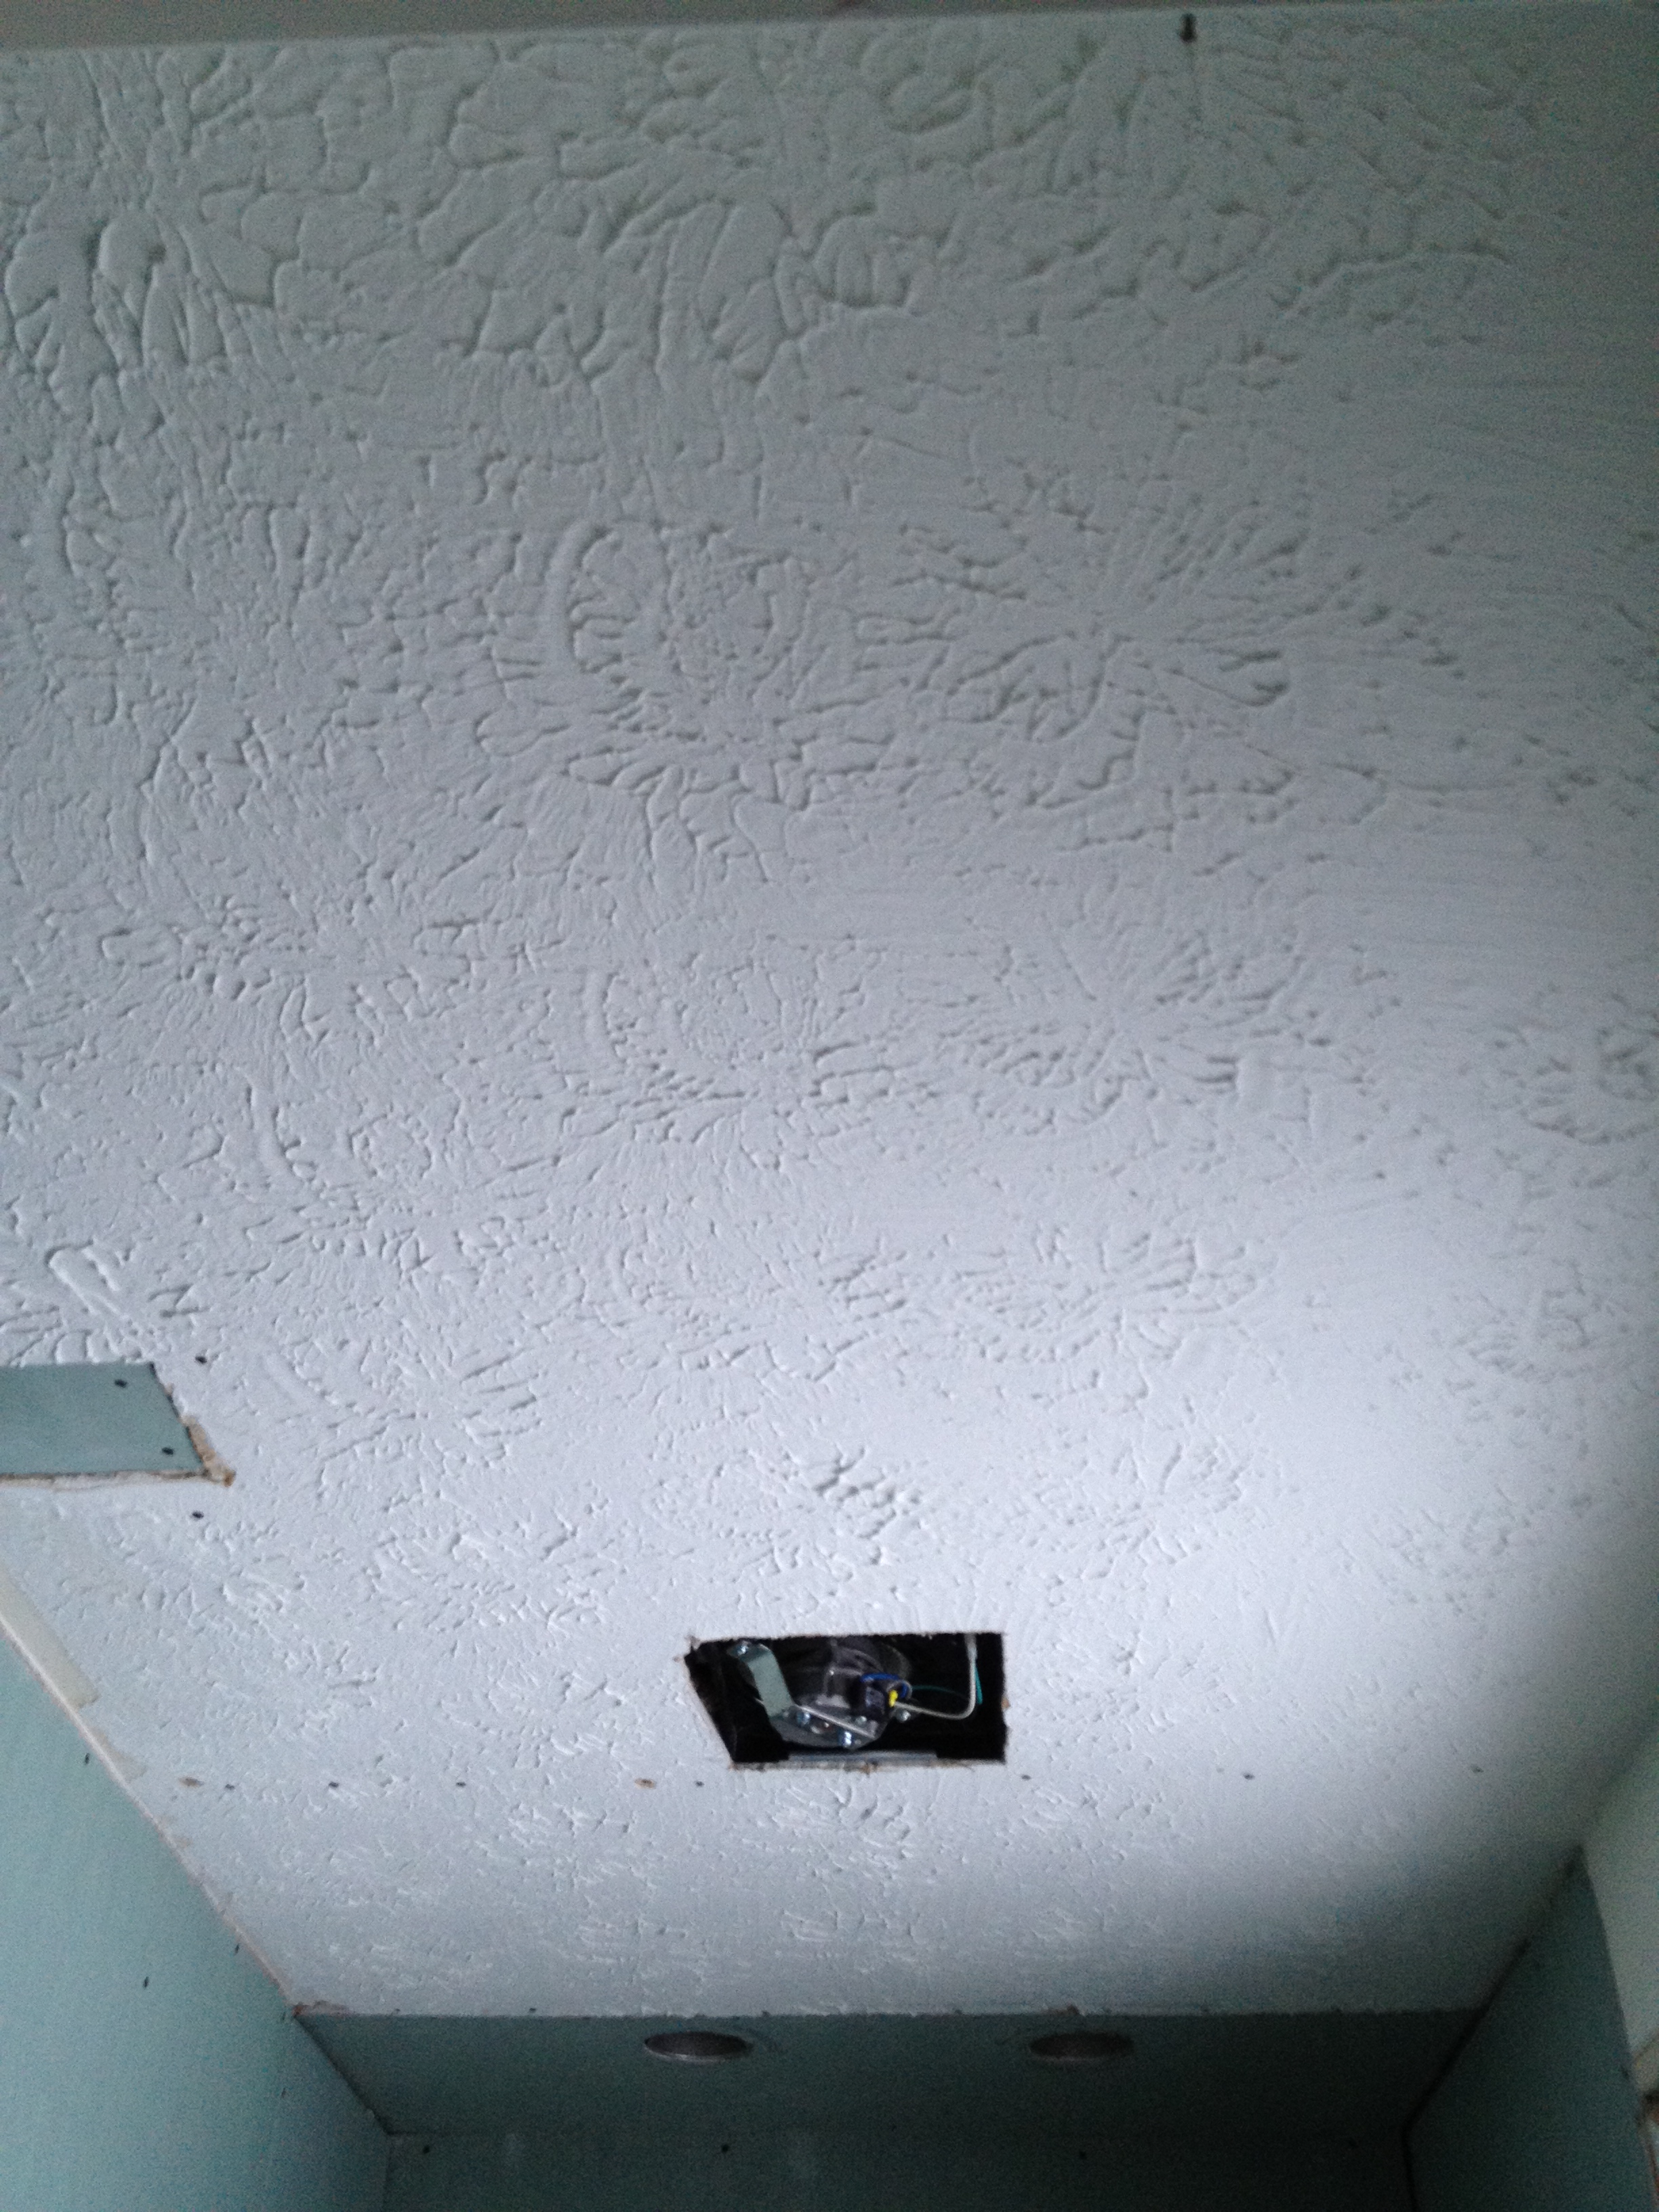
It has been a short two weeks since my last post, but we have made a lot of progress on the bathroom. As mentioned in the previous post, we planned to hire someone to flatten the textured walls and ceiling in the bathroom. Since they would also be patching up any holes in the walls (and ceiling since we changed the exhaust fan). Therefore, our priority was to focus on anything that could affect the drywall.  First – we changed the light fixture. With all the electrical work Jim has done – this was pretty easy. The hardest part was making sure it was level.

New light fixture!

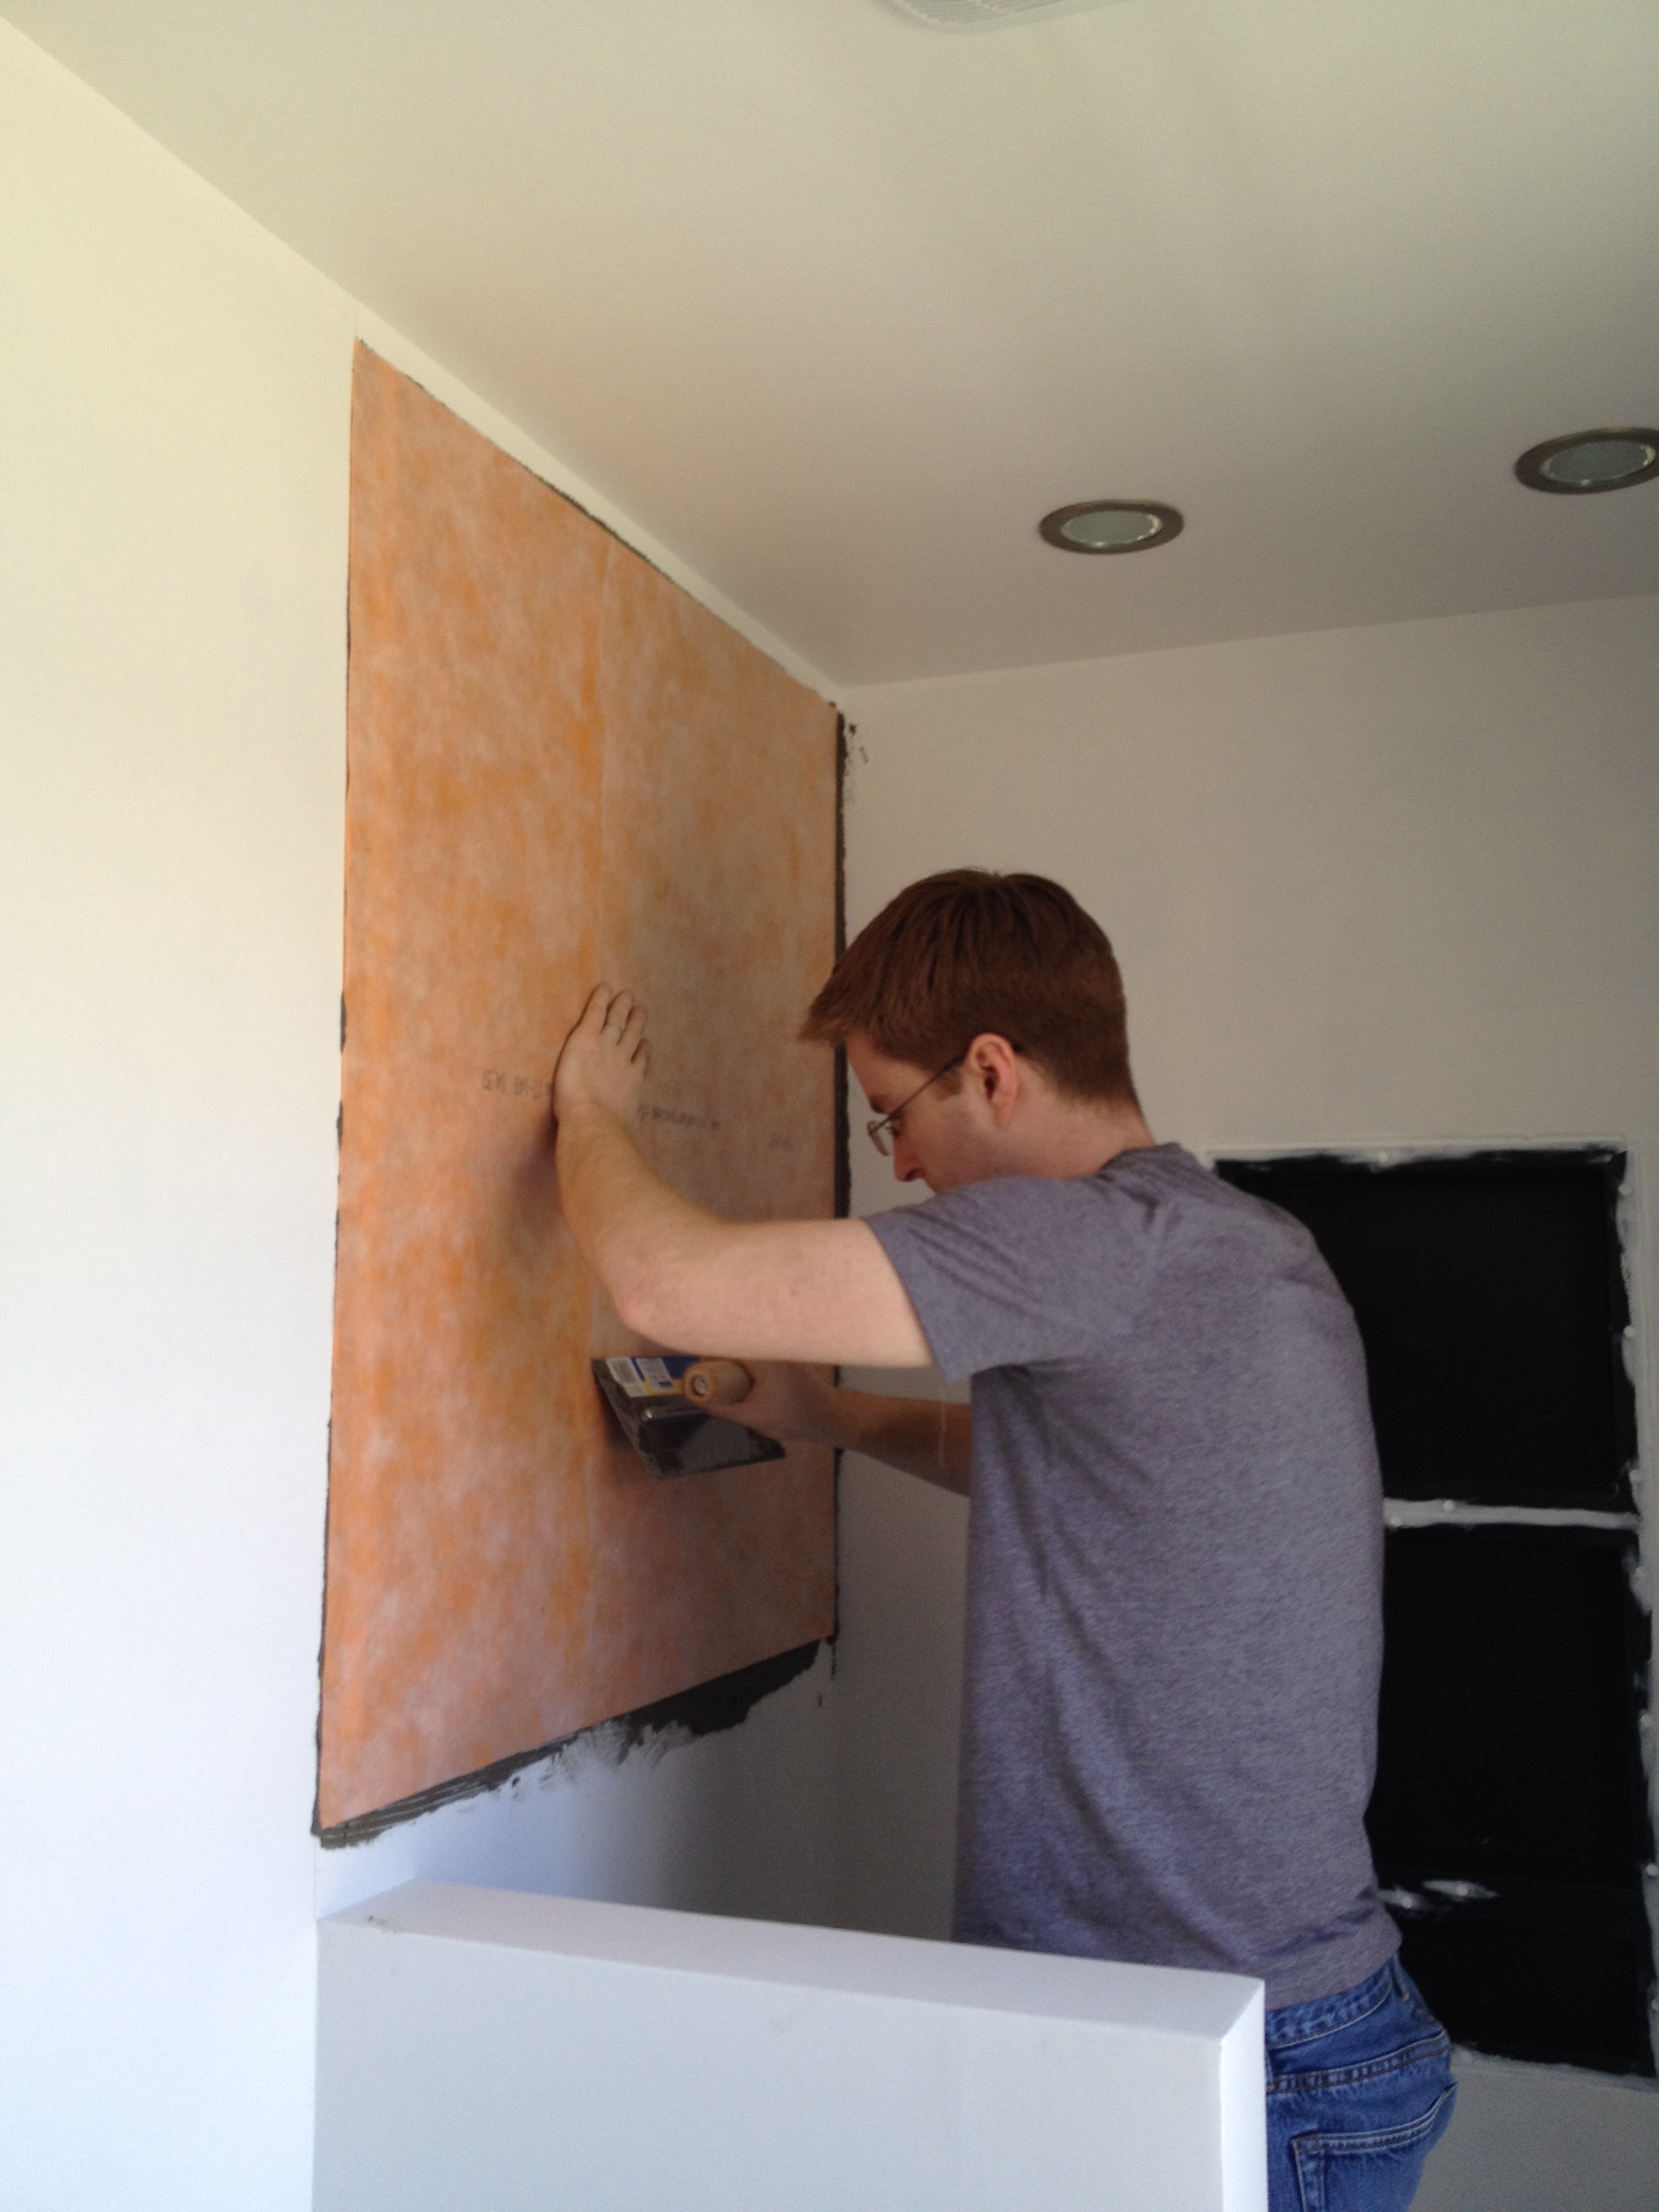
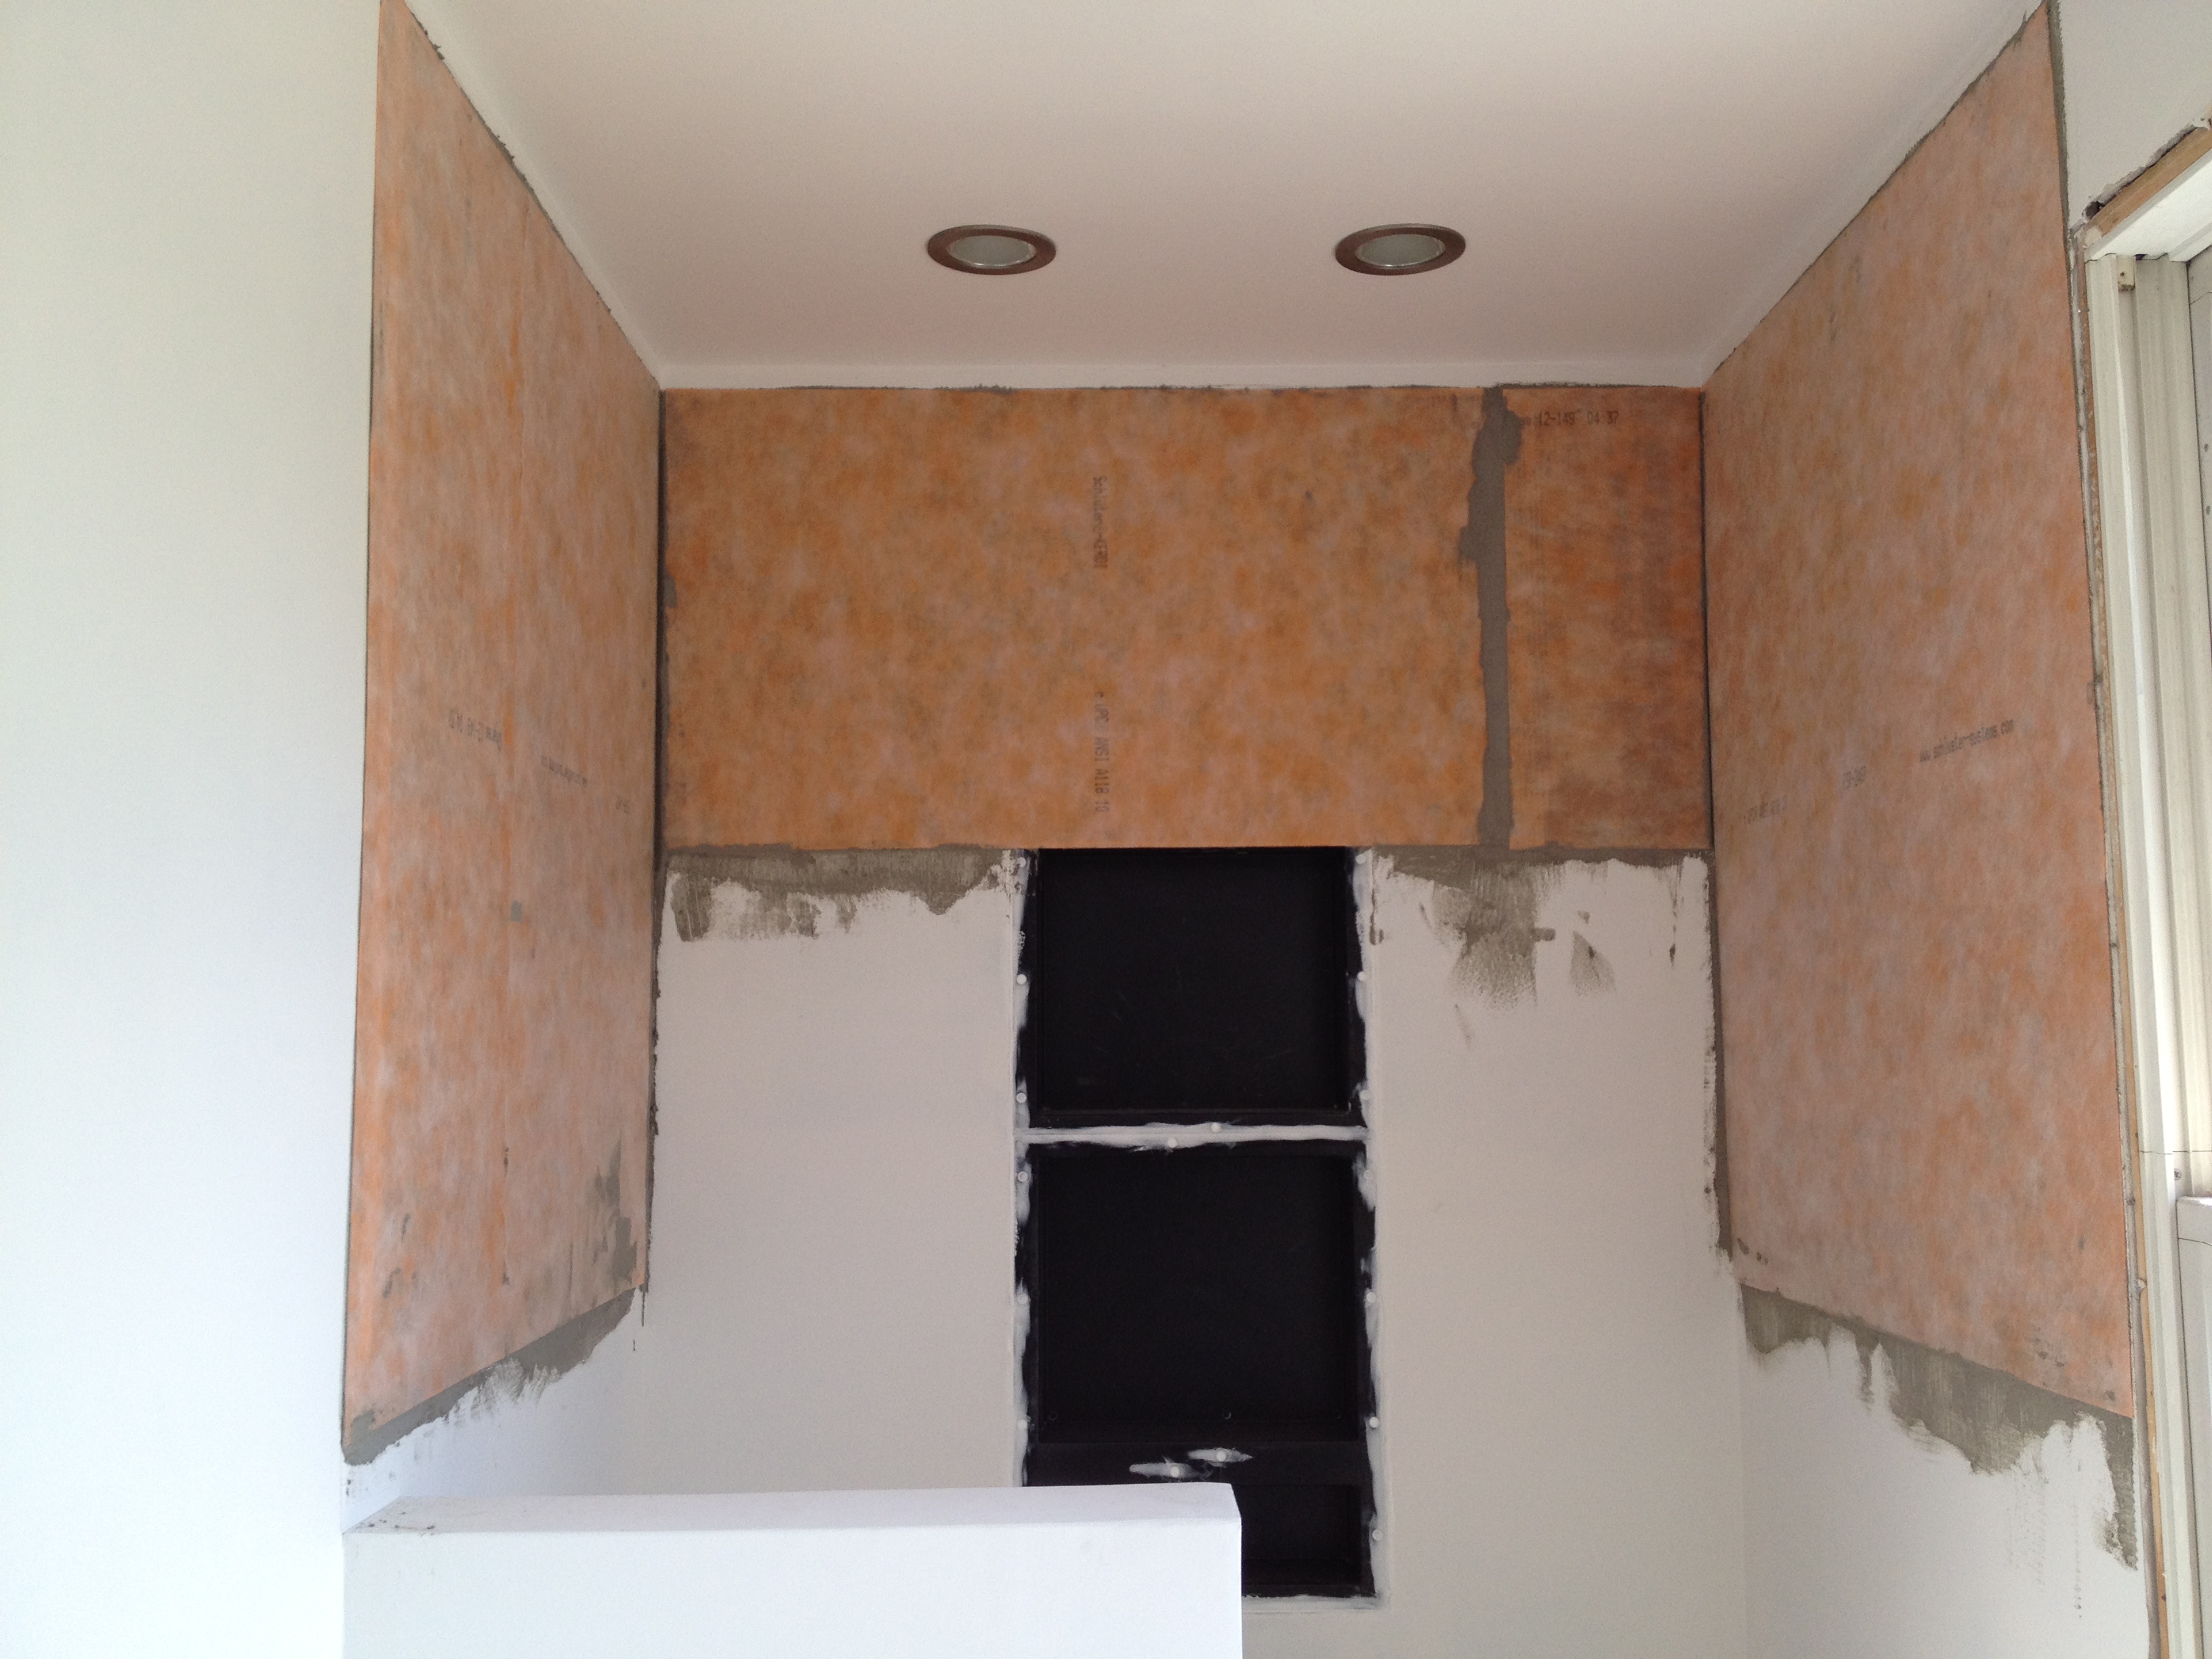
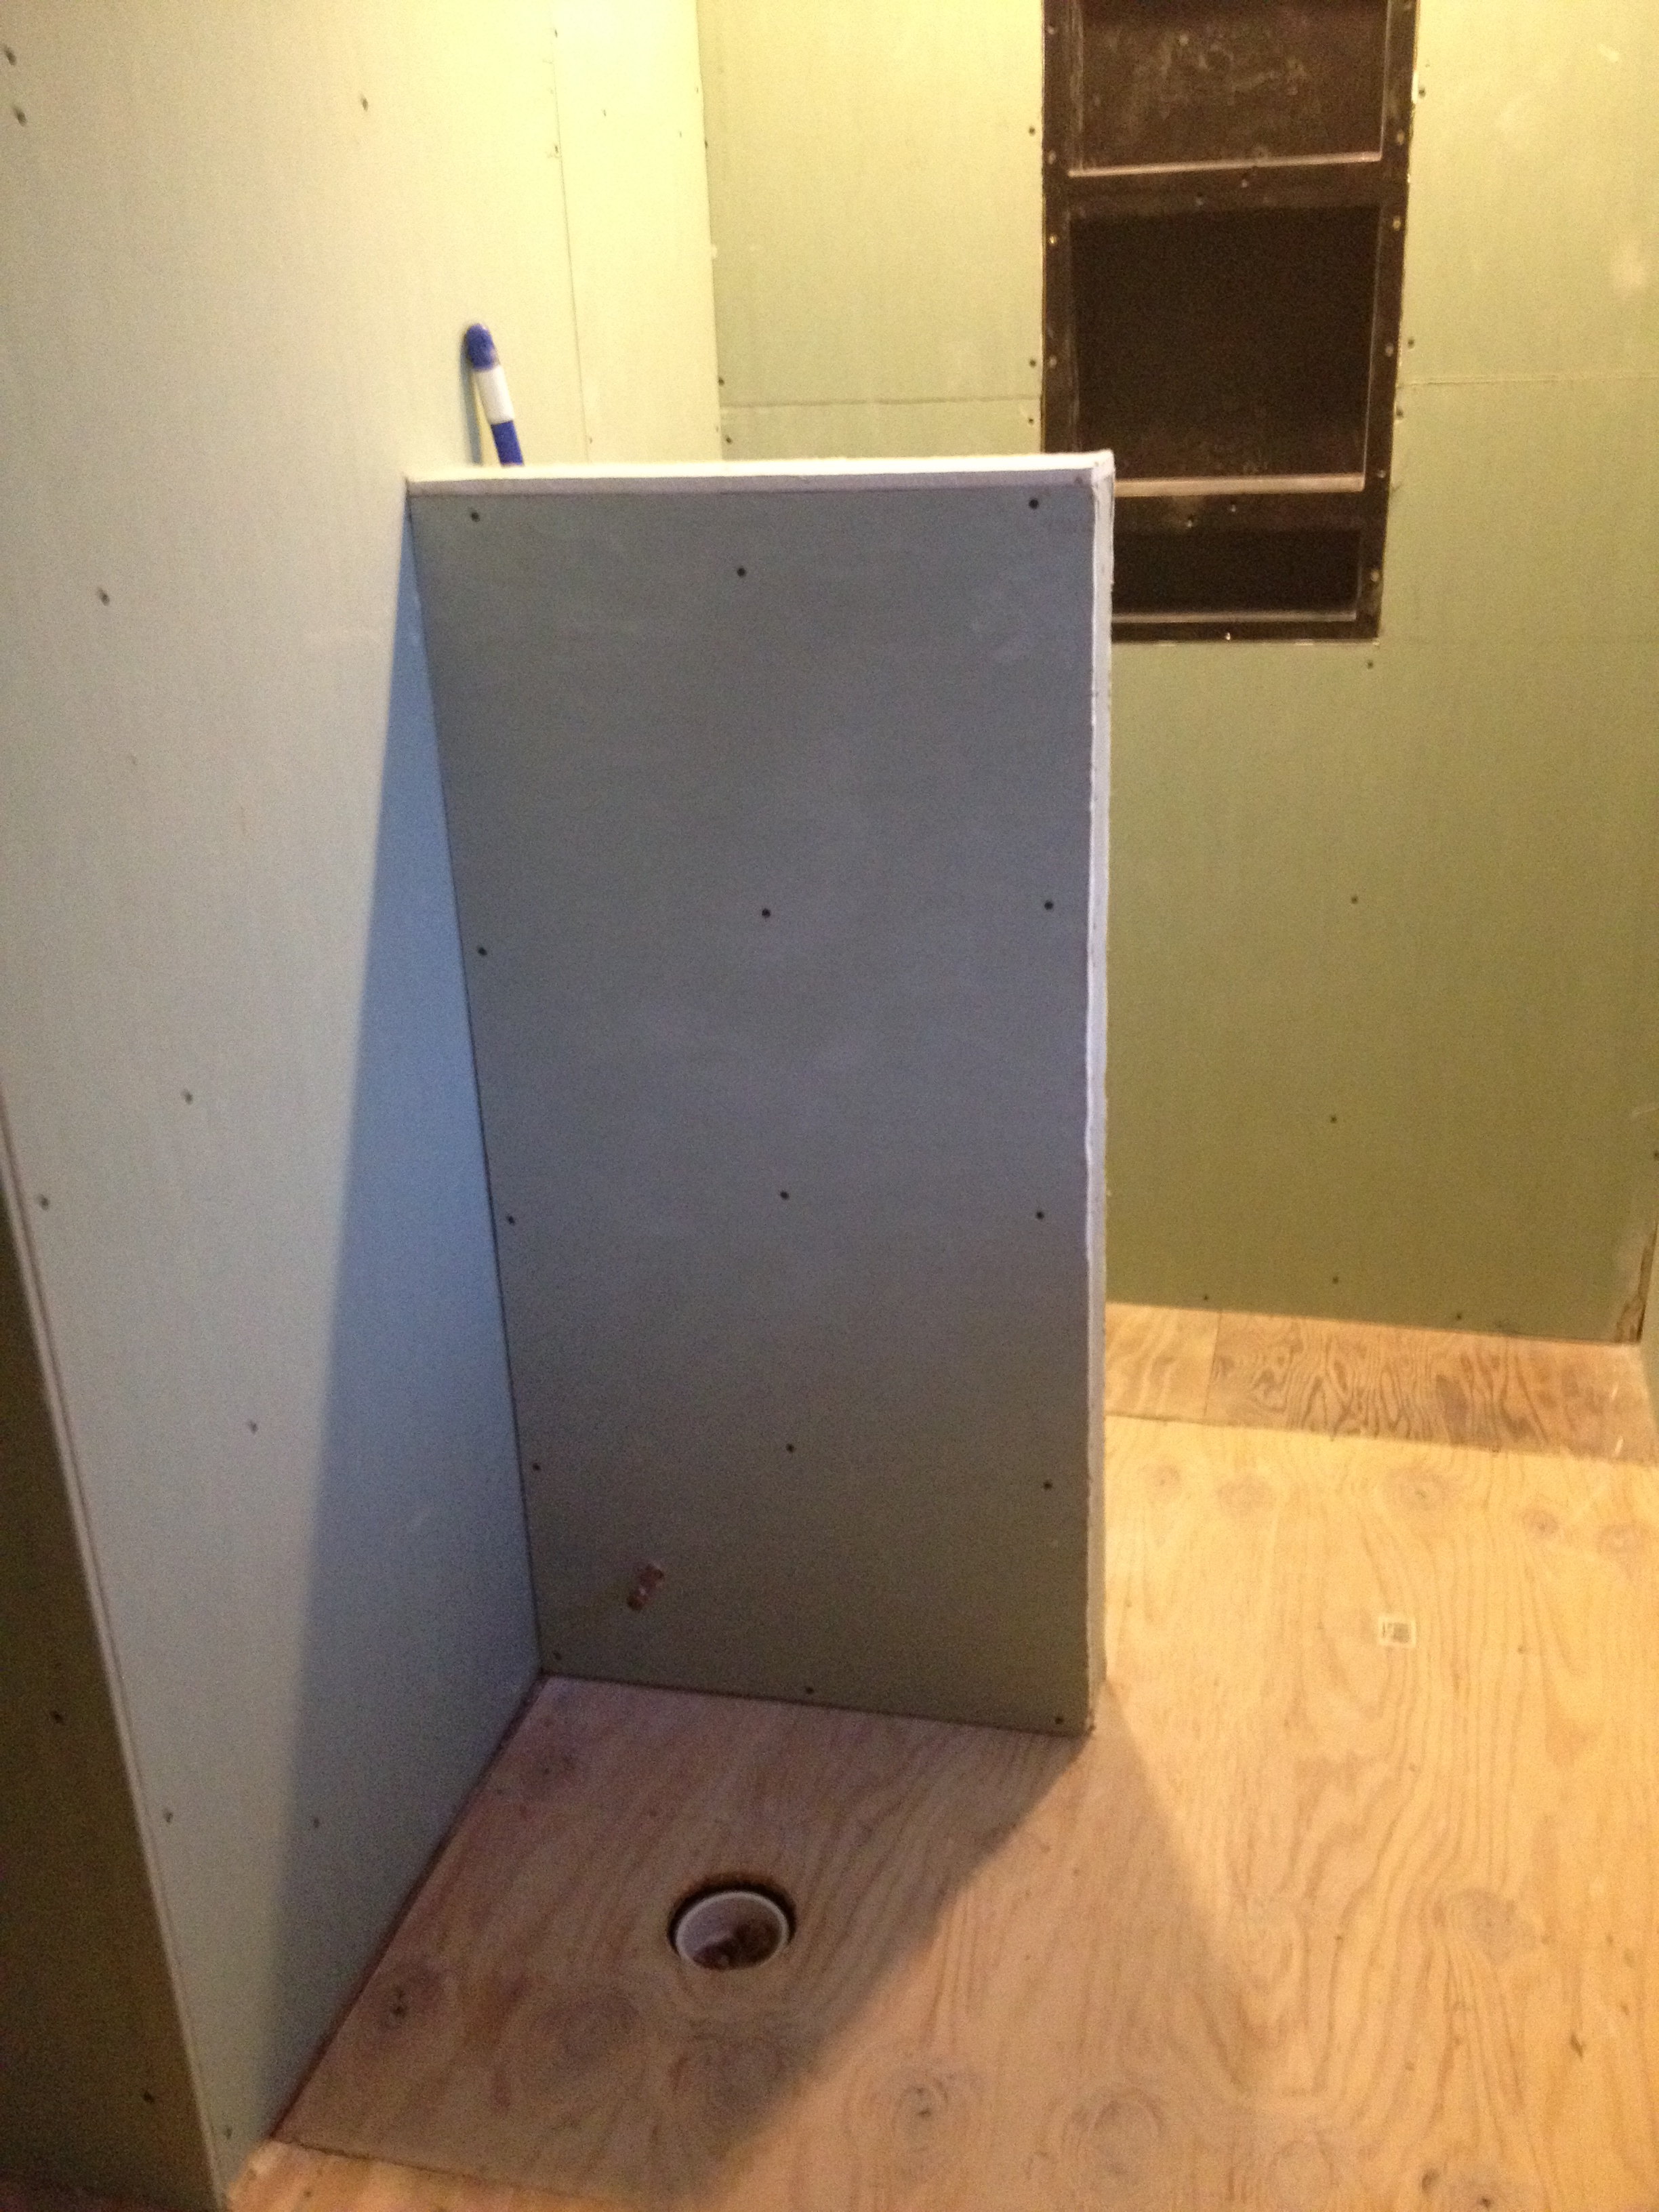
Next, we had to focus on the new medicine cabinet.  We had a hole in the wall from the previous medicine cabinet that could used for the new one. The only problem was the new medicine cabinet was not the same length as the previous one, it was shorter.  There was a lot of thought and discussion on how high the medicine cabinet (with the mirror) should go.  We pretended to be people at different heights, including children and tall friends. We finally settled on the best spot. In order to make up for the smaller medicine cabinet, we added two 2 by 4’s between the two studs in the wall.  This was the result:

The drywall guys can cover up the extra space!

We waited to install the medicine cabinet until after the walls and ceiling were done.

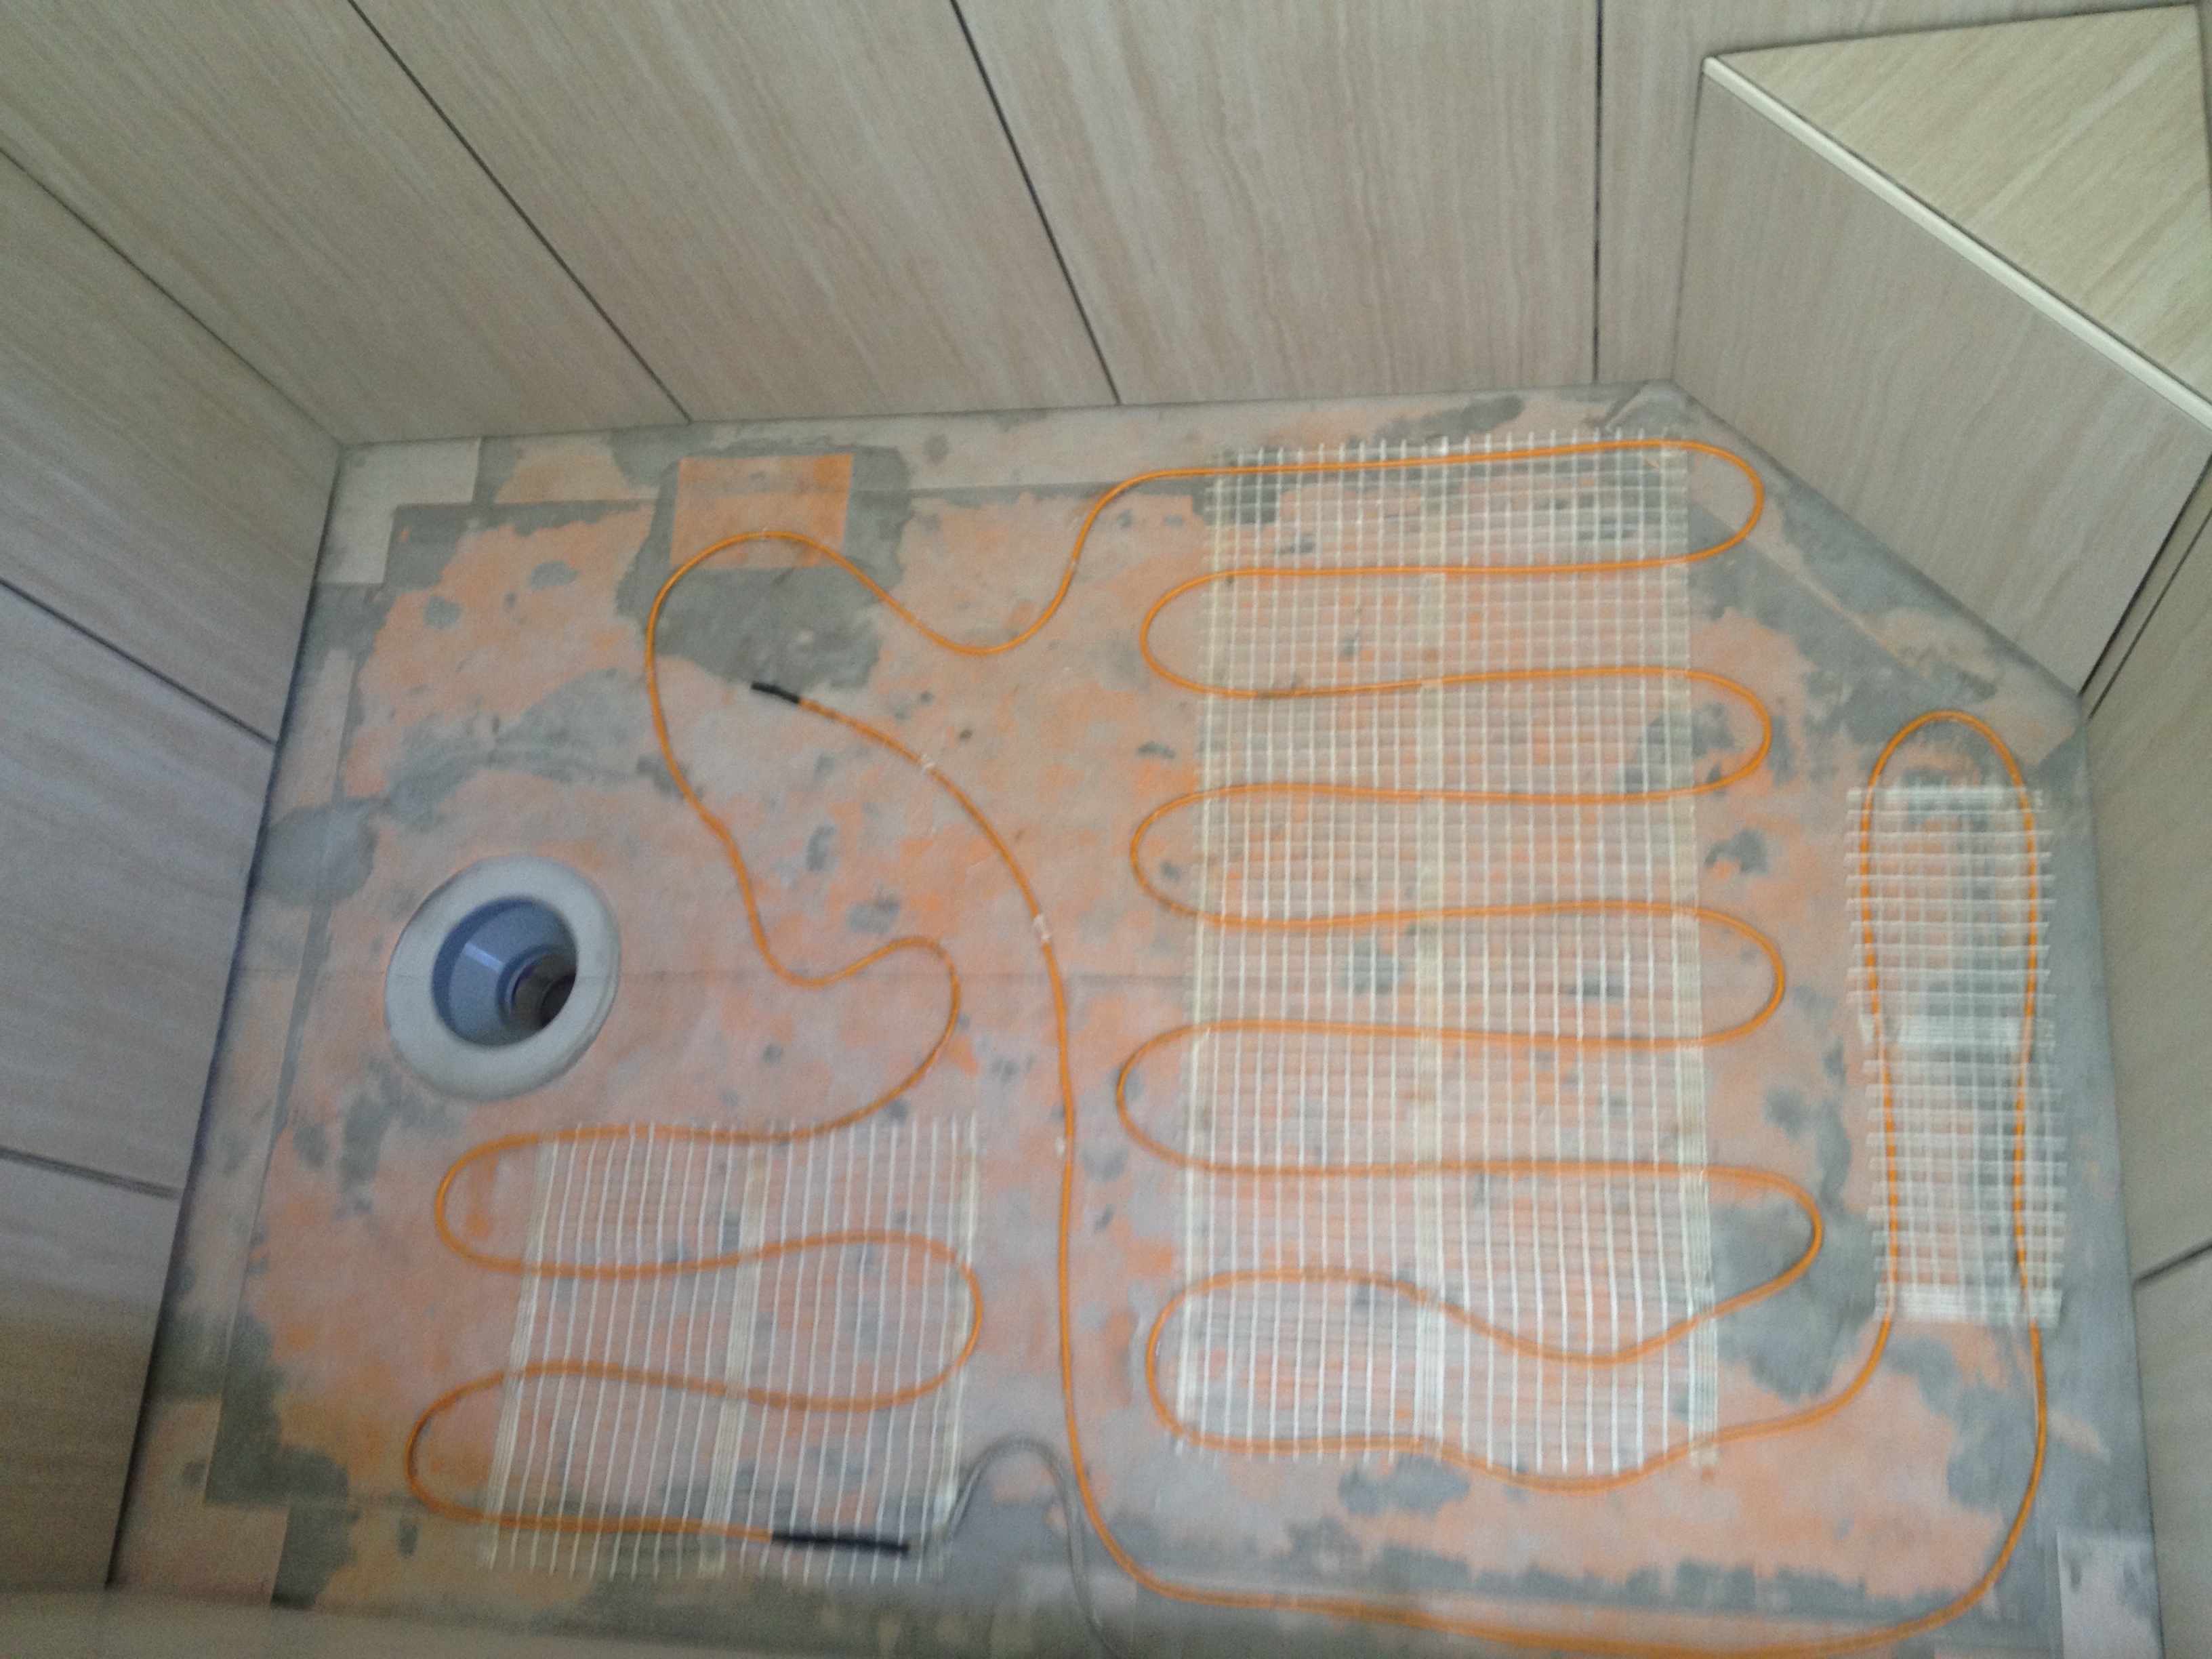
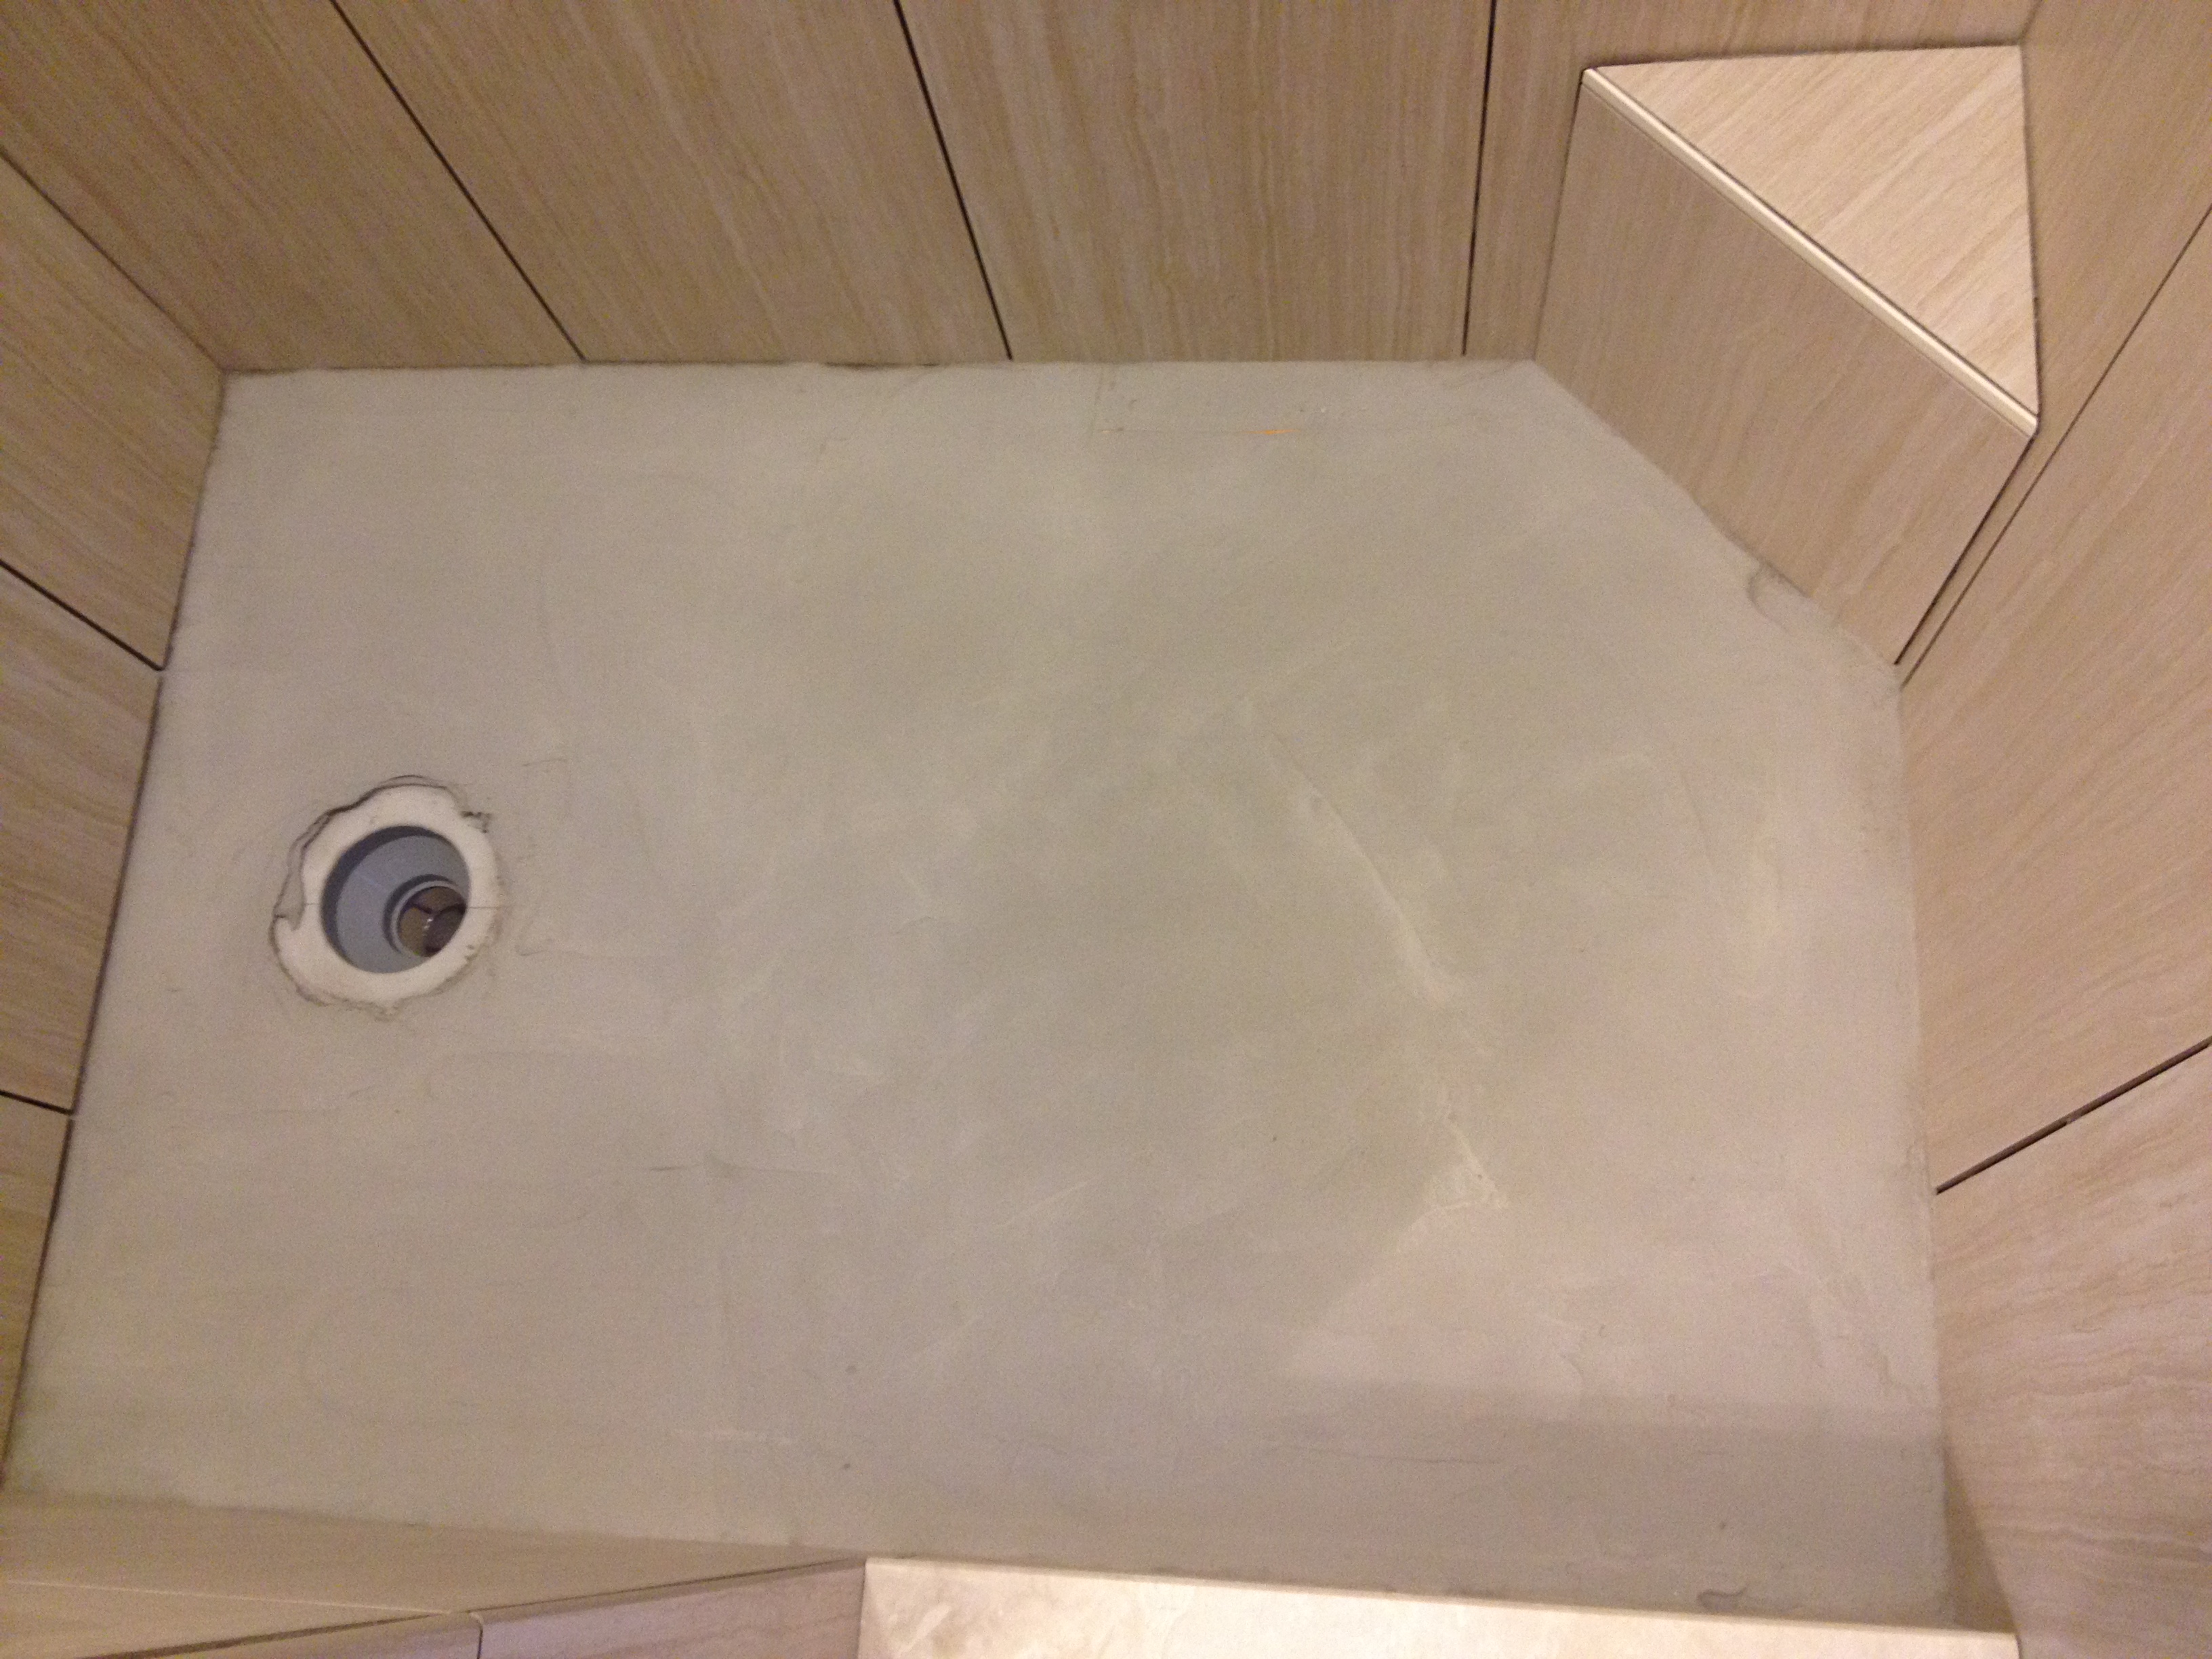
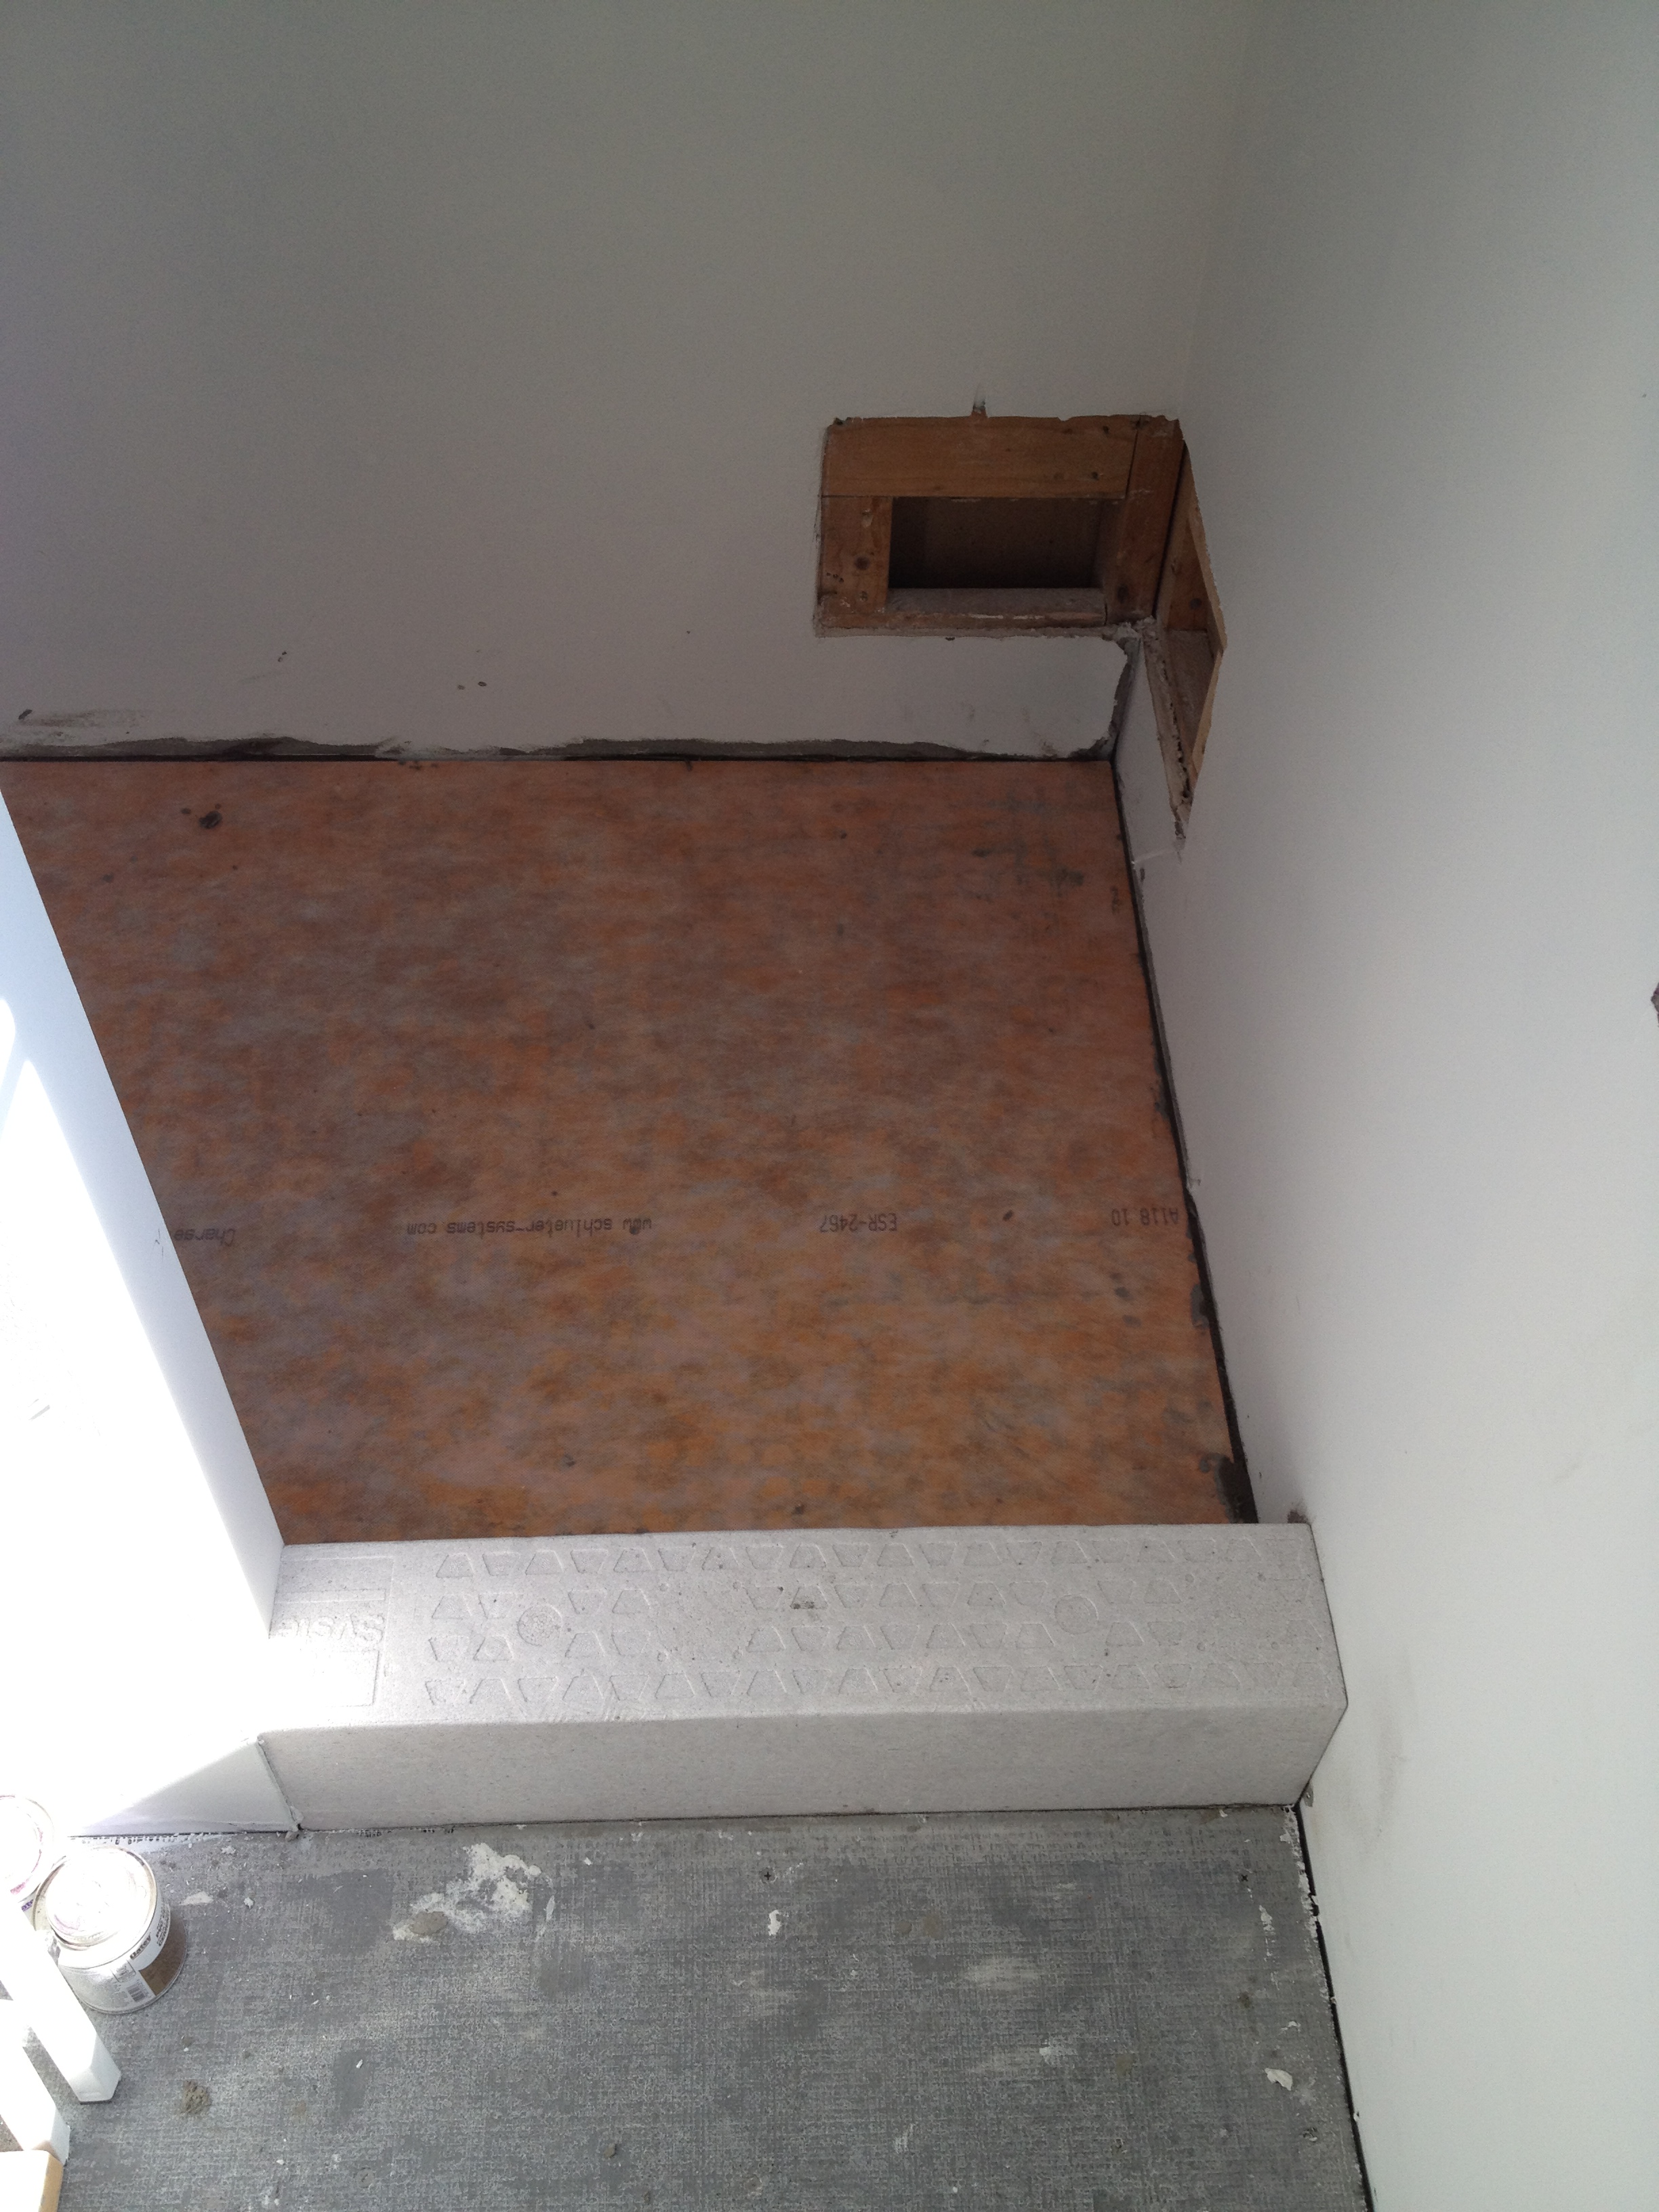
With the completion of the medicine cabinet, we were finished with all the wall and ceiling work for now. Next, we could start focusing on the floor. We needed to add new cement board to the subfloor.  Since the space is small, we only had to use two cement board pieces. This made things go just a tad faster than when we did the kitchen cement board.  The one thing that proved to be challenging was cutting out the hole in the cement board for the toilet’s waste pipe. The hole fell inside of the edge of the cement board. In order to start cutting the hole, Jim used a power drill to make a bunch of small holes in the outline of the circle. Then he connected the holes with a utility knife.  In our first attempt, the hole turned out to be larger than what we needed. Luckily, we had another piece of cement board and we could give it a second try.  The second time, the hole was just the right size.

Waste pipe hole – we took the flange (the piece that the toilet screws into) off to make it easier to lay the cement board and tile. We have the plastic bag there to stop fumes from escaping and to prevent anything from falling in the pipe

Before screwing down the cement board, we needed to add mortar to secure it into place. You may remember this from the kitchen post when we laid the cement board.  After the mortar was spread on the subfloor, we placed the cement board in place, and screwed them down.  In order to connect the two boards, we laid mortar in between the two pieces, placed this special type of tape over it, and finished it with one more layer of mortar. The work was still exhausting, but it went by a lot quicker since it was our second time around.

Jim putting the mortar down

Jim showing his acrobat skills while screwing in the cement board (didn’t want to step on the board with the wet mortar underneath)!

One piece of cement board complete!

New cement board finished! Look at that perfect hole for the waste pipe!

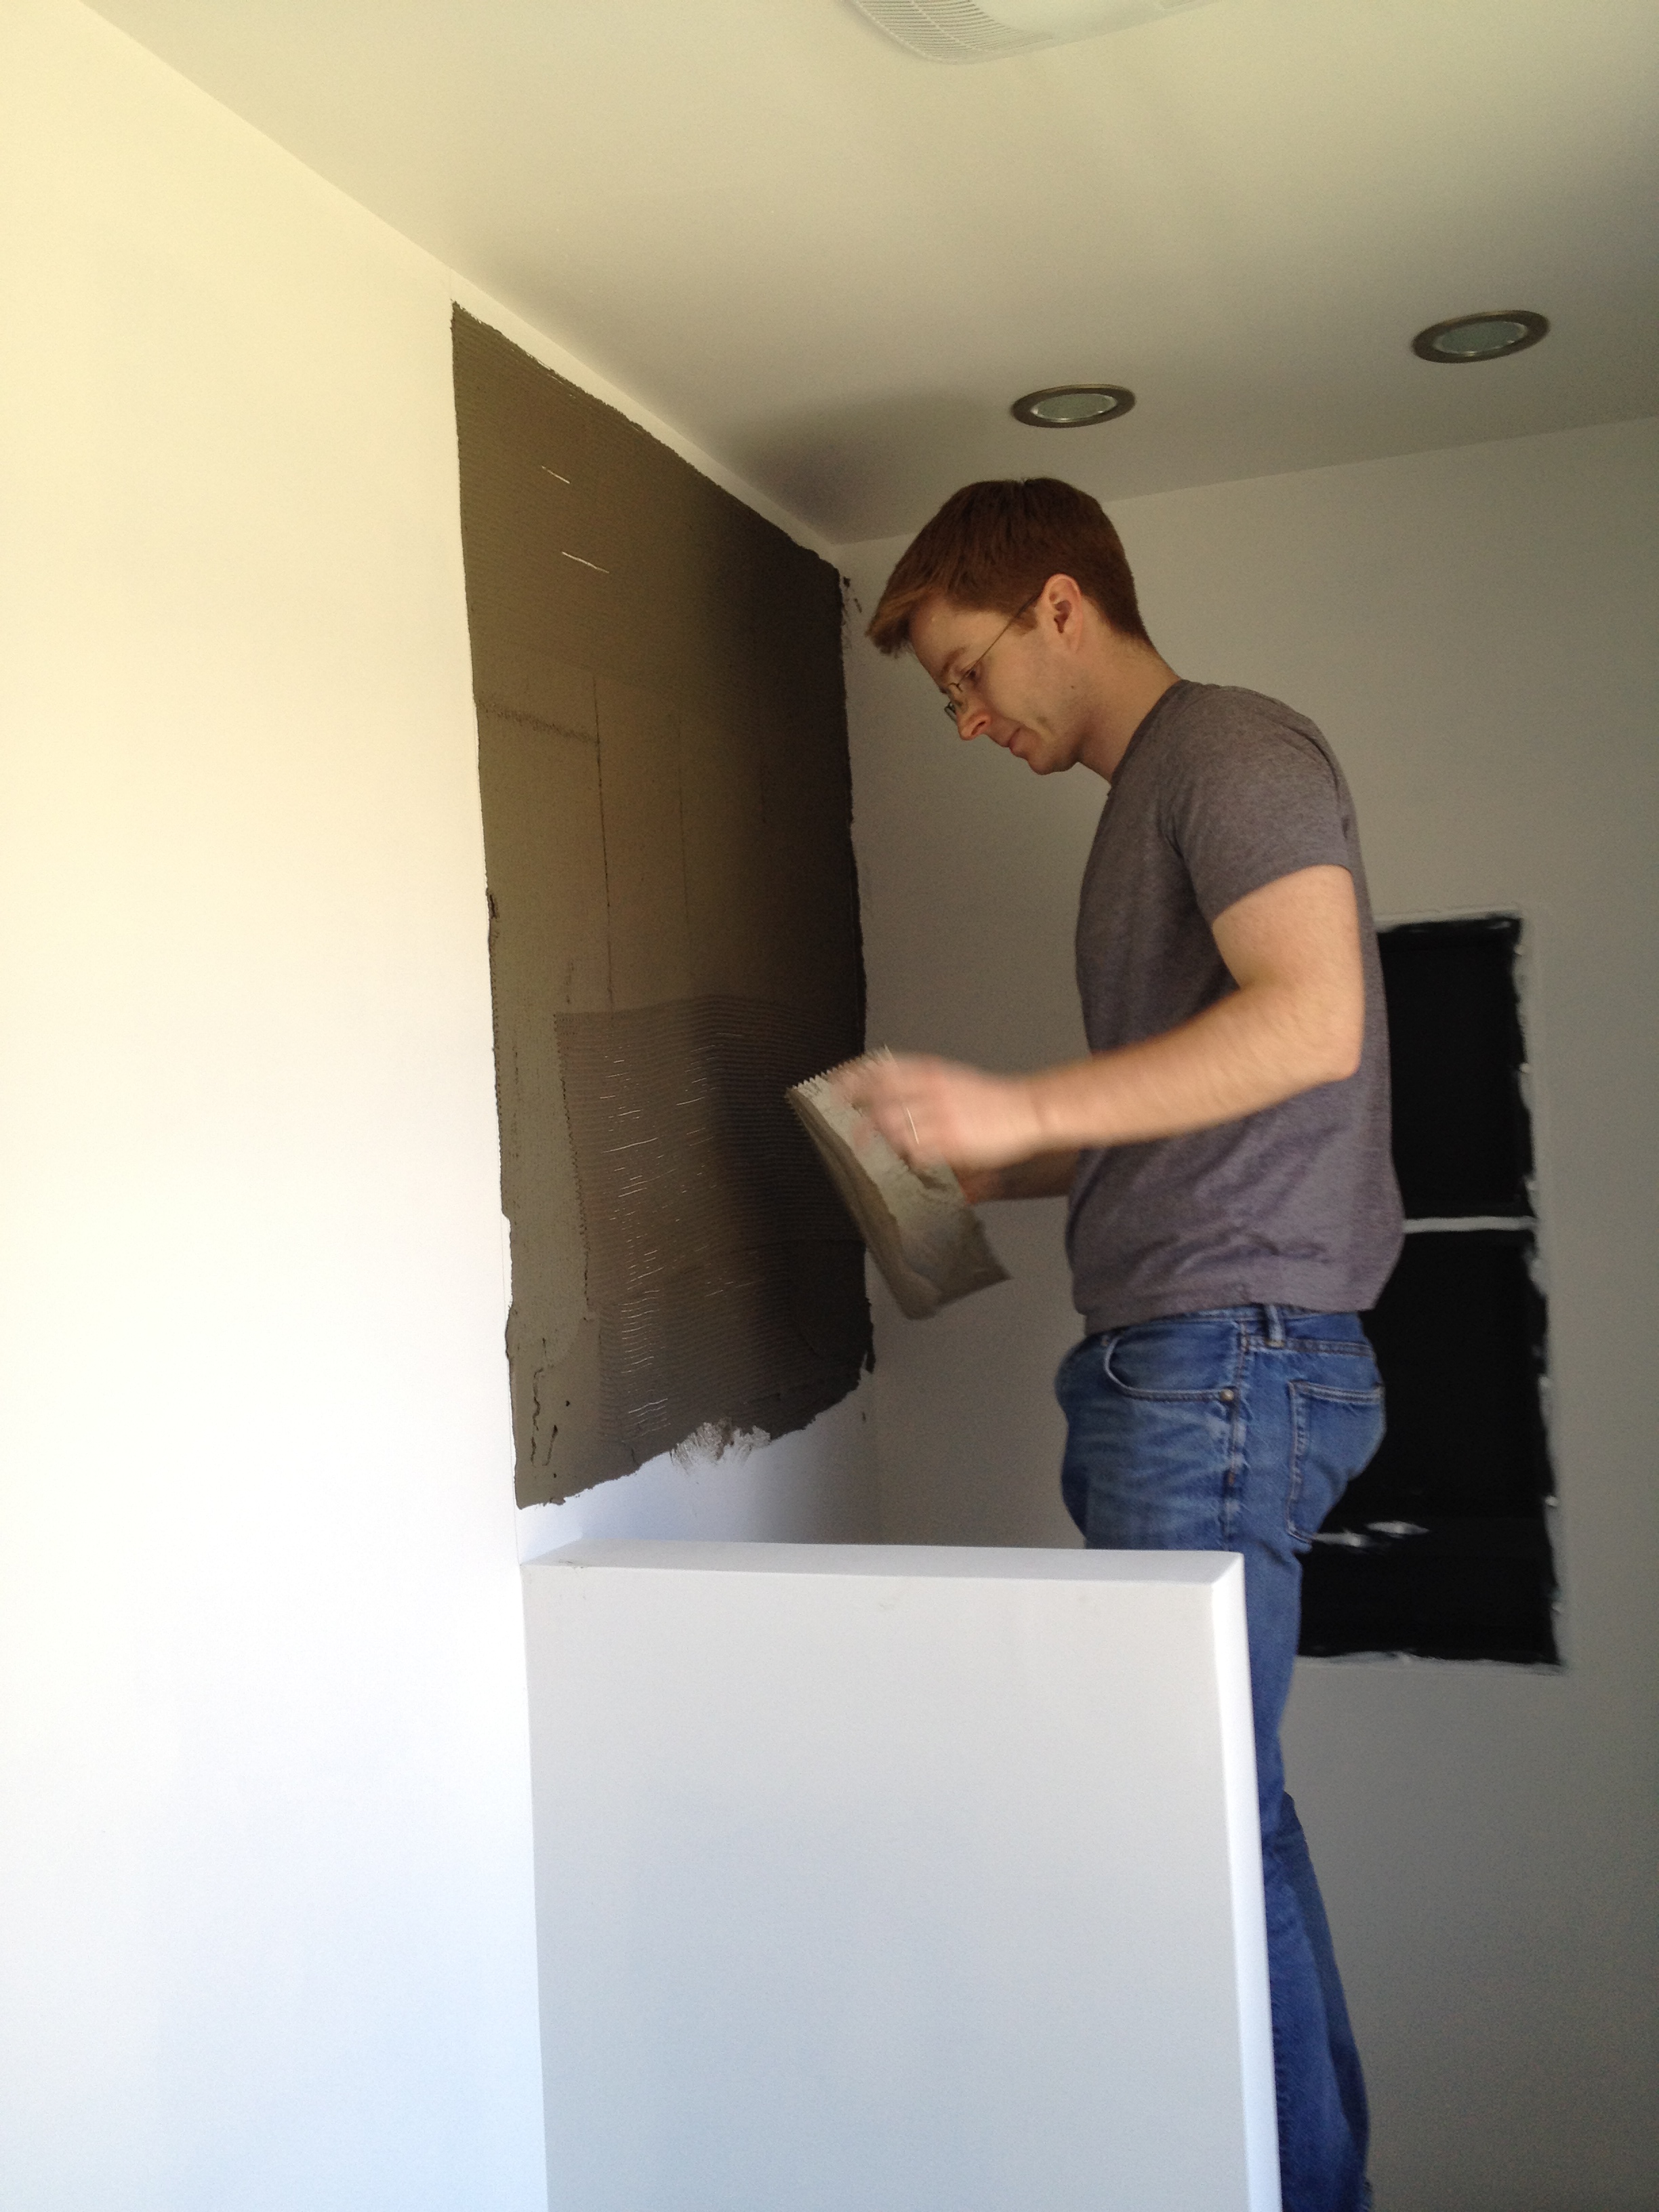
The next project was smoothing the walls and ceiling. Since we hired someone for this job, there isn’t much to say except that I love the new SMOOTH walls and ceilings. They completed the work in one day (last Tuesday). Here is how it looked once it was completed:

Medicine cabinet hole closed up – we uninstalled the light fixture so it wouldn’t get paint on it

The hole in the ceiling is gone!

Even though two weeks have passed since my last post, we have not worked on the bathroom every night. When we were redoing the kitchen,we would try to get something done almost everyday. As much as we would like to finish the bathroom quickly, it is unnecessary to work every day since there is less to do. Plus during this project, Jim is playing in a volleyball league Wednesday nights and has his volunteering as an EMT on Thursday nights. I am also tutoring Tuesdays after work (I was tutoring Thursdays as well, but just recently cut back). These extra curricula activities eat into the bathroom remodeling time.  So our bathroom walls and ceilings were smoothed out last Tuesday, but we didn’t get around to painting until Friday night.

Our trip to Home Depot to pick up some paint supplies on Friday evening reminded us that we should probably pick up a new flashlight while we were there. Hurricane Sandy was predicted to make landfall Sunday or Monday and although the bathroom was the first thing in our mind, we had to be prepared. We lost power for two days after the durecho in June, so we weren’t sure what to expect.  We bought a “weapon-sized” (Jim’s words) flashlight and then tried to put Sandy in the back of our minds.

Since we are painting pros by now – we knocked out the painting job quickly on Friday.  We chose a nice, neutral taupe color.

Painted walls!

With the painting complete, we could now install the medicine cabinet.  With a level and the power drill, this was easily completed. We also wanted to update the old and dirty electrical outlet and light switch. The exhaust fan cover could officially be put in place since the ceiling was painted as well.

New medicine cabinet and electrical outlets!

Another picture of the medicine cabinet – it is hard to take a picture of a mirror

Exhaust fan cover in place!

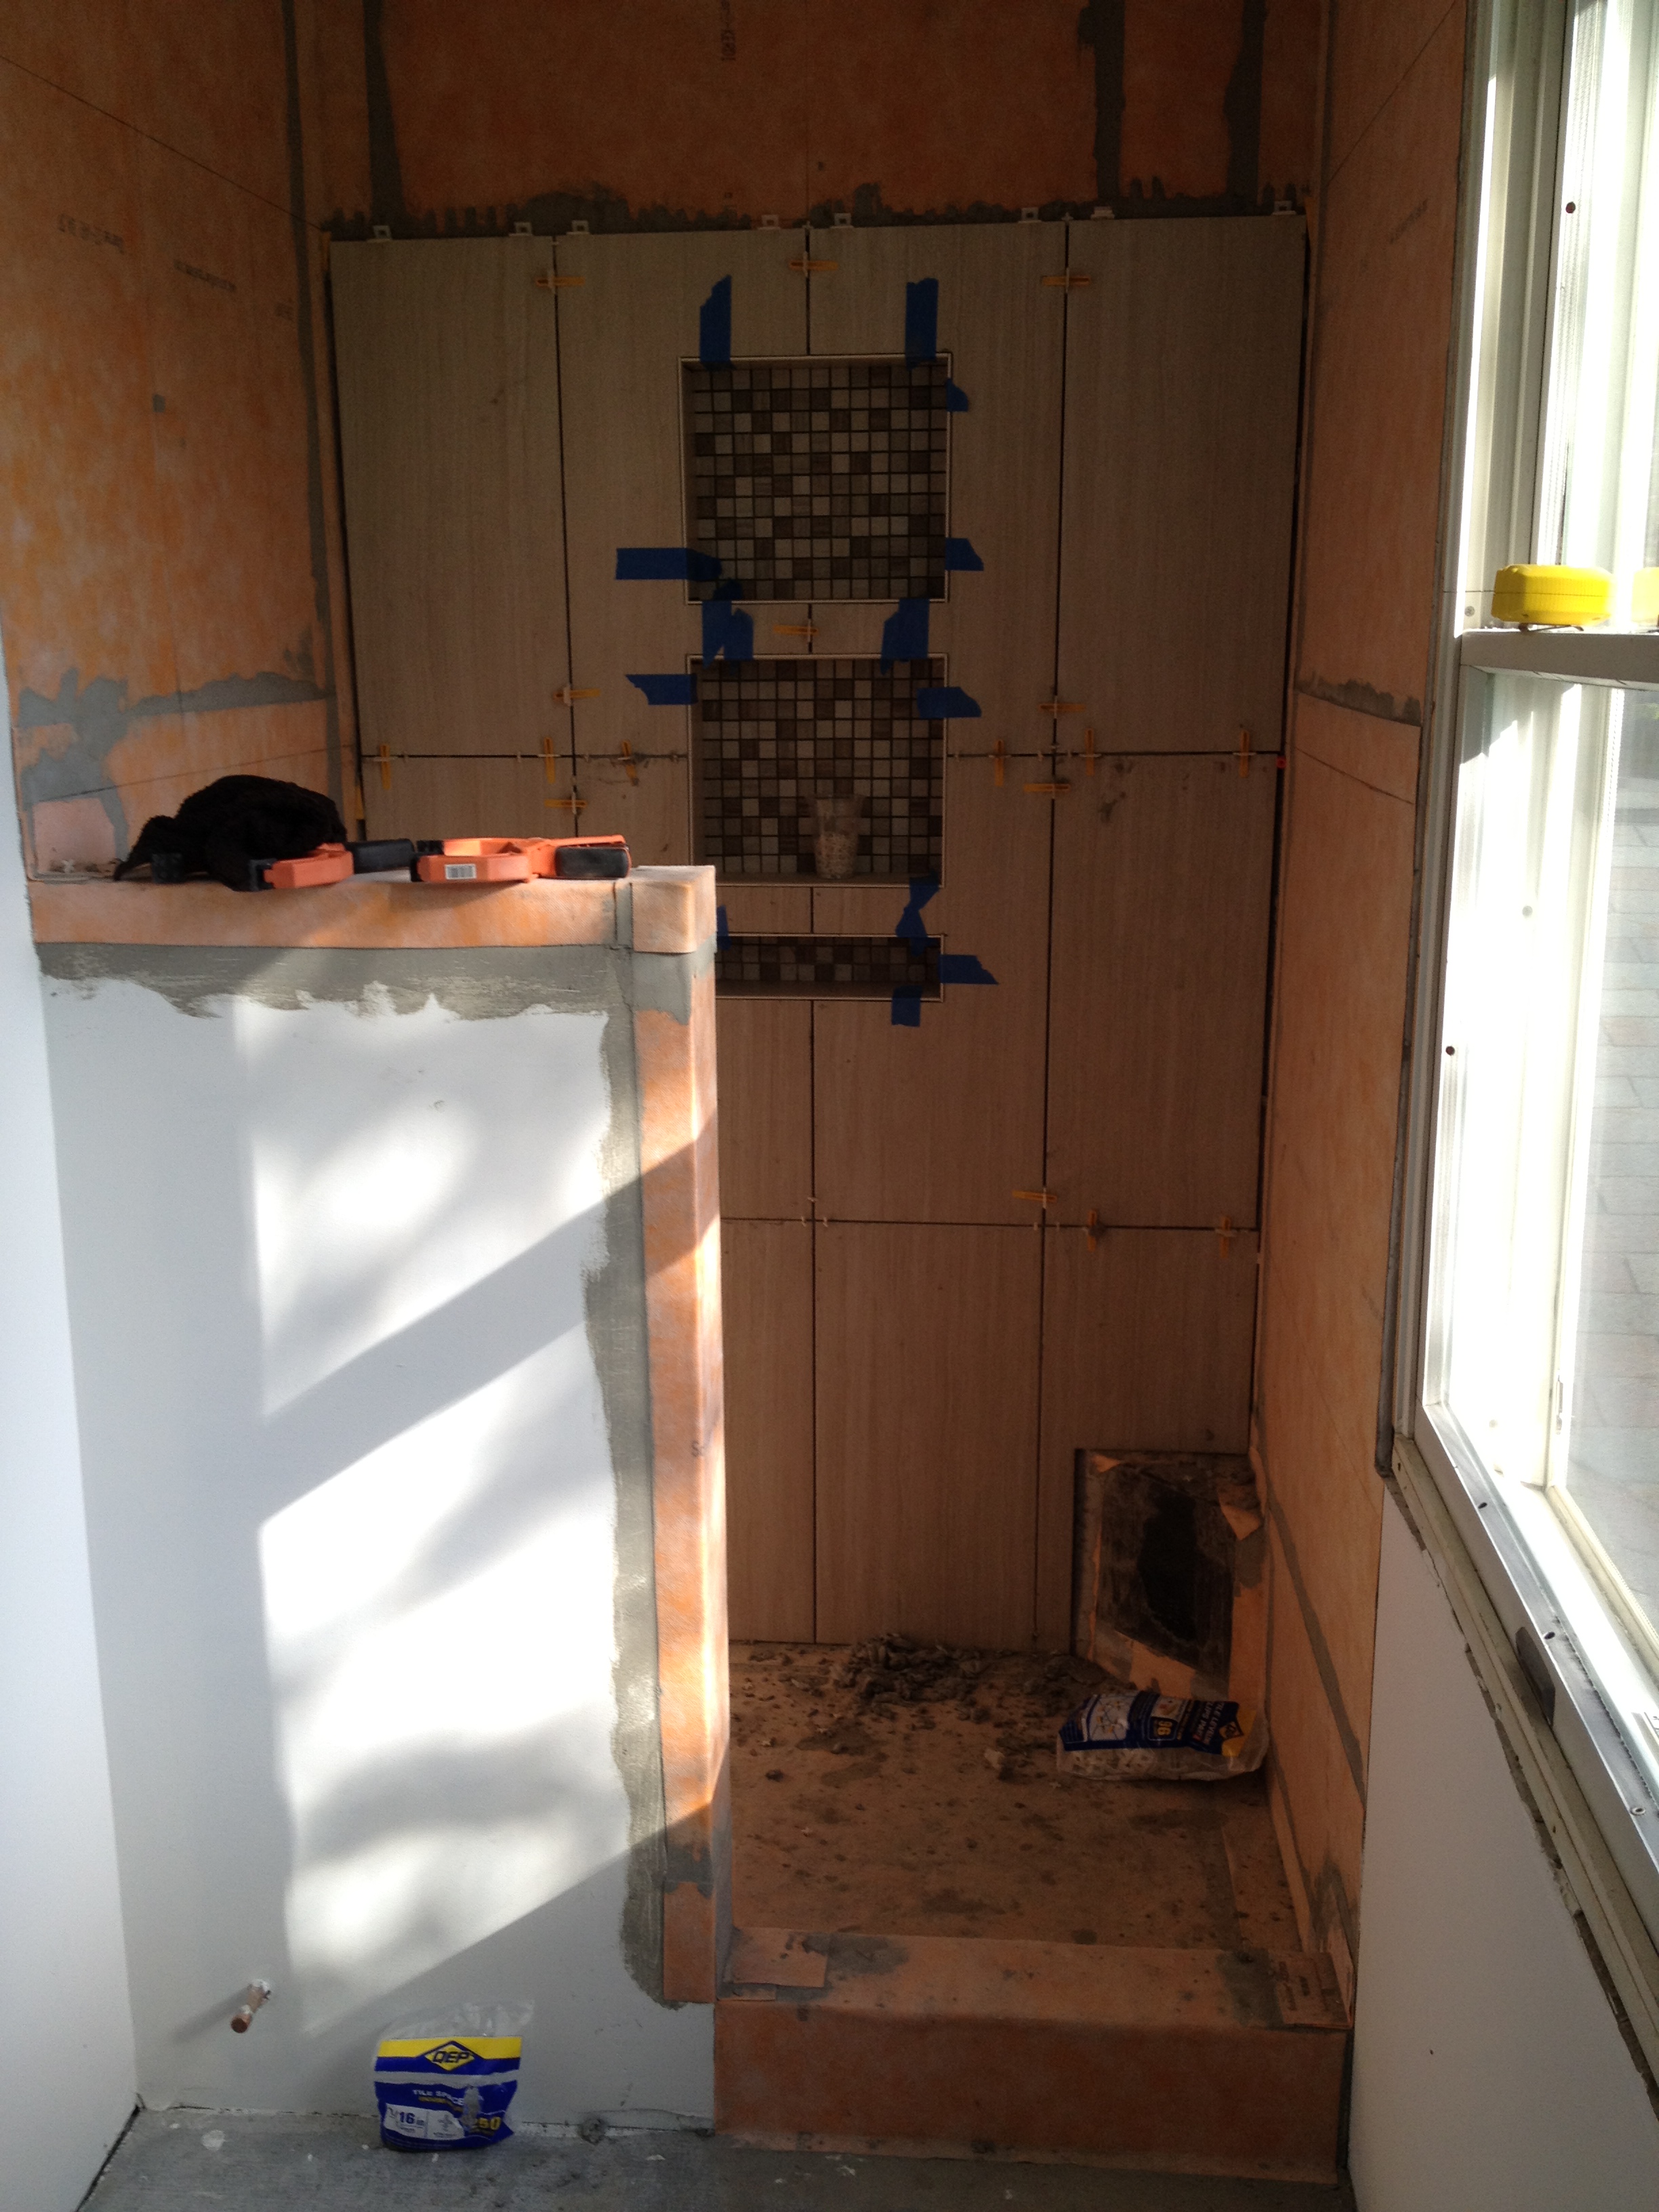
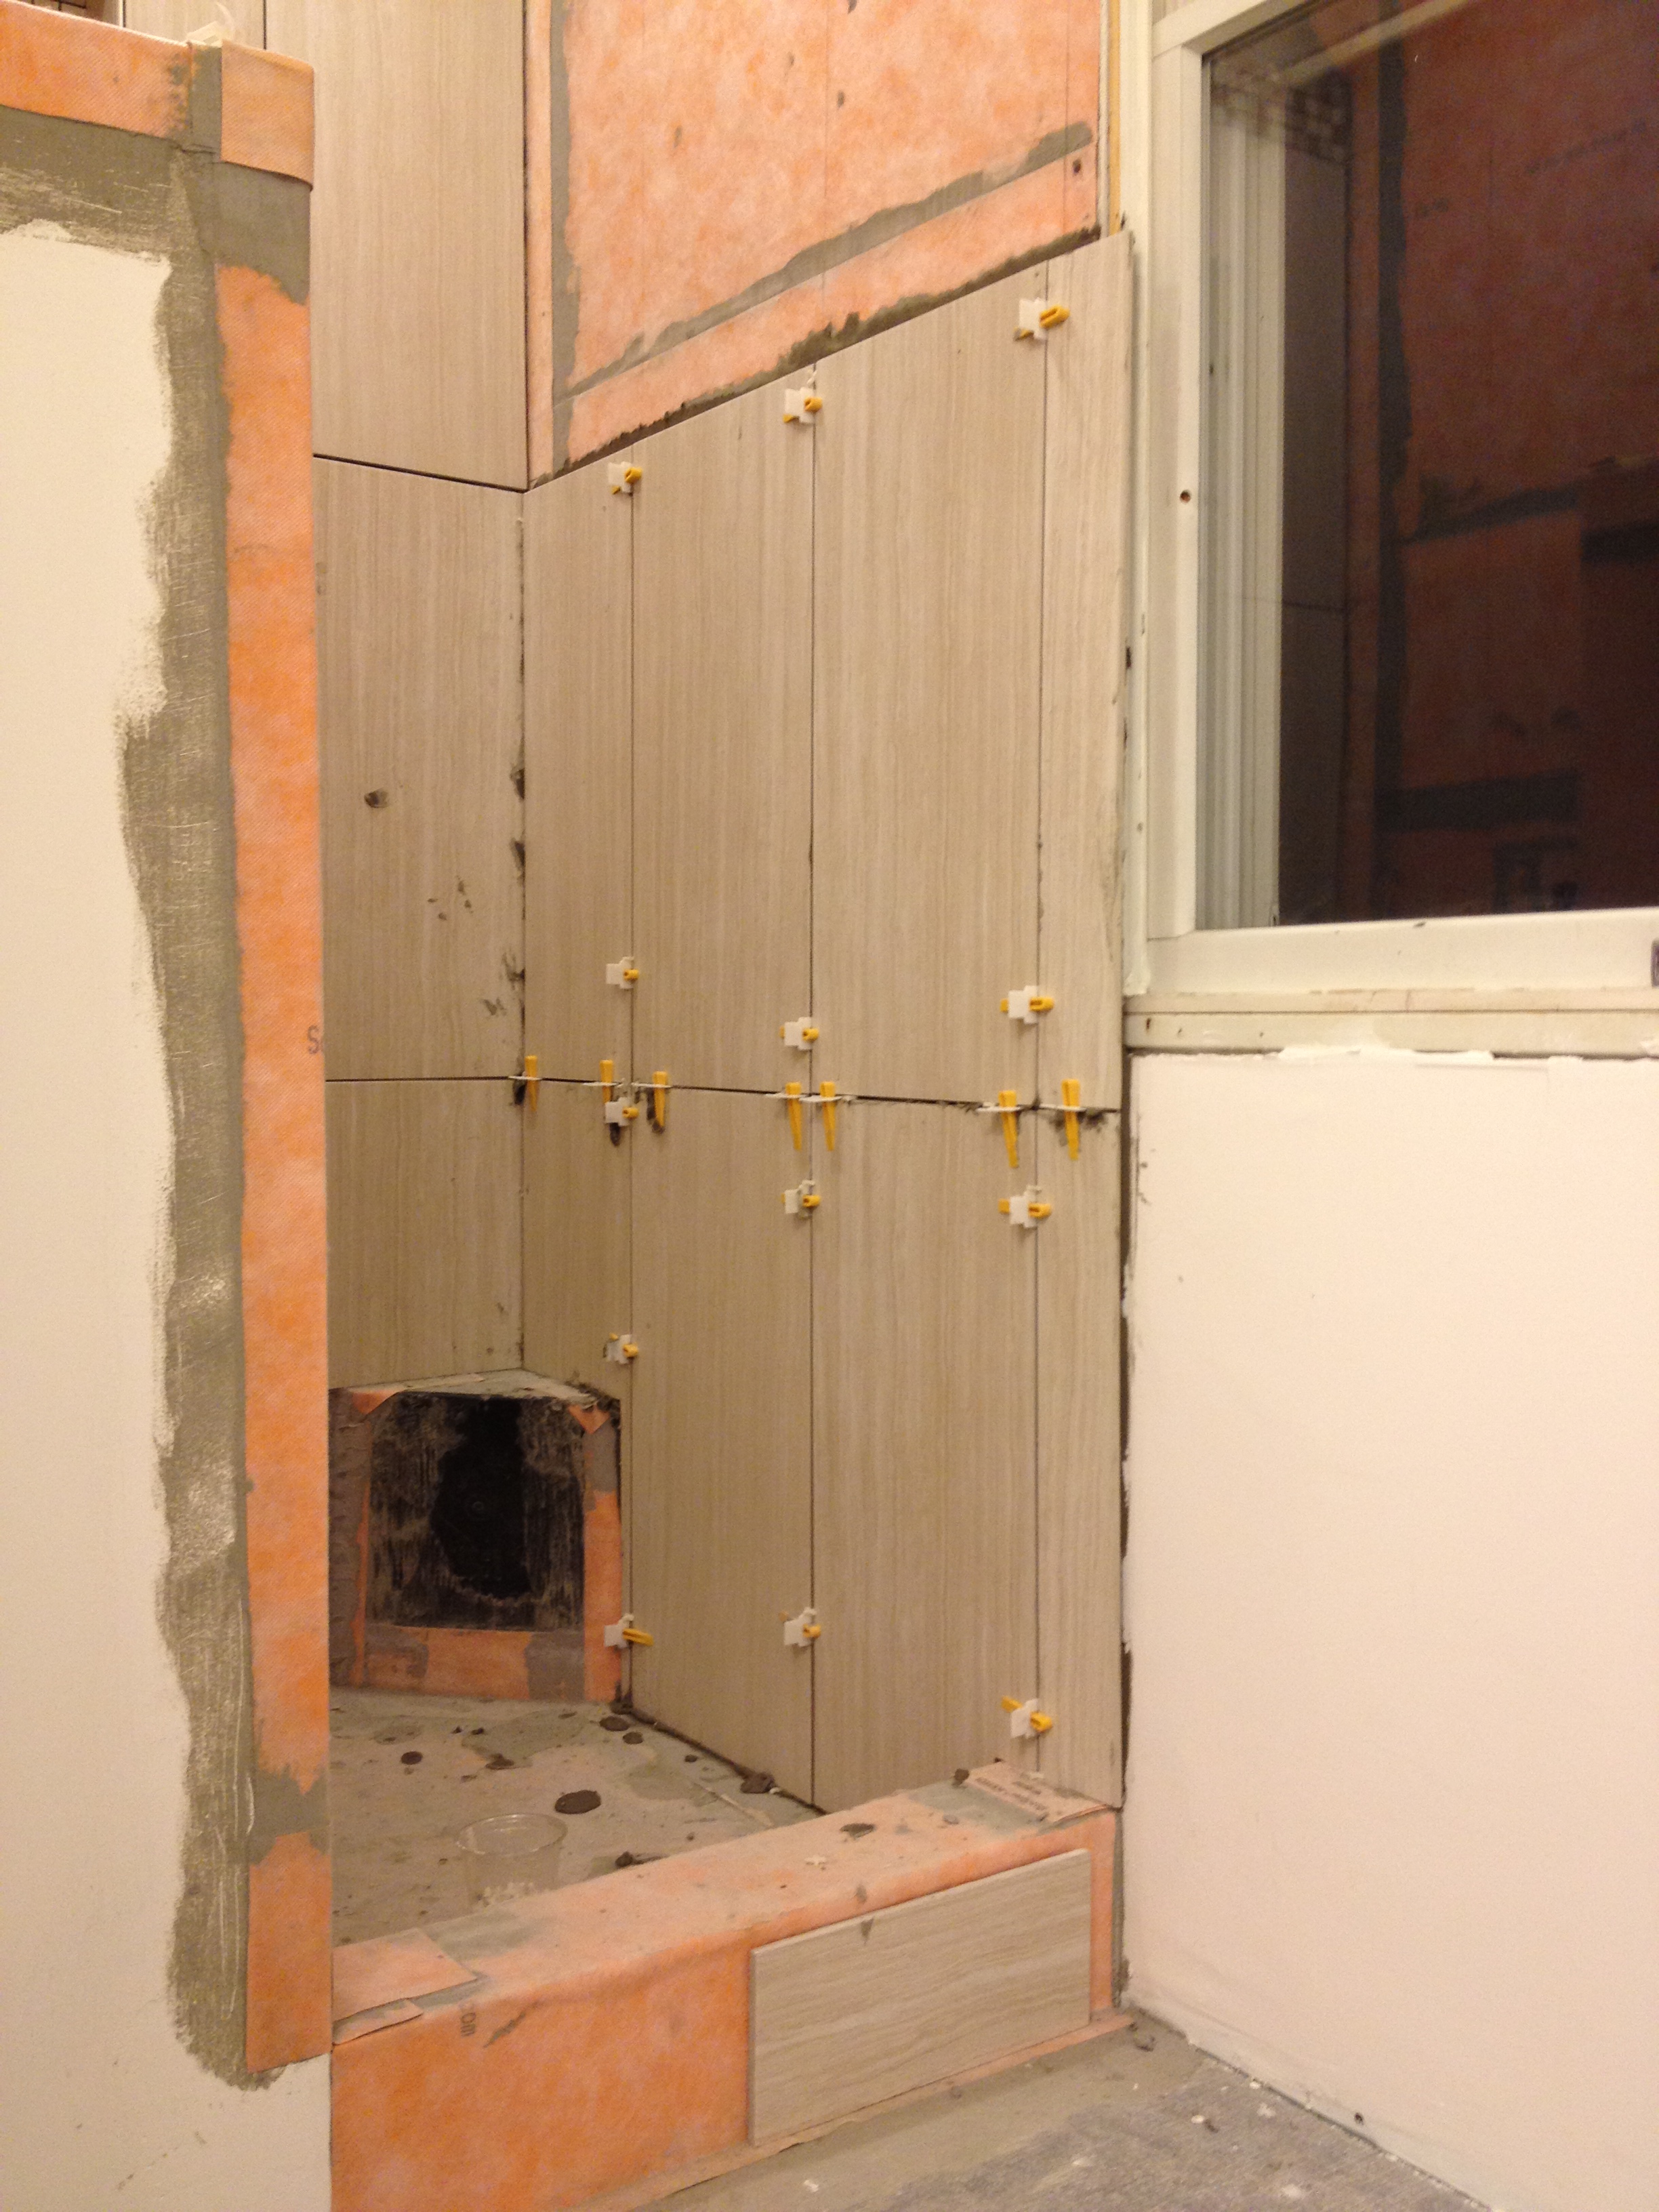
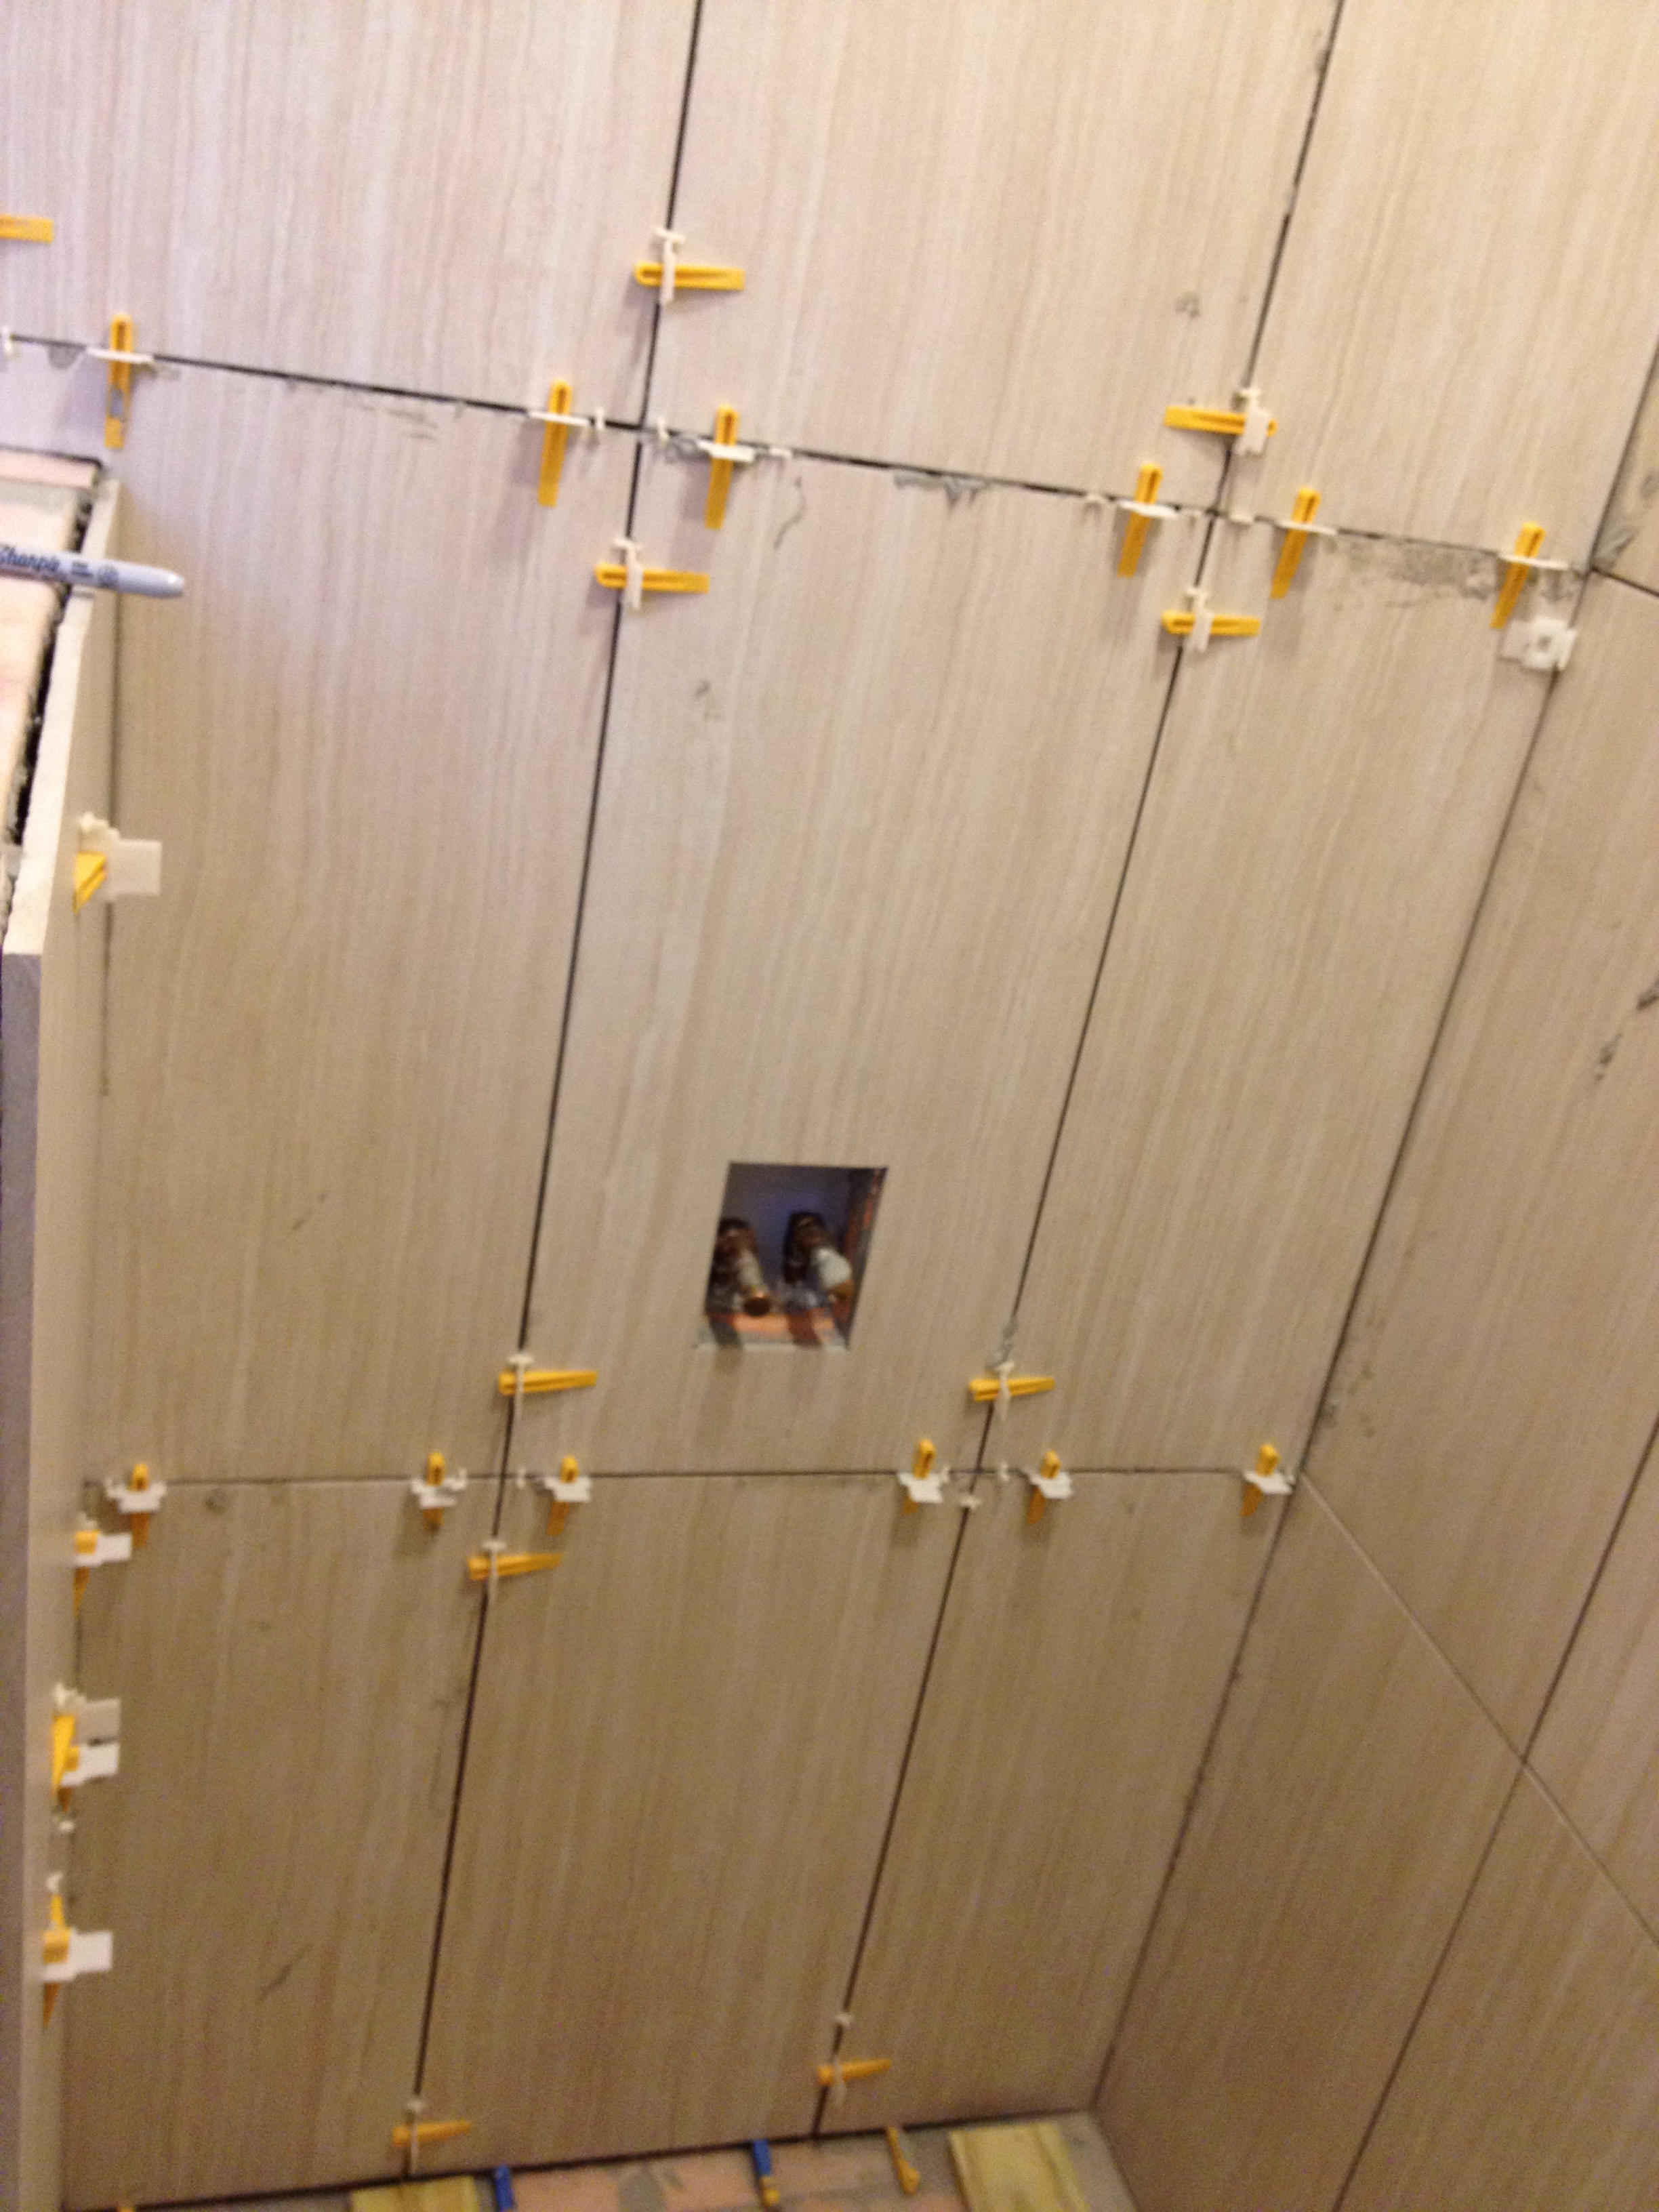
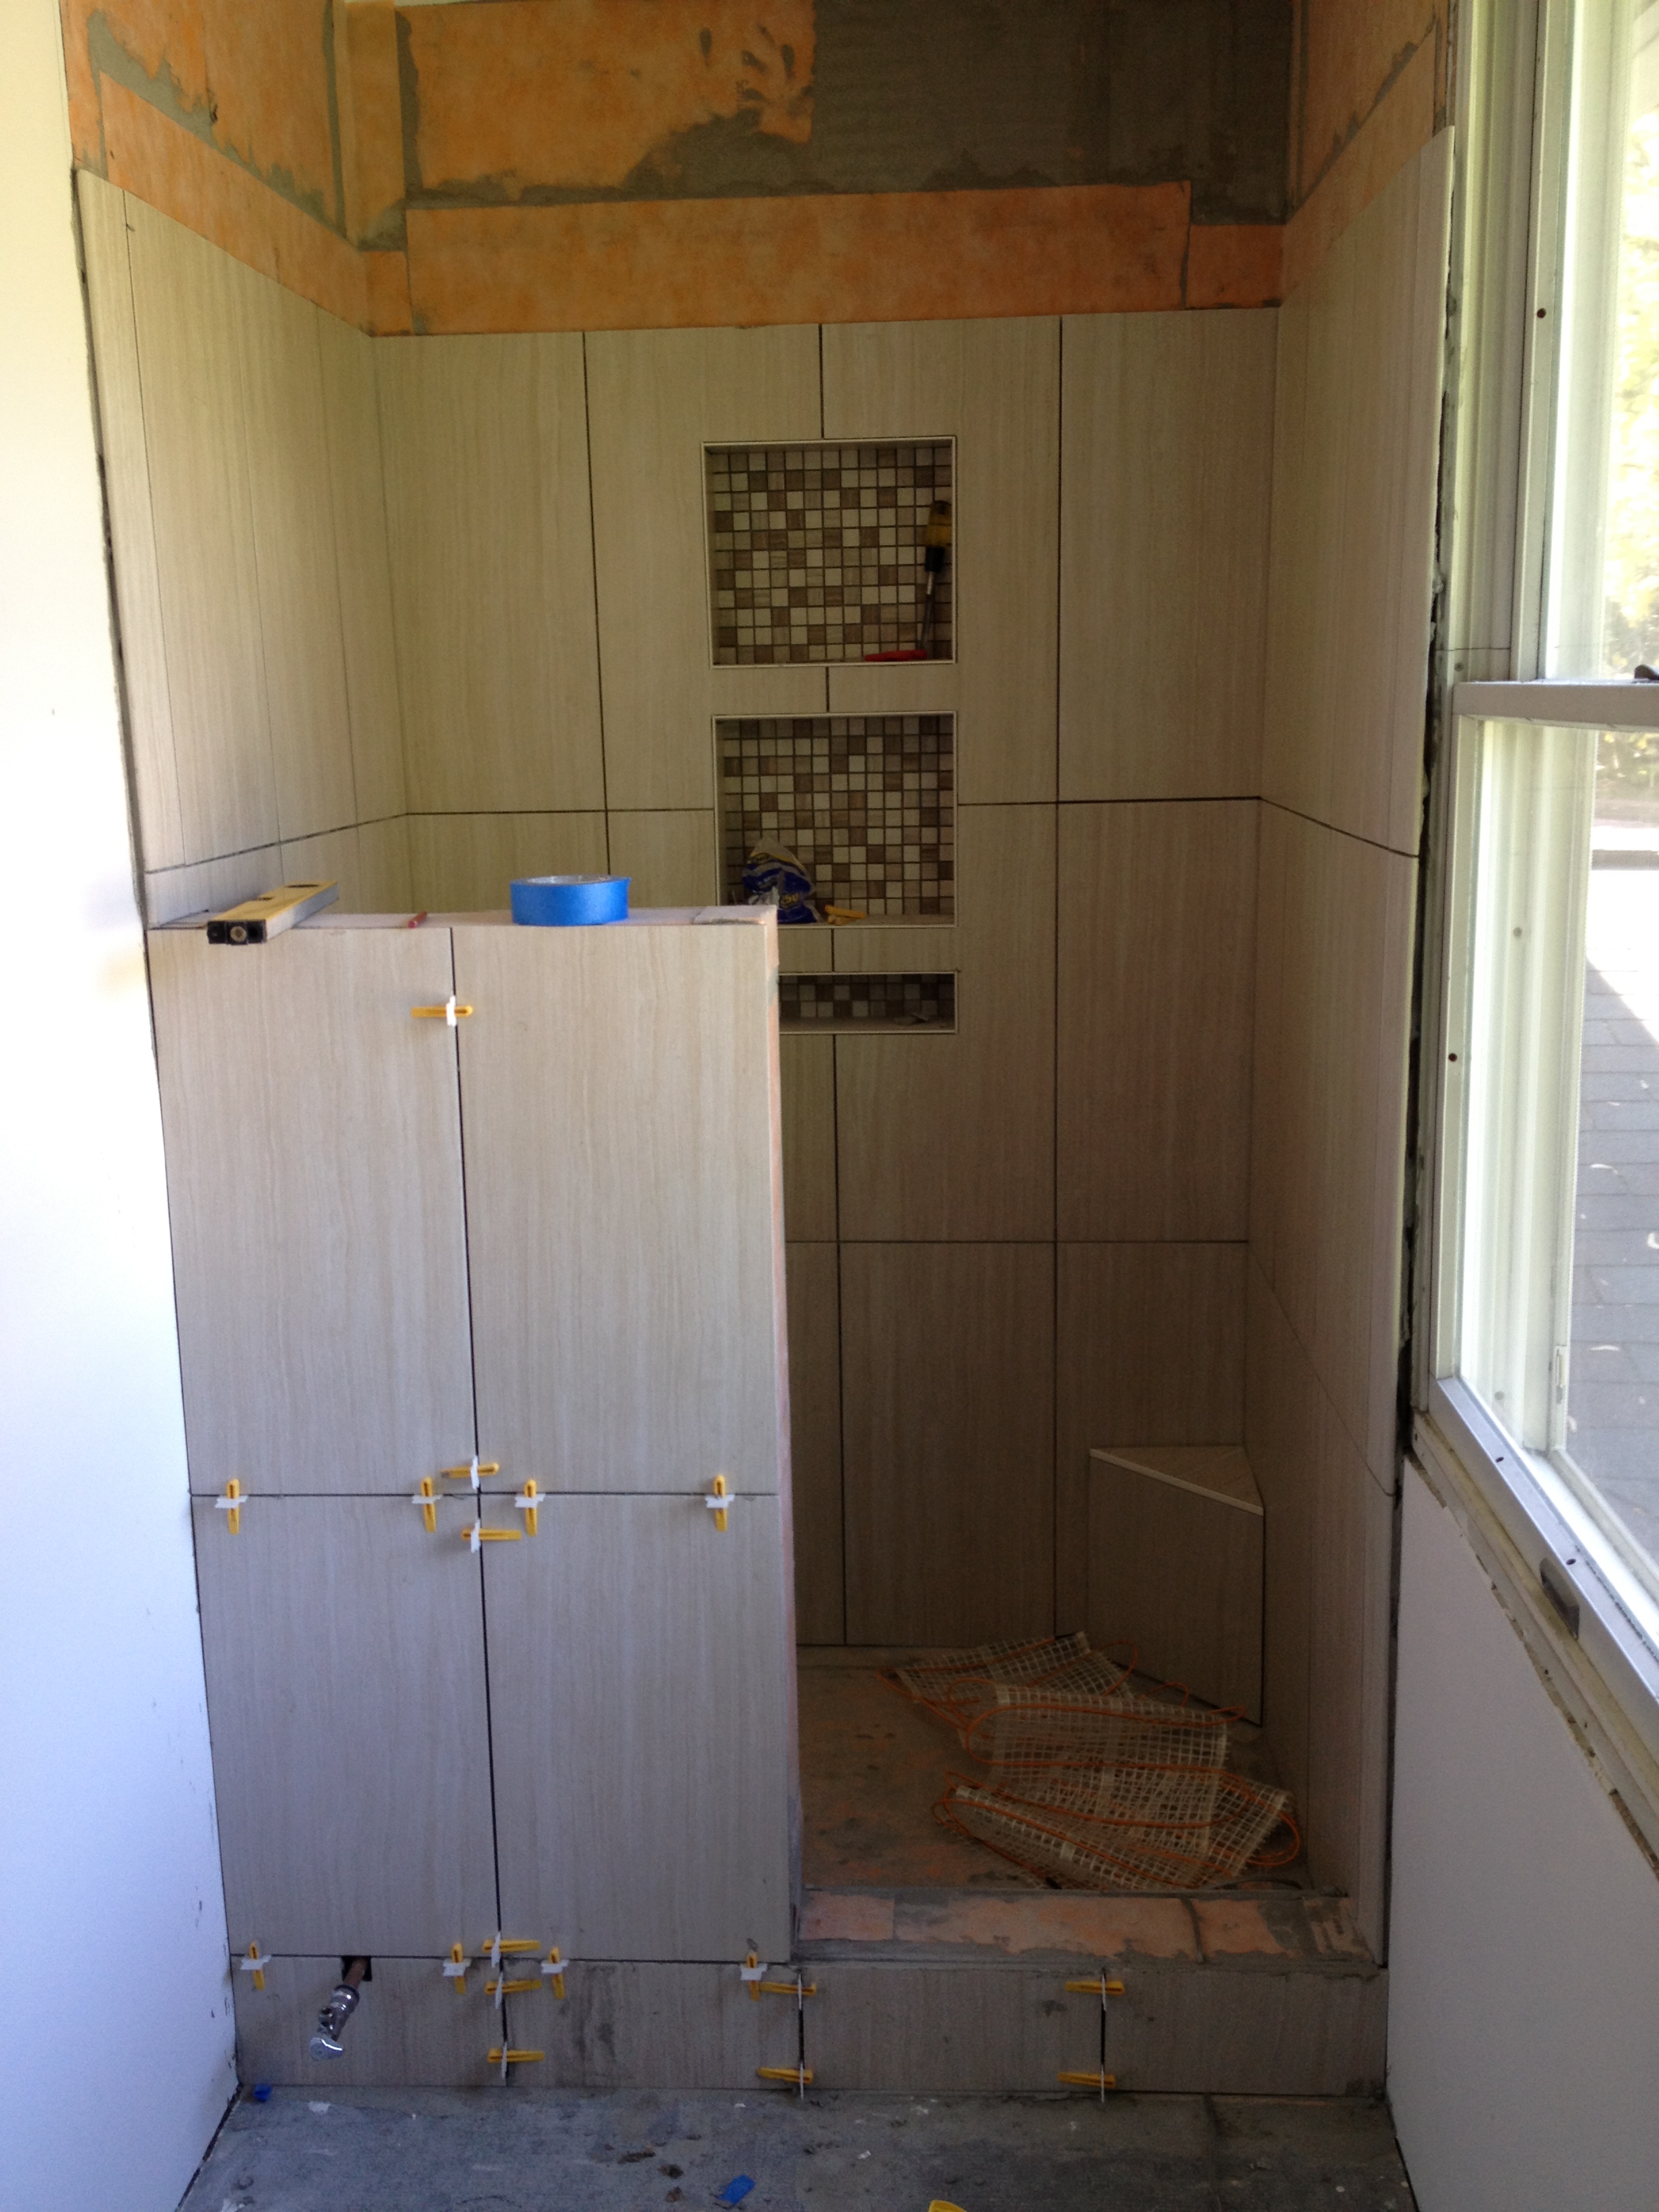
We dedicated Saturday to painting touch-ups, tile placement, and Halloween costume shopping. We had to paint the ceiling and walls on Friday. Some of the blue tape we used to protect the new paint caused the paint to peel when we took it off. This led to a decent amount of touch-ups on Saturday. We also wanted to get moving on the tiles. When we re-tiled the kitchen floor, we ordered enough tiles so we could use the same tile in the bathroom. We ended up ordering the perfect amount of tiles which was great. We did all the tile placement and measurement with enough time to get in our costumes and celebrate Halloween with friends on Saturday night.

Marty McFly and his girlfriend, Jennifer Parker! Happy Halloween!

On Sunday, we were determined to get as much done in the bathroom before we lost power.  We weren’t sure when the rain was going to start. Jim went to Home Depot early to rent the wet saw we needed to cut the tile. While he was there, I started bringing in the trash cans and patio furniture so Sandy wouldn’t wreak havoc in our yard. Since we already took the tile measurements, including the complicated section of tiles around the waste pipe, Jim was able to get started cutting the tile as soon as he got back from the store. We were both worried about the tiles surrounding the waste pipe, but thanks to careful measurement and planning, the cuts worked out perfectly on the first try.  In about an hour and a half, Jim cut all the tiles and returned the wet saw to Home Depot. We worked so quickly – I never even got a picture! If you need a refresher about a wet saw – check out this old post.

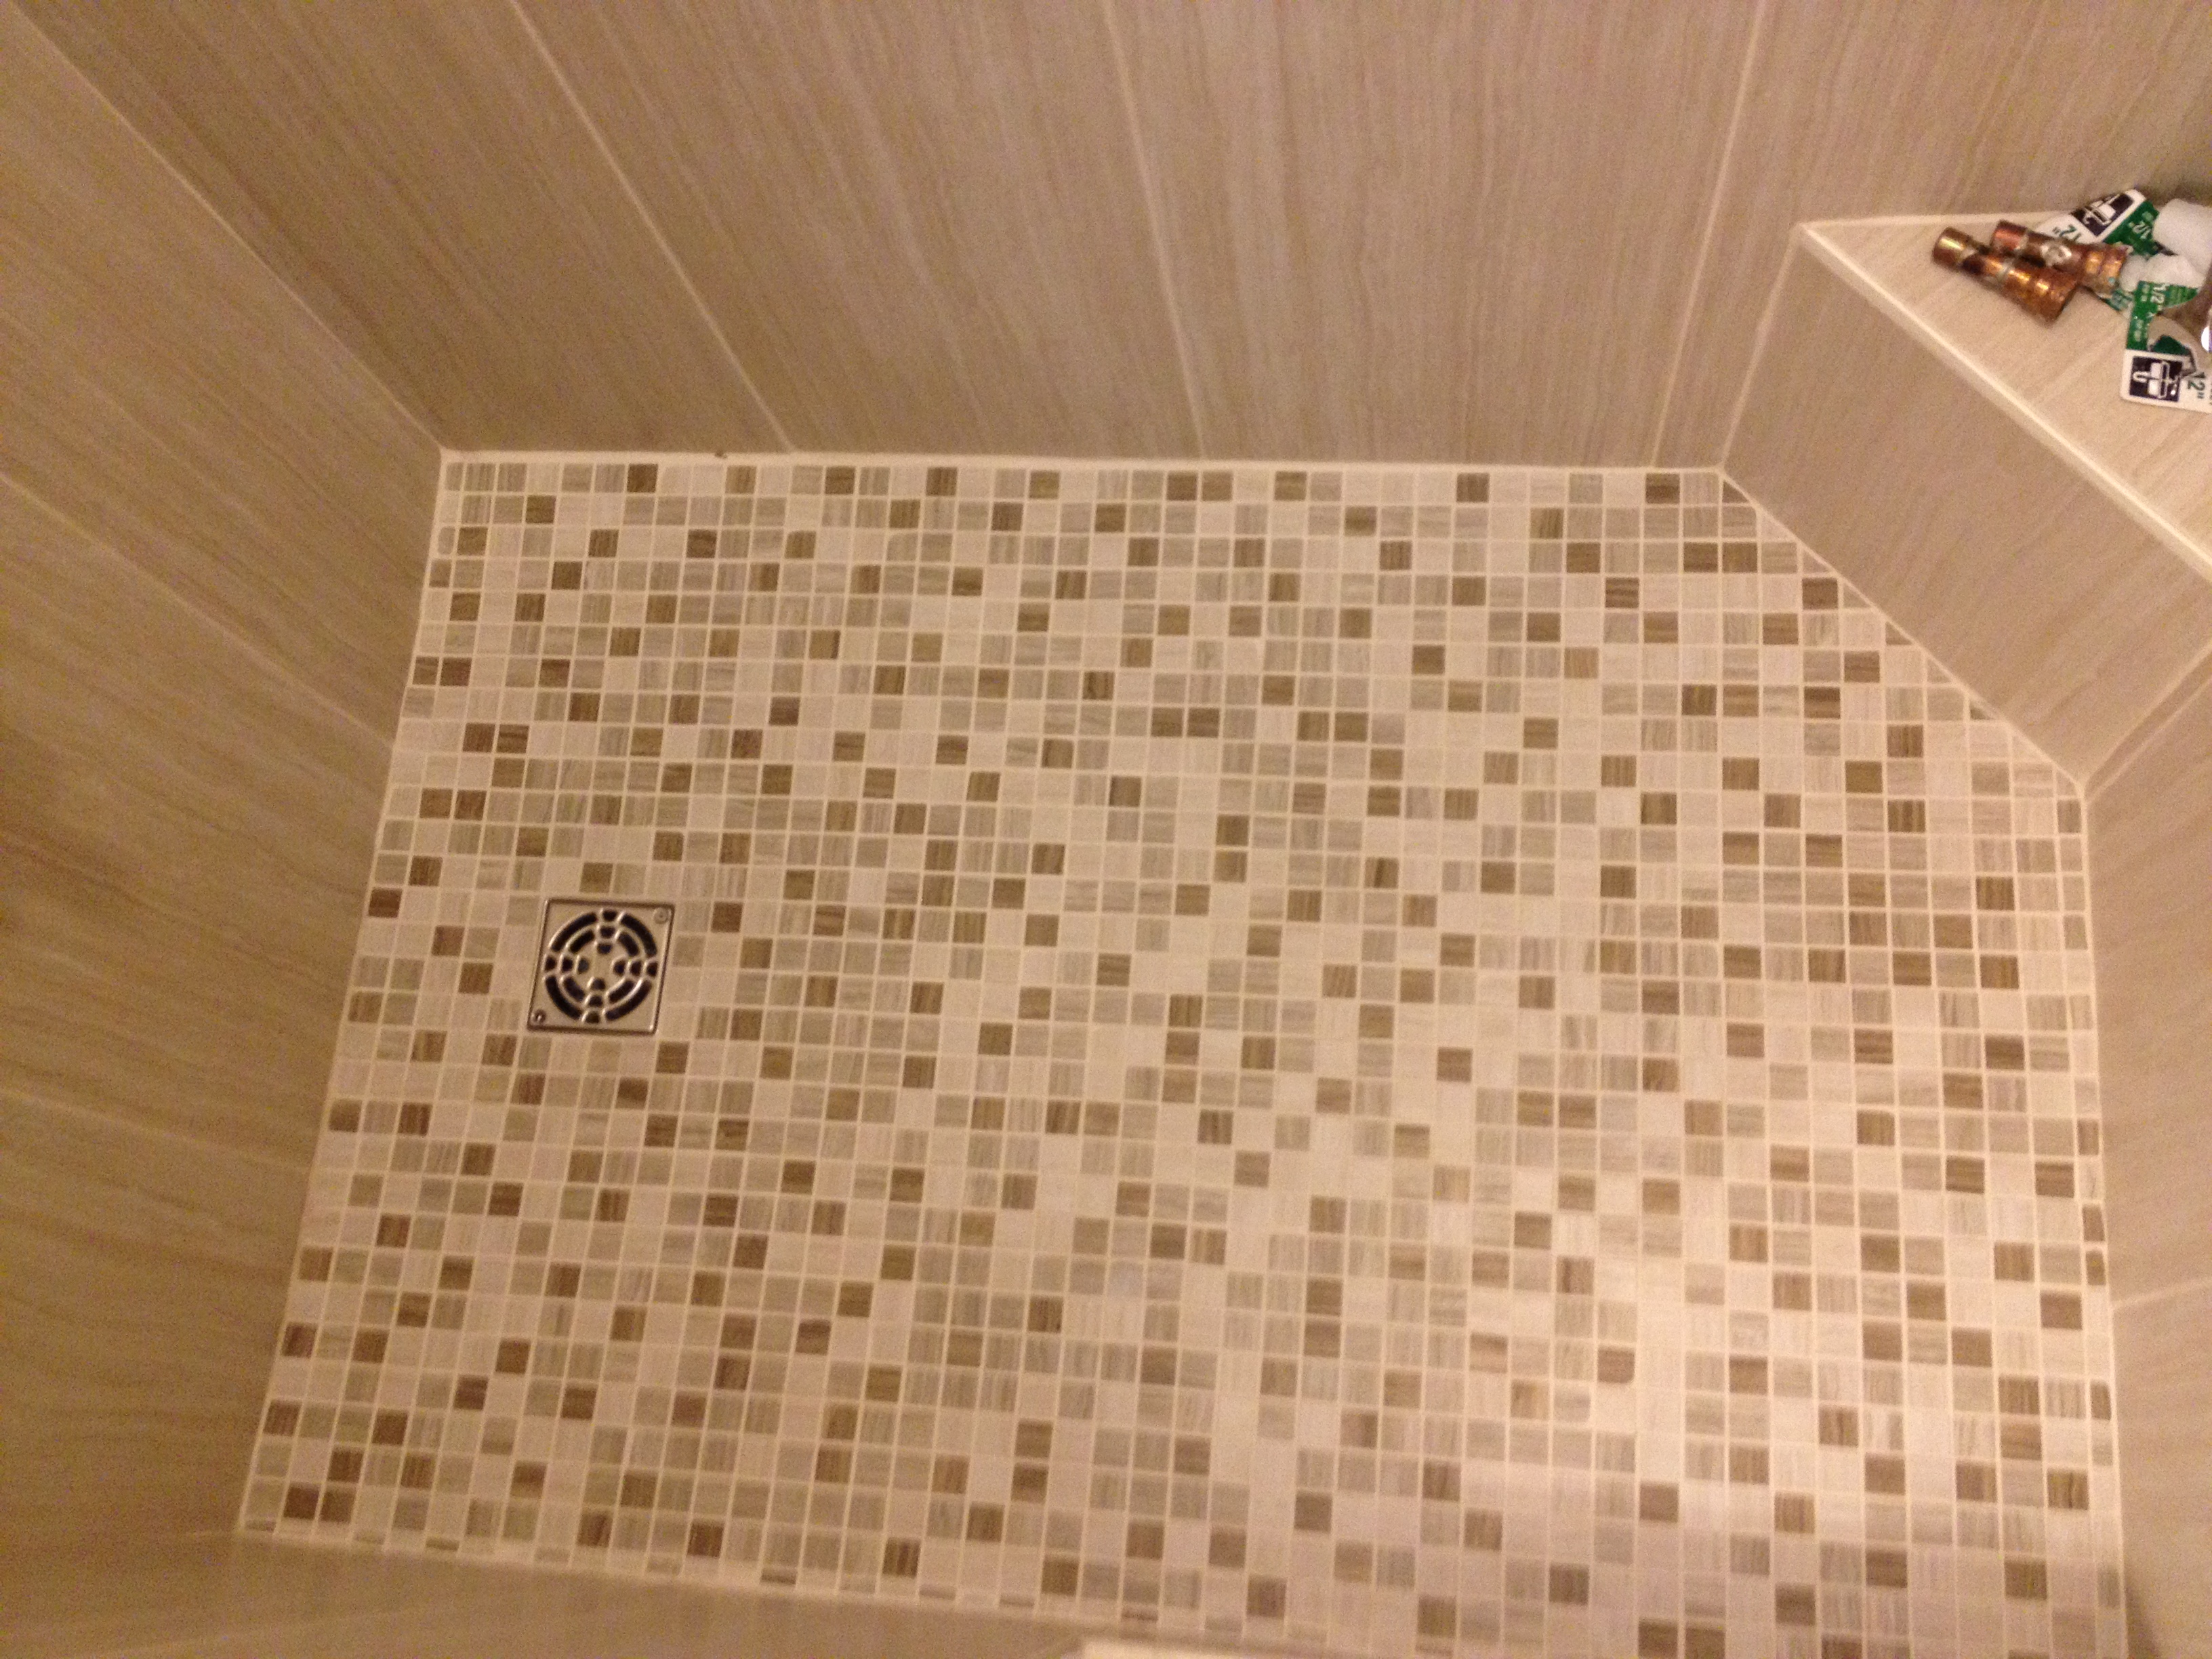
We were both convinced we would lose power and did not know for how long, so even as the rain started to fall, we laid out the tile on the bathroom floor. Jim attached a new flange to the waste pipe since the old one was pretty gross and rotted. We were able to see that the flange fit perfectly in place with the laid out tile which was a relief. The new tile had to line up with the already existing tile in the kitchen. The biggest challenge with this was that we had to line up the tiles while also starting the new tile in the corner of the bathroom farthest from the kitchen. As soon as the mortar was down for the tile, we would not be able to walk or kneel on it, so we had to work out way out. To solve this problem, we traced pencil between all of the tiles to give us an idea of where they went. We also left the non-secured tiles in place while we put the mortar down.  Luckily, our planning paid off and the tiles lined up.  We managed to finish the mortar without losing power!  We called it a day and prepared for Sandy.

Tile set in place with the mortar – look at the perfect hole in the tile for the waste pipe and the nice new flange!

Another view of the secured tile

On Monday, we woke up with power on in the house. The storm hadn’t gotten too bad yet, so we still were not convinced we were going to keep the power. We both did not have work that day, so we decided to take advantage of the extra time. The mortar was dry, which meant we could grout the tile. Grout is the stuff that fills in the space between each tile. It needs to be spread into the spaces and then wiped away with a “moist” sponge. This takes a lot of time. You cannot use the sponge to wipe more than once because you may spread the grout (which is like wet sand) and the grout can scratch your tile. You also need to wipe down each tile three separate times. It is not fun and it hurts your hands, knees, and back. Don’t let HGTV fool you into thinking it is easy. You may remember my injuries from the kitchen grouting experience. The storm was supposed to start getting bad at 2pm so we started early, hoping to get whatever we could done.  Before we started the grout, we quickly installed the toilet paper holder. We knew we wouldn’t be able to walk on for a day once the grout was completed, so we did what we could beforehand.   We also had to get any excess mortar off of the tiles. With a wet cloth and flat head screw driver, we were able to prepare the tile without incident. After grouting the bathroom tile, we did a few touch ups on the grout in the kitchen. There were a few imperfections that bothered us that others may have never noticed.  Within a few hours, we finished the grouting.  Sandy started really to pick up by then, so we hunkered down in the living room for the rest of the day/night.

Toilet paper holder installed

Look how cool it is! It just lifts up for when you need to replace the roll!

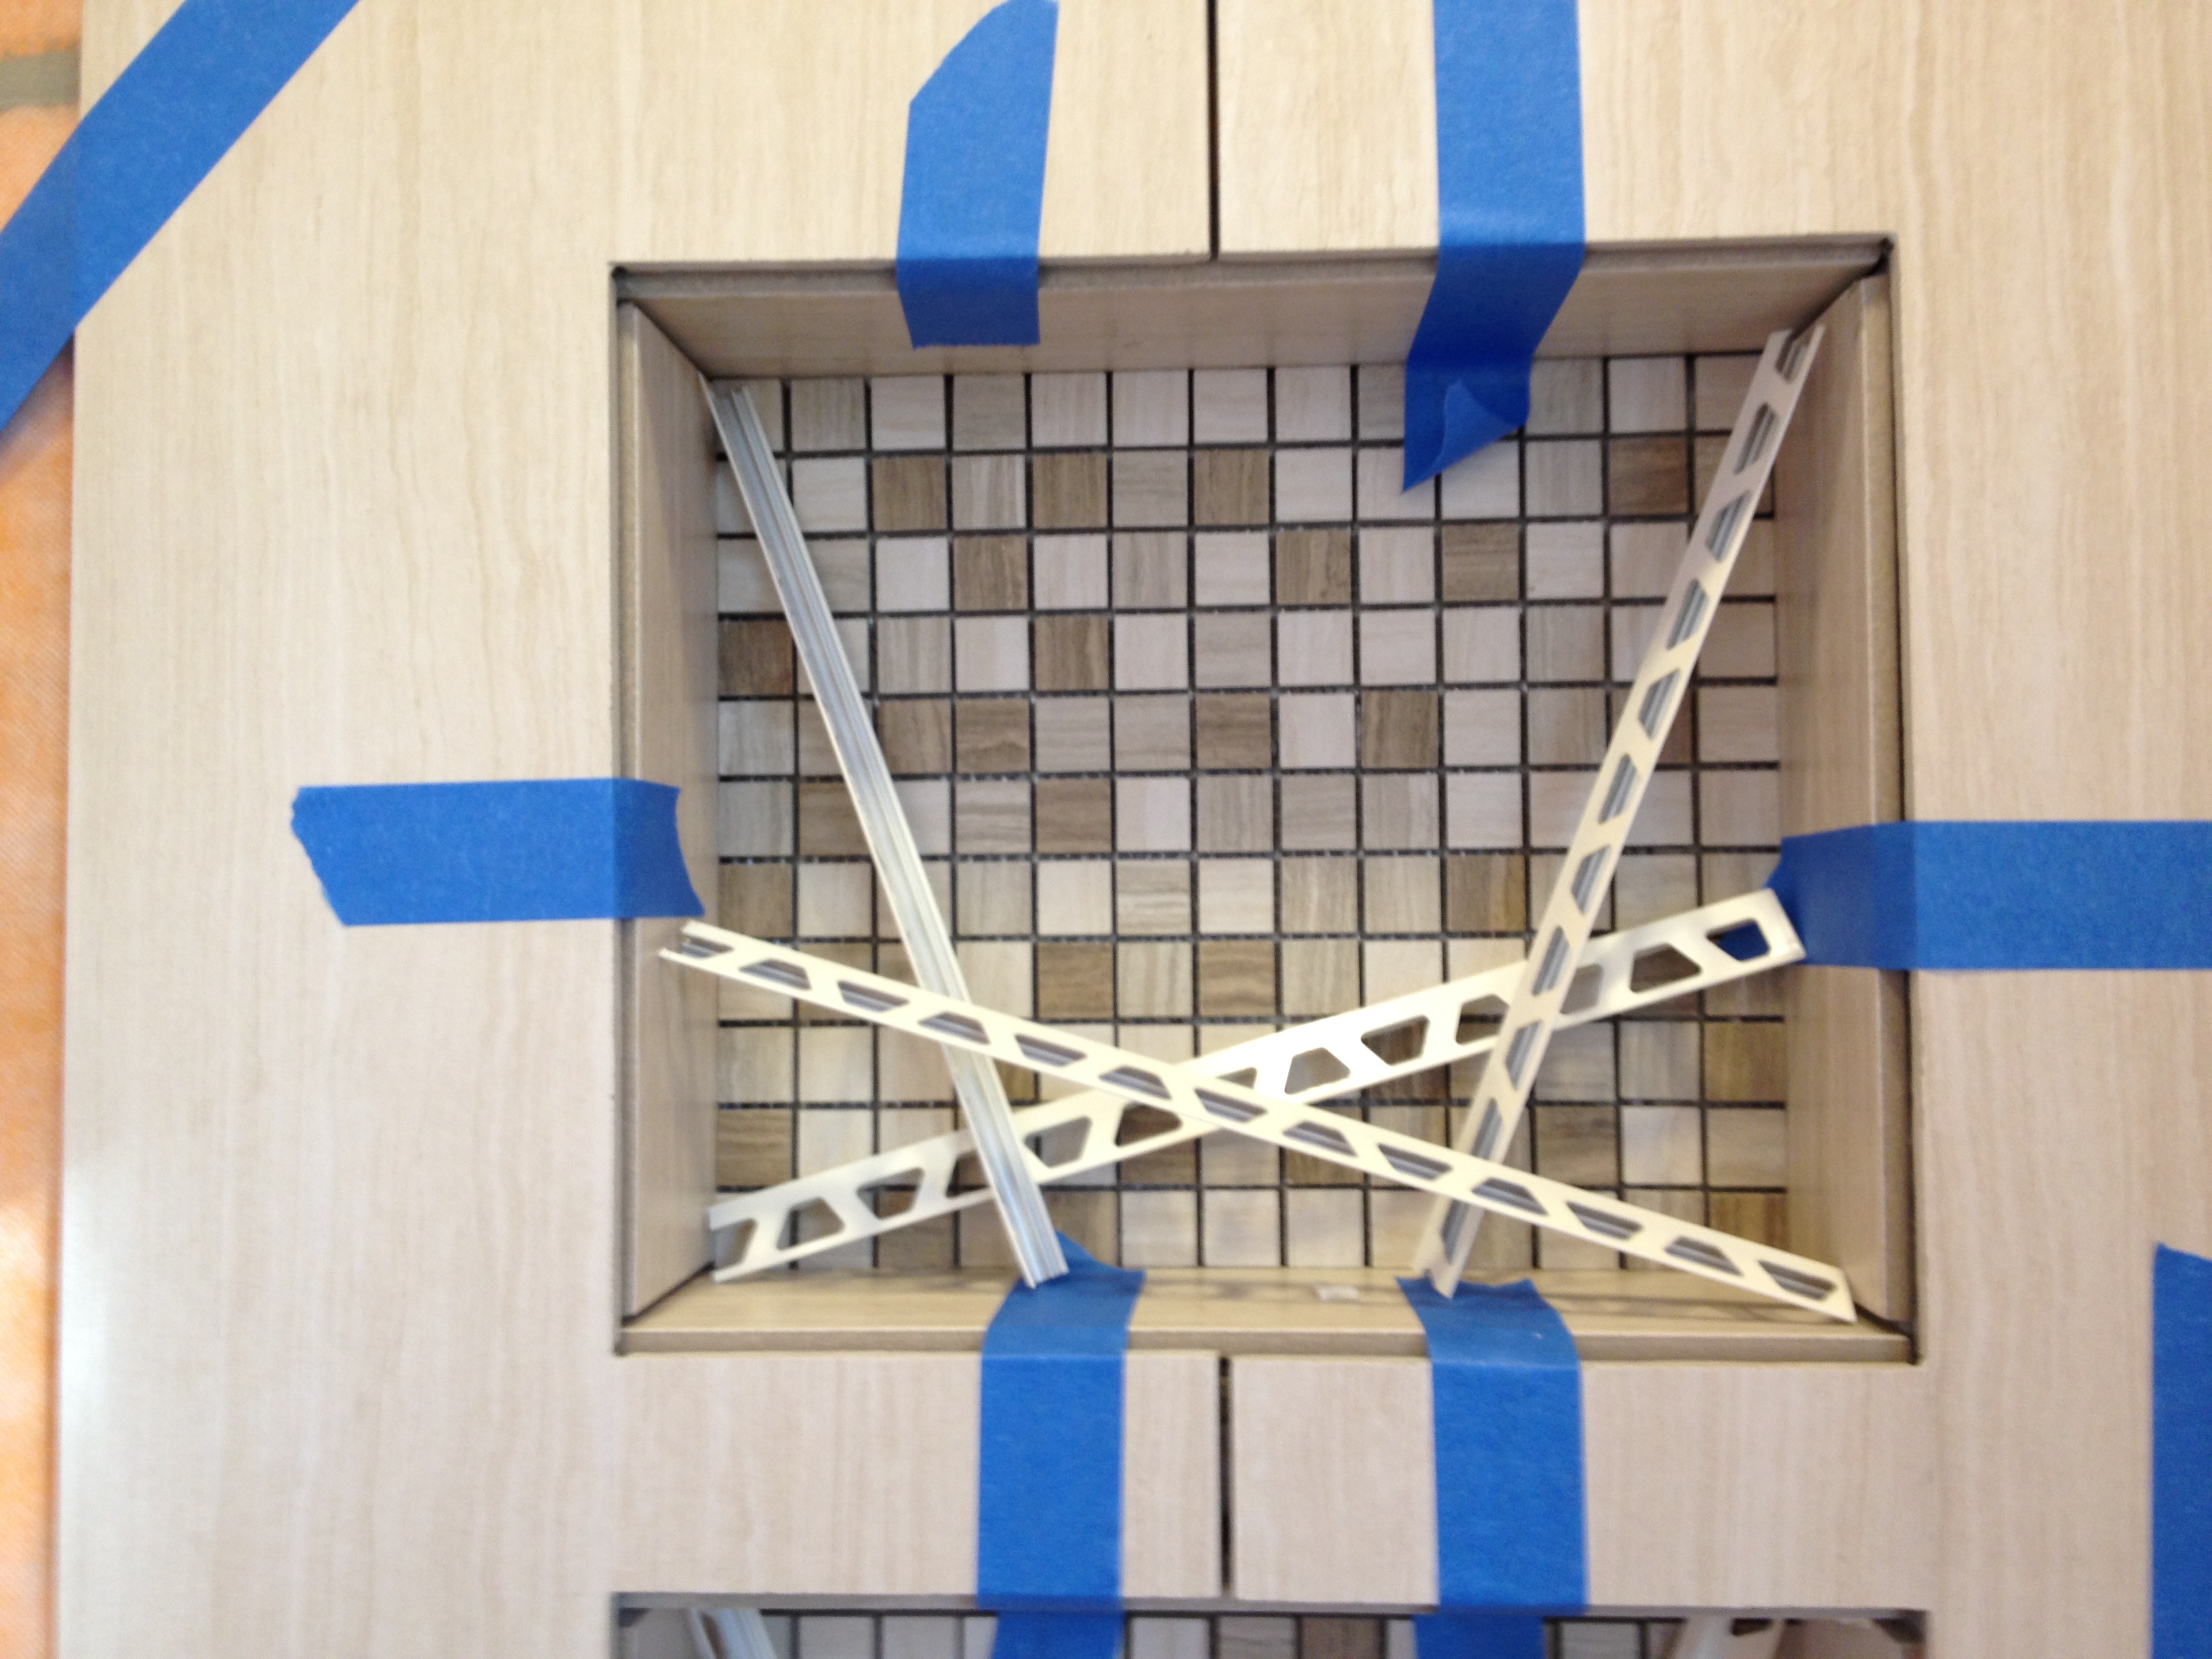
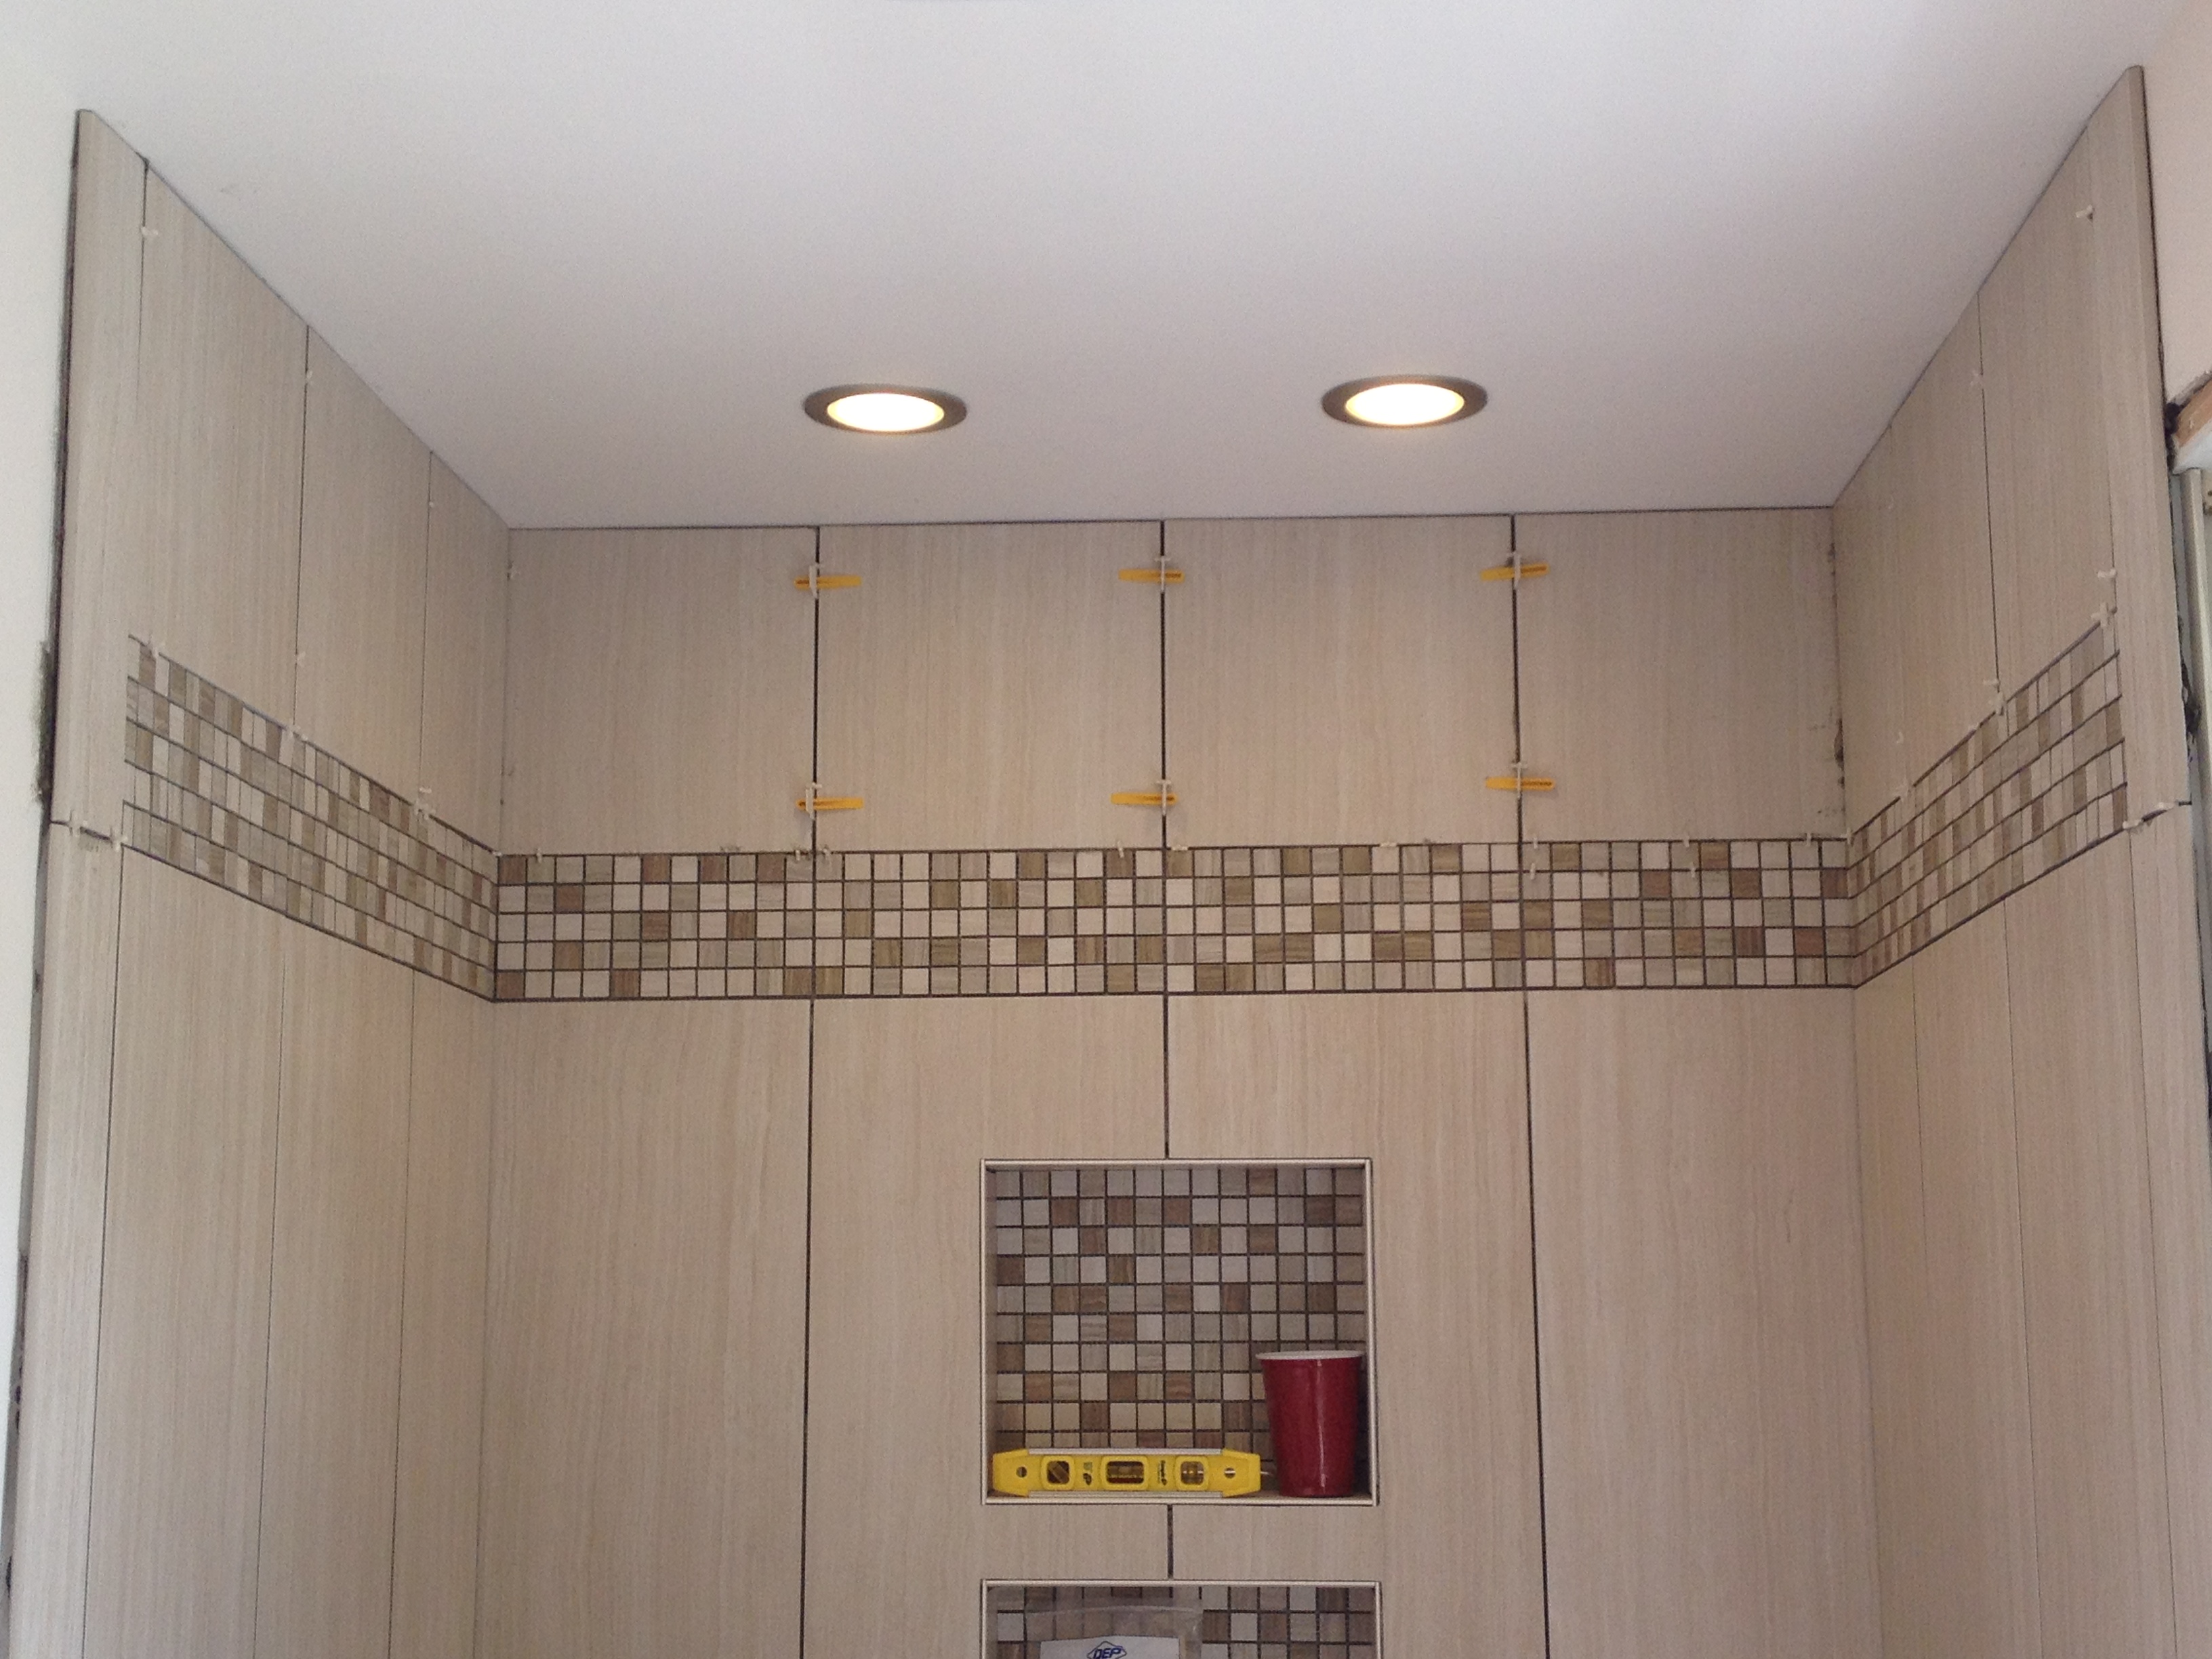
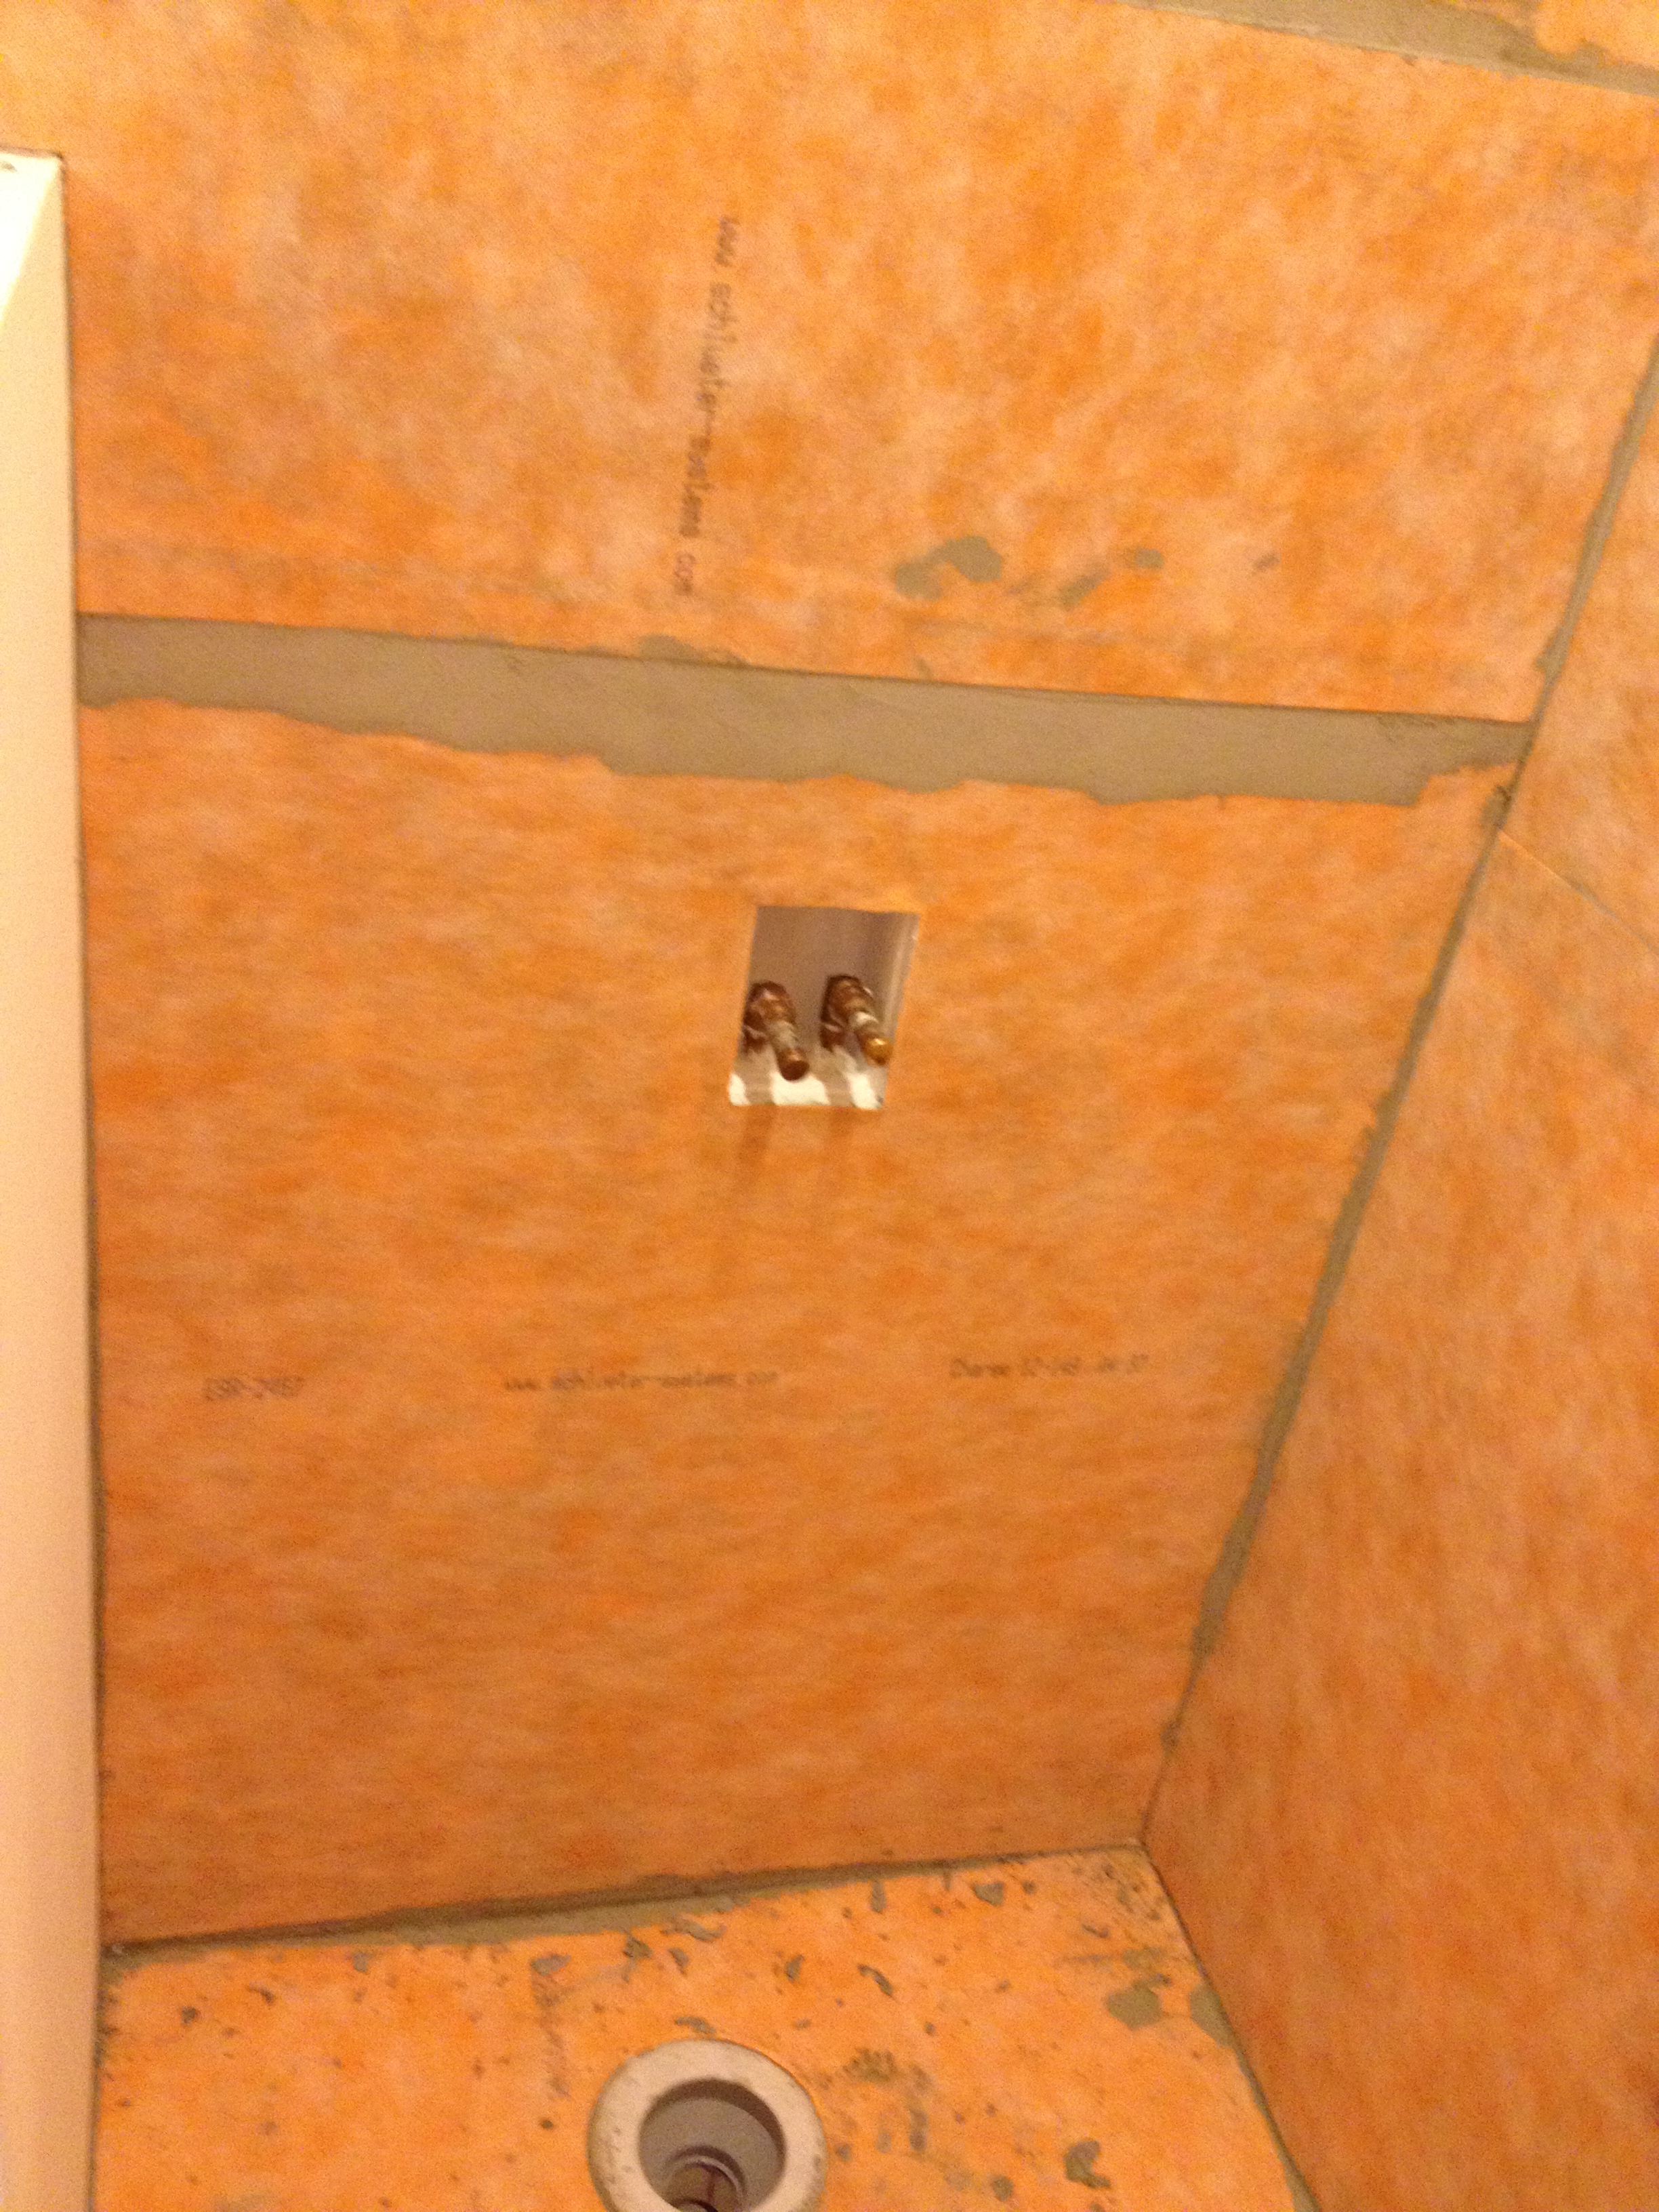
Close-up of the grout in the tile – you can see the mosaic tiles we added in the bathroom to match perfectly with the kitchen mosaic tiles!

After sleeping in our basement since we live near “large trees” (aka we have five huge oak trees in our backyard), we woke up Tuesday morning and still had power!  We couldn’t believe we were one of the lucky ones who did not lose power throughout Sandy’s devastation.  We lost it for a total of a minute the night before but that was it.  Thankfully, most of our family and friend’s fared well throughout the storm also (evacuations and power outages aside).

Since the storm had calmed down on Tuesday, Jim was able to make a trip to Home Depot to pick up some new molding for the bathroom. We both did not have work again, so we dedicated the day to the bathroom. Jim measured and cut out the moldings while I spackled the walls where there were imperfections.  We installed moldings and quarter moldings along the floor of the bathroom. Once installed, we painted them to match the trim throughout the house.  Once we completed the molding, we installed the towel rack near the would be sink. We took the sink out and put it in place to measure the perfect location for the rack (we did the same for the toilet and toilet paper holder). With this complete, the only things left to install were the toilet and sink.

Close-up of some of the molding and quarter molding

The new towel rack (it matches the toilet paper holder) – you can also see the new outlet in this picture!

We decided to install the toilet first. We already have a sink in the kitchen, but since the demolition, we have no toilet on the first floor so the toilet got priority. Using our “1,2,3 Plumbing” book as a guide, we installed the bolts on to our new flange.

The new flange with the bolts installed

Next, we added the wax seal to the bottom of the toilet. This ensures an airtight seal between the waste pipe and the toilet to prevent leaking.

Bottom of the toilet with the wax seal

Then we needed to put the toilet over the flange, leading the bolts into the holes on the toilet base. Once in place, we used washers to tighten the toilet into place. Then Jim had to saw off the tops of the bolts so the bolt covers could fit. Once this was set, we noticed that the toilet was not perfectly level. We used plastic shims to level the toilet (a shim is a piece of material used to fill up space and make something align). This luckily worked out very well and the toilet was leveled.

Secured in place

Next, Jim added the tank onto the toilet base. It required lining the tank and base just so (three points needed to be touching) to ensure the tank didn’t leak. Then they were bolted together. We also attached the toilet seat which was pretty simple.

Tank and seat in place!

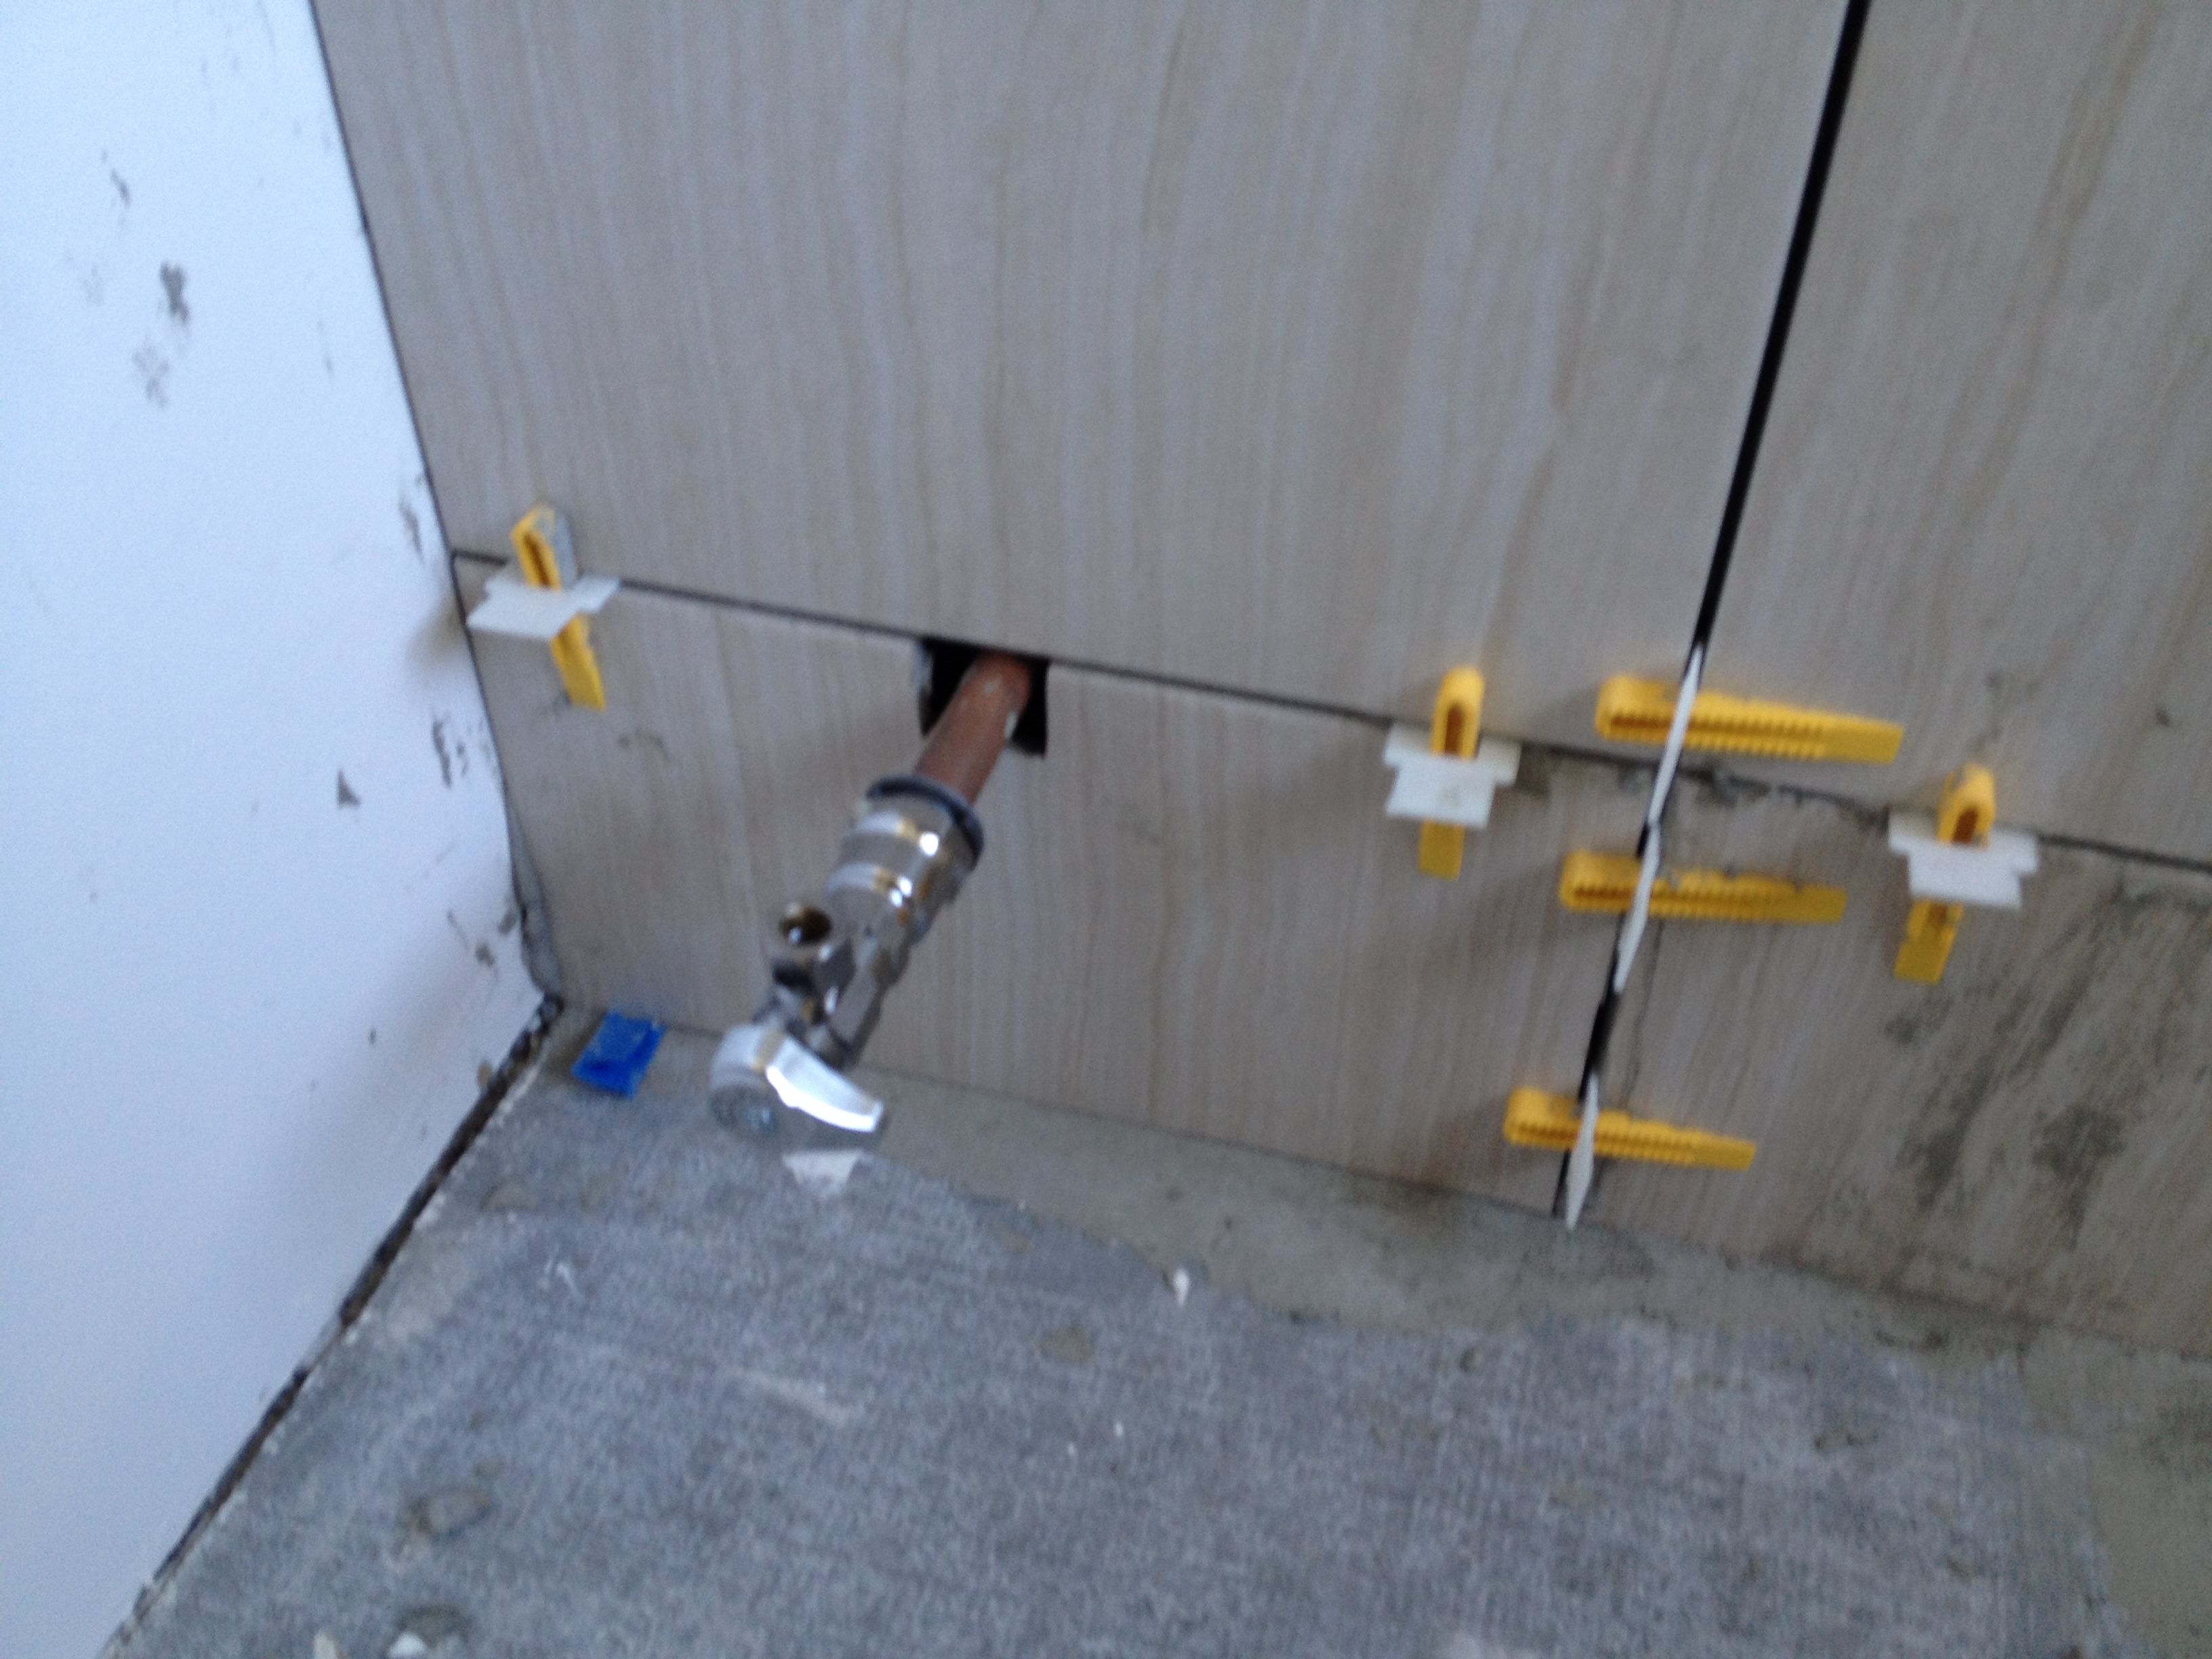
The last step was to hook up the supply pipe to the toilet and turn it on. Since we replace the supply pipe valves, it was very easy to connect the supply pipe.

Close-up of the new supply line

We turned all the water and let the tank and toilet fill out. After a variety of tests, we concluded there was absolutely no leakage.  The toilet was officially open for business. After two unexpected days off from work – we are now one sink away from a completely remodeled bathroom.

Roll Back(splash) to Me

Posted on

Why hello readers!  It has been a while!  Do not worry – we have not forgotten about you.  With the kitchen ALMOST done, there have been a lot less updates to post.  The past few weeks have been focused on smaller kitchen projects.  Although the projects are small, they can still be time-consuming which is why we are not finished yet.

The smaller projects have included adding trim to the windows and archway. We also needed to add quarter molding around the walls of the kitchen. Jim put up new shades and curtain rods for the windows (the curtains have been ordered) and I spent a LONG time cleaning the windows.  Apparently after 4 1/2 months of construction – windows get really dirty. We also painted all the trim and added some finishing touches like new doorknobs to doors leading to the bathroom, basement, and garage (those doors were also painted).  Here are some pictures I took along the way:

Window #1 before

Window #2 Before

Molding and blinds on Window #1! (sorry about the lighting)

Molding and blinds on Window #2!

Final product with the curtains! (window #1)

Window #2 Complete!

No divider between the kitchen and dining room/living room

Jim added a threshold!

Old and gross hinges

Another view of the hinges

New, clean hinges!

Another view!

New door handles! (I didn't take a picture of the old ones before Jim removed them - use your imagination)

We added a door bumper to the bathroom door so it won't have a hole in it (it previously had a hole from the garage door opening into it!)

With these smaller tasks completed, we were left with the last two big tasks of the kitchen. The backsplash above the countertops and the crown molding along the tops of the cabinets. We ordered the backsplash from the same store we bought our kitchen tile (shockingly not Home Depot). The store has an awesome selection and we were able to get something we both really liked. It arrived two Fridays ago, so we decided to do the backsplash first.

We ordered glass tile for the backsplash.  There is a lot of similarities between applying floor tile and applying a backsplash.  You need to cut it to fit into place, use mortar to set the tile, and then finally apply grout.  Even with our tile experience – we still thought we might get the first two steps done in one day. We were wrong.

There are a few steps that are different between laying tile and applying backsplash. Some of them had to do with preparing the space. We needed to protect our new and beautiful granite countertops from any mortar and/or grout that may be spilled. It was also suggested to start the backsplash slightly above the end of the countertop. This meant taping down cardboard along the edge of the countertop. The cardboard provided the perfect amount of space between countertop and backsplash starting point. With the cardboard there, we could rest the backsplash while we applied to the mortar. Otherwise it may be hard to hold in the right place. We also needed to pull the outlets from the wall a little because they would need to have a different end point once the tile was up. It was also suggested to sand the walls and roughen them up a little. This would help make them more adhesive.   Another prepping step had to do with behind the stove. We needed to included backsplash behind the stove, but there was no countertop to use as a guide. Instead, Jim hammered on a 2 by 4 to the wall so we could use it as a guiding point. It worked wonderfully.

Countertops protected - you can see the 2 by 4 behind the stove in the left of the picture

More protection and cardboard in place

As you may remember from our tiling, we needed to lay out all of the tiles to make sure they fit and cut where they needed to be cut.  There needed to be a hole for all seven outlets. While measuring and cutting all the tiles, we wondered why we didn’t just decide to have one outlet. Luckily, with the smaller tile, we did not need to rent the wet saw again. Jim had a tool that could cut the glass tile. We worked all day Sunday. When it got to 7pm, we realized we may not be able to mortar the same day. Measuring and cutting out tiles is very, very time-consuming.

Some of the tile cut and laid out

More tile ready to go

And even more!

Monday, after work, we were both ready to mortar.  We got started around 5:30 and finished around 9. Overall, applying the backsplash to the mortar went smoothly. We only had one section where the measurement was off, so we used other pieces of tile and swapped them out. Since our backsplash is a bunch of different smaller glass tiles, it wasn’t too difficult to replace pieces. If a tile was scratched or broken, we also replaced it. Here is how our tile looked Monday evening:

First corner up (you take the plastic off after it is up)

More backsplash

More of that section

Wide view

Tuesday was our grouting day.  We got started closer to 6pm that night and finished after 9 – almost the same hours as before. We needed to take the plastic off the tiles before we got started. Jim put the grout down with the grout float and I wiped it smooth with the sponge (same jobs as before). The grout was a different texture than before which made it a little harder to work with for both of us. Almost, there was less room and a lot more space to fill grout (there is grout between each tile).  It took a long time (considering the space), but we did finish in one night. Phew.  My hands were pruney but no injures this time from wringing out the sponge.

Tile with grout

View #2

View #3

Close-up so you can see the grout

It took us through Wednesday night to finish everything up. Jim added silicone in the space where the cardboard was while I cleaned up the counters and did one more wipe of the backsplash. We also had to put all the outlets back in place. We were finished putting everything back in place around 8 – it was great to have dinner a whole hour earlier that night!

Finished product:

Pretty!

View #2

View #3

View #4

We are ONE step away from a finished kitchen.  We are actually holding off on that step for just a few days.  We’ve been ignoring the rest of the first floor for the past 4 1/2 months and it needs some TLC. Since the crown molding is just a finishing touch, we are going to come back to it after working on our other rooms.  When we finish the crown molding I will place before and after shots – STAY TUNED!

Everyday I’m Tiling, Tiling…

Posted on

It has been almost two weeks since my last post. You must be thinking – “Maibe is getting really behind on this blog.” But alas, we have been working on the same project this entire time. Jim and I did not anticipate how long tiling the kitchen floor would take.

On Friday (the 20th) we prepped the floors for tiling.  We sweep and organized. Also, Jim laid out “self-leveling cement” on the spots of the floor that needed some extra help.  Self-leveling cement is pretty cool.  You pour it out and it moves until it is level.  There were only three small spots we needed to use the cement.

The self-leveling cement isn't really pretty

The other spot

We picked up the tiles Saturday morning. We had hoped to start first thing that morning, but the tile place closed early on Friday and then did not open until 10am the next day.  After we had all the tiles (300 sq ft) back at our place, Jim whipped up a batch of mortar (this type is called thin set).  We used mortar when laying down the cement board, so you may remember that it can be difficult and time-consuming to get the right consistency.  Once the thin set was ready, Jim used a trowel to spread the thin set.  I would then place the tiles in place. We used 1/8 inch spacers between each tile. We also started in the middle of the room and worked out (not the corner this time)! This ensured the tile would be centered with the room. After the tiles were in place, I had to check to make sure they were level.  On the first day of tiling, this took forever. It was hard to move the tile once it was on the thin set. There was a lot of standing on the tile or lifting it with a screwdriver.  The more we laid tile, the more we realized the level for each tile didn’t have to be perfect – just “good enough.” Also, it was more important to have a row leveled than an individual tile.  We worked until a lunch break – here are some pictures from the morning:

The floor right before we started

The tiles! The small ones on the right are the "mosaic" tiles - we put those on the edge

Jim spreading out the thin set

Looking pretty good

You can see the mosaic in this picture - also those white things are the spacers

We continued until early evening.  After day one:

More done here!

One hallway between the cabinets complete

Over at the other end we got some done too!

Trying to get as much as possible in one picture

We woke up Sunday morning and got working.  We first wiped clean any tiles that had thin set on it. We also cleaned between the joints of the tiles (where the tiles meet). We had to make sure the thin set was low enough between the joints that it would not show when we grouted. Grout is the sand-like material between tiles. If you aren’t sure what I am talking about – go to your bathroom and look at the tiles. See that stuff between your tiles?  That is grout. More on that later.

After cleaning up the tiles, we had a quick bowling break. (That’s right, I said bowling – we’re doing a bowling league with some friends) Instead of going to the bar after the bowling match – we headed home to continue the tiles. After working the rest of the day/night – we finished the full tiles. Since our kitchen is not shaped in a perfect square (that can be broken into 13 by 13 squares), we had a lot of tiles that needed to be cut in order to fit into place. Jim bought a tile cutter that cut of few inches of tile in straight lines. We were able to use this for some tiles that needed to be cut during those first two days – but the majority required use of a wet saw.

Other hallway complete

View of the full tiles done!

Monday night, we laid out the tiles that had not been cut yet. We measured each section and marked each tile. We planned to finish this in one night – I mean, how long could it take?  The answer is hours. During our dinner break on Monday, we decided to stop for the night and finish up Tuesday. It took us just as long Tuesday night.

Wednesday was wet saw time. If you watch any DIY shows on TV (we happen to be big fans) – you probably have seen a wet saw. It is like a regular table saw, except there is a little hose that spits water out on whatever you are cutting. Something about the water allows the tile to be cut without breaking.  We rented the saw around 5:30pm. We got to work as soon as we got home. We finished at 11:30pm. There was a pizza break in there too. That gives you an idea of how many tiles we had to cut. Luckily, we planned ahead and had all the tiles pre-marked. I would bring a tile to Jim, he would cut, and then I would dry the tile and make sure it fit in place.  There were a few tiles we had to re-cut for it to fit perfectly but overall, the tiles fit into place on the first try.  One tile took four tries to cut correctly. It had a U shape type hole that needed to be cut. The first two lines, Jim could cut on the saw. The connecting bottom line (to form the U) had to be cut using the tile cutter we had. Every time Jim did this, the tile would break. On the fourth try, Jim started cutting in the middle of the line, and luckily the tile stayed together.  After 5 + hours, we fell into bed.

Measured tiles ready to be cut

The whole kitchen looked like this

Jim using the wet saw

Thursday we had a break (Jim was at the station and I went to happy hour – yeah, my husband is better than me). Friday, we planned to start attaching the cut tiles. Jim got stuck in a late meeting at work. By the time he got home, we planned to take another night off.

Saturday (the 28th – we’ve hit a week now), we finished placing the last of the tiles.  This still took longer than expected. We had no plans Saturday (other than my 9 mile run) – so at least we were able to collapse onto the couch and rest before completing the LAST step of tiling.

Some mosaic and perfectly cut tiles

Close up of tile joints before the grout

We woke up early Sunday so we could get as much as possible done before our bowling match. We needed to clean the joints and tiles as we did last Sunday (and Monday – which I never mentioned). Once the joints were set, we were ready for grout!  Grout ensures nothing will get between your tiles. It also helps even out how tiles look. We bought “grout booster” that makes our grout water-proof and stain-proof. So no red wine spills will stain our grout!

Grout is made in a similar fashion as mortar. It then needs to be applied between the joints of the tiles. Once the grout is in, you take a sponge to smooth out the grout. After the grout looks smooth, you use the sponge to wipe away any excess grout on the tile. The sponge needs to be wringed dry between each use. If left over grout is on the sponge – you will spread it along the tiles and the little sand in the grout could scratch them. Surprisingly, hours after hours of wringing a sponge can be very painful.  Not only did my hands look like prunes, but they were scattered with cuts from chaffing. Jim’s hands were cramped from mixing and applying the grout. Plus we both were on our knees every day we were working on the tiles

Jim spreading the grout

Jim and I again were surprised by how time-consuming this was. We did not make it to our bowling match at 4:45pm but we did finish Sunday night.

Tiles with grout!


Do you see those bloody prunes? Those are my hands - this doesn't capture my many cuts, but at least it gives you a good idea of the wrinkles

Around 7pm, we were officially done with the tile.  We were exhausted by thrilled.  We have a real floor again!

Laying the Groundwork

Posted on

Sorry for the absence of updates recently.  I was a little under the weather this week, so it was hard for me to focus on a post.

Last week was dedicated to the cement board. You may recall the cement board hell we were put through while tearing up the cement board that was previously on the floor.  We made sure to put in the cement board correctly – so no one would have to suffer the same fate in the future.  For those who do not know, cement board is placed underneath tile in order to protect and strengthen the sub-floor.

Before we screwed the cement board in place, we laid out all the boards. Unfortunately, you cannot lay them out so that the ends of the boards all line up. If there is a section with four edges, it creates a “weak spot” in the floor that eventually will lead to tiles getting lose and/or breaking. Therefore, cement board not only needed to be cut so that it fit around the cabinets and vents, but also so the boards were not all ending at the same spot.  Jim started this while I was at work on Tuesday.  I came home and joined him that night and we finished about half of the floor.  The next day, Jim finished the rest of the job himself!  With all the pieces cut, we were ready to screw these boards in place.

Cement board laid out

Where we stopped the first night

Other side

Cement board throughout the whole kitchen!

Long view

Since our sub-floor was ripped apart when we took up the previous cement board (the glue tore up the wood), the entire floor was not level.  This poses a problem to the tile – a floor that is not level will eventually cause tiles to break. Jim found that using mortar under the cement board would help level it and keep it place. Unfortunately, mortar is not super easy to mix. Jim bought an attachment for the drill the helps mixes the mortar (think super large blender).  Even with the attachment, it was hard to get down to the bottom of the bucket to ensure the mortar had enough water and the right consistency.  Jim started the mortar and putting boards into place on Thursday, but with the slow mixing, he only got the first two rows down.

Friday we continued to secure the boards.  With two of us, the job went a little quicker. Once the mortar was put into place, we could place the board down together. I would then screw in the board while Jim moved to the next location. We had a good system down.

Jim putting the mortar down

Making cool ridges in the mortar (this is to make sure it is all the same amount, not for the design)

We worked for a few hours and saved the rest for Saturday. Once the boards were all in place, we needed to put mortar in the cracks of the board and this wiry tape over the cracks to keep it in place. We woke up early Saturday and we were done before we needed to take a break for lunch (even if we had lunch at 2pm). I didn’t take any pictures of the secured cement boards because it didn’t look much different from the previous pictures.  The cement boards were secured and the best part was we didn’t need to walk on a torn up sub-floor anymore! (We each had our share of splinters these past few months) Almost all the floor was level. There were a few spots that weren’t perfect so we plan on correcting those sections before tiling. More on that as it comes.

Sunday was dedicated to finishing up the island.  All the cabinets were in place, but we needed to make the island look like one long unit. This could be accomplished by adding a backboard.

Island before the backboard (you can see the secured cement boards in this)

There were large panels we needed to cut so they were the correct length and height.  Unfortunately none of the panels were long enough to cover the entire island so we needed to deal with two panels and make it look like one. Once the panels were measured and cut (using utility knives, which wasn’t that easy), I held the panels in place while Jim stapled them in place. We also used some wood glue in the places where we couldn’t hide the staples.  In addition to the panels, Jim ordered piece of wood that would add decoration. I am sure they have a name, but I don’t know what that is.  There were four pieces to be spaced equally along the island.

Jim used the extra panel to map out his design

The panel without decoration - the blue tape shows where the panels will go

Using tape to help hold the decorative panel - I also held it while Jim screwed it in

We placed and screwed the decorative panels four times and we ended up with:

Finished product!

We used Martin Luther King, Jr. Day to shop for counter tops and tile.  A functioning kitchen is in sight!