After almost a week of no posts (gasp), one can assume we are back to a normal schedule. With the holidays over, Jim and I are back to work so we have limited time to dedicate to kitchen remodeling. Jim is still working from home for the next few weeks, so he is planning to do as much multi-tasking as possible. This past week proved to be successful in that sense.
At the beginning of last week, we had almost all of the cabinets complete. We were waiting to attach one top cabinet and three base cabinets because we (uh, Jim) needed to build two custom cabinets that would attach to these. You may be wondering – why would you choose to build custom cabinets when you have so many beautiful, non-custom cabinets? Well, you see, we did not so much choose to build these cabinets as we were forced into it. The old kitchen design only had cabinets along half of the kitchen wall. In case you forgot:

Remember this?? I barely do. See that wall with holes in it (Jim cut those to make sure it wasn't a load-bearing wall), it cut the room into two
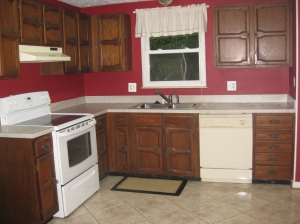
Another view of the old kitchen, it is hard to see but at the end of the cabinets on the right is the wall I pointed out in the first picture
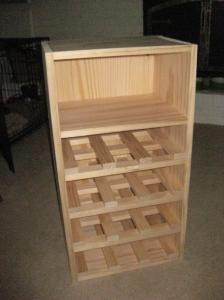
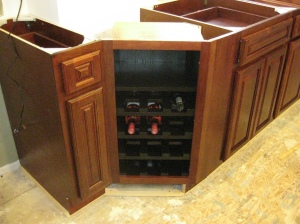
Even though that short wall was not load-bearing, it did divide the kitchen into sections where the width changed. The part of the kitchen where all the old cabinets were, had more width than the next section. When we tore down the wall, we saw that there was a difference of about 13 inches between the walls. We could not just put regular cabinets along the walls because then we would have one set back 13 inches behind another one. Adding some sort of diagonal would enable us to connect the the distances. No ready-to-assemble cabinets would come in the exact dimensions we needed – so we had to build custom cabinets! The plan was for the top diagonal to be open shelves and the bottom diagonal to be a wine rack (great use of space, am I right?).
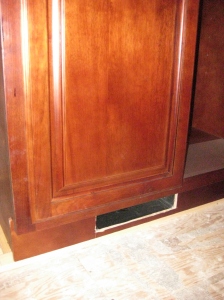
Jim planned out the custom cabinets months ago when putting together the whole kitchen plan. Even with the basic plans in place, the beginning of this week involved a lot of additional planning. Jim redesigned the wine rack as well. Jim had most of the final measurements, but we needed to put in some of the last cabinets to get a better idea. On Wednesday, Jim had already started on the final base cabinets when I got home from work. One of these cabinets was going to be over a vent for our A/C, so Jim needed to cut a hole out of the toe kick in the cabinet and get an extension that curved outwards for the vent.
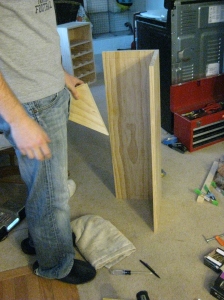
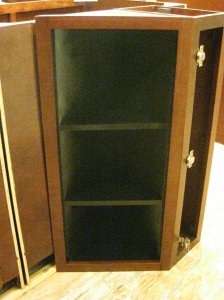
We finished putting up the last of the base cabinets. We needed to do a few adjustments to make sure all three were level and flush to each other. Jim took some more measurements and was ready to begin the custom cabinets. When I came home from work on Thursday, Jim had already built this:
He also was in the middle of building this:
After a few more screws, the top shelf looked like this:
The wine rack needed to be cut slightly in the back so it would fit perfectly in the space between the existing cabinets. Jim drew out the line.
In addition to the shelf and wine rack, Jim ordered extra panels from the cabinet place so he could create a frame for the custom cabinets. The frame would be the same color as the cabinets, so it will make them look like the rest. In addition, he created a filler panel with a toe kick to cover up the open space between the wine rack and the next cabinet. I did not take any pictures of these unattached, so I will point them out later. Here are the frames Jim made:
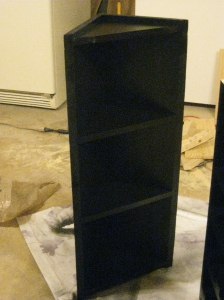
After working all day on the cabinets, Jim had to go to a shift at the Rescue Squad (have I mentioned that my husband not only is an awesome handyman but also a volunteer EMT?). While Jim was at the station, I primed and painted the custom cabinets. We originally hoped to stain the cabinets the same color as the rest but we could not find an exact match. Instead, we decided to paint them black. We were taking a risk, but it worked out great.
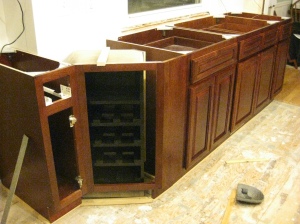
On Friday, Jim finished the last coats of paint and attached the frames. He also attached the top shelf to the last wall cabinet to be hung. Both the shelf and last cabinet were going to have under cabinet lights, so there were wires to come through the cabinet. Jim drilled out the hole as well. Friday night, we started to put the cabinets in place.

Wine rack in place...the piece of wood leaning on the right base cabinet is the filler panel Jim made to cover up the empty space
Of course things were not as simple as the pictures may make it seem. We didn’t finish the wine rack until Saturday because we realized we needed to make some adjustments. The toe kick on the filler panel was bumping into the raised section of the wine rack which prevented it from going in to place. We could fix this easily by cutting off part of the raised section, but we could not get the wine rack out unless we undid the frame and panel OR we took off the top shelf. The frame and panel were more difficult to put together, so we opted to take the top shelf off the wall. By Saturday afternoon, we had all the cabinets in place and Jim even had both under cabinet lights set up and working. We painted the top shelf a few times (the spray paint didn’t look good when a light was shining on it, flat enamel worked much better). You may think we would call it a day there, but no – not on a Saturday!
With the cabinets complete, the floor is our next big project. We are expanding the kitchen tile into the family room that is attached. In order to get started on the floor, the family room needed to be prepped. We plan on keeping part of the family room as a family room and then the rest as part of the kitchen. We picked the cut off line and Jim marked the carpet. It was time to get rid of it.
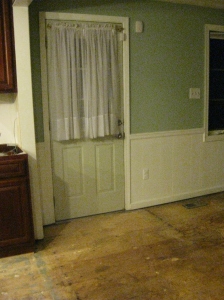
Pulling up the carpet wasn’t too bad. We cut it into smaller pieces and threw it away. We did the same with the carpet padding underneath. Even pulling up the wood panels the carpet was nailed into wasn’t too bad to get up (although I accidentally knelt on it, taking a few tiny nails to the knee…ouch) The major obstacle was that the carpet padding was attached with a staple gun and about a million staples. Once everything was up, Jim and I got pliers and pulled up every single staple. By the end, we had no energy to attempt to take the wood panel off. This was the room Saturday night:
Sunday morning – I cleaned up the garage while Jim got up the wood panel.
Now Reader, a week later, you are all caught up. We are at a stopping point until we get the right size cement board tomorrow. We even have the night off (whoa!). At least, I thought we did…Jim is currently taking measurements for the hanging microwave.
Before I end this post (because it isn’t long enough), I want to emphasize how much work Jim put in to the custom cabinets. I can not do justice how important each measurement, plan, and drawing he made were to the success of these cabinets. There were so many angles and corners that had to line up JUST perfectly. An 1/16 of an inch could throw everything off. It truly amazes me how well he put these cabinets together and how perfect they look in the kitchen.

