Monthly Archives: October 2014

Maibe is having TWO Babies!

Posted on

That’s right everyone, your favorite DIYing couple (we’re your favorite right? We’re totally cooler than the Young House Love couple…) is expecting…TWINS.

Our pregnancy annoucement

Our pregnancy announcement


When we went in for our first ultrasound and the technician said, “heartbeat….and heartbeat,” we didn’t realize she wasn’t just repeating herself, but that there were two heartbeats.  We were thrilled.  We feel doubly blessed to be expecting twins.

Although twin pregnancies are more common nowadays, they still come with some scary risks.  Pre-term labor, gestational diabetes, preclampsia are just some of the fun complications that you are at an increased risk for with twins.  Not to mention the increased weight gain adding pressure to your back and joints.  Luckily, I am pregnant with dichorionic/diamniotic (often shortened to di/di) twins.  This means that my twins are in their own amniotic sacs and have their own placentas.  Di/di twins are the least risky type of twins.  They are also the only kind of twins that can be fraternal (70% of di/di are fraternal, while 30% are identical) and therefore the most common. The other types of twins are monochorionic/dicamniotic  (mono/di – two separate sacs, one placenta) and monochorionic/monoamniotic (mono/mono – one sac and one placenta, the riskiest type of twin pregnancy). Mono/di and mono/mono twins are always identical.

Ultrasound at 19 weeks - I love seeing my babies!

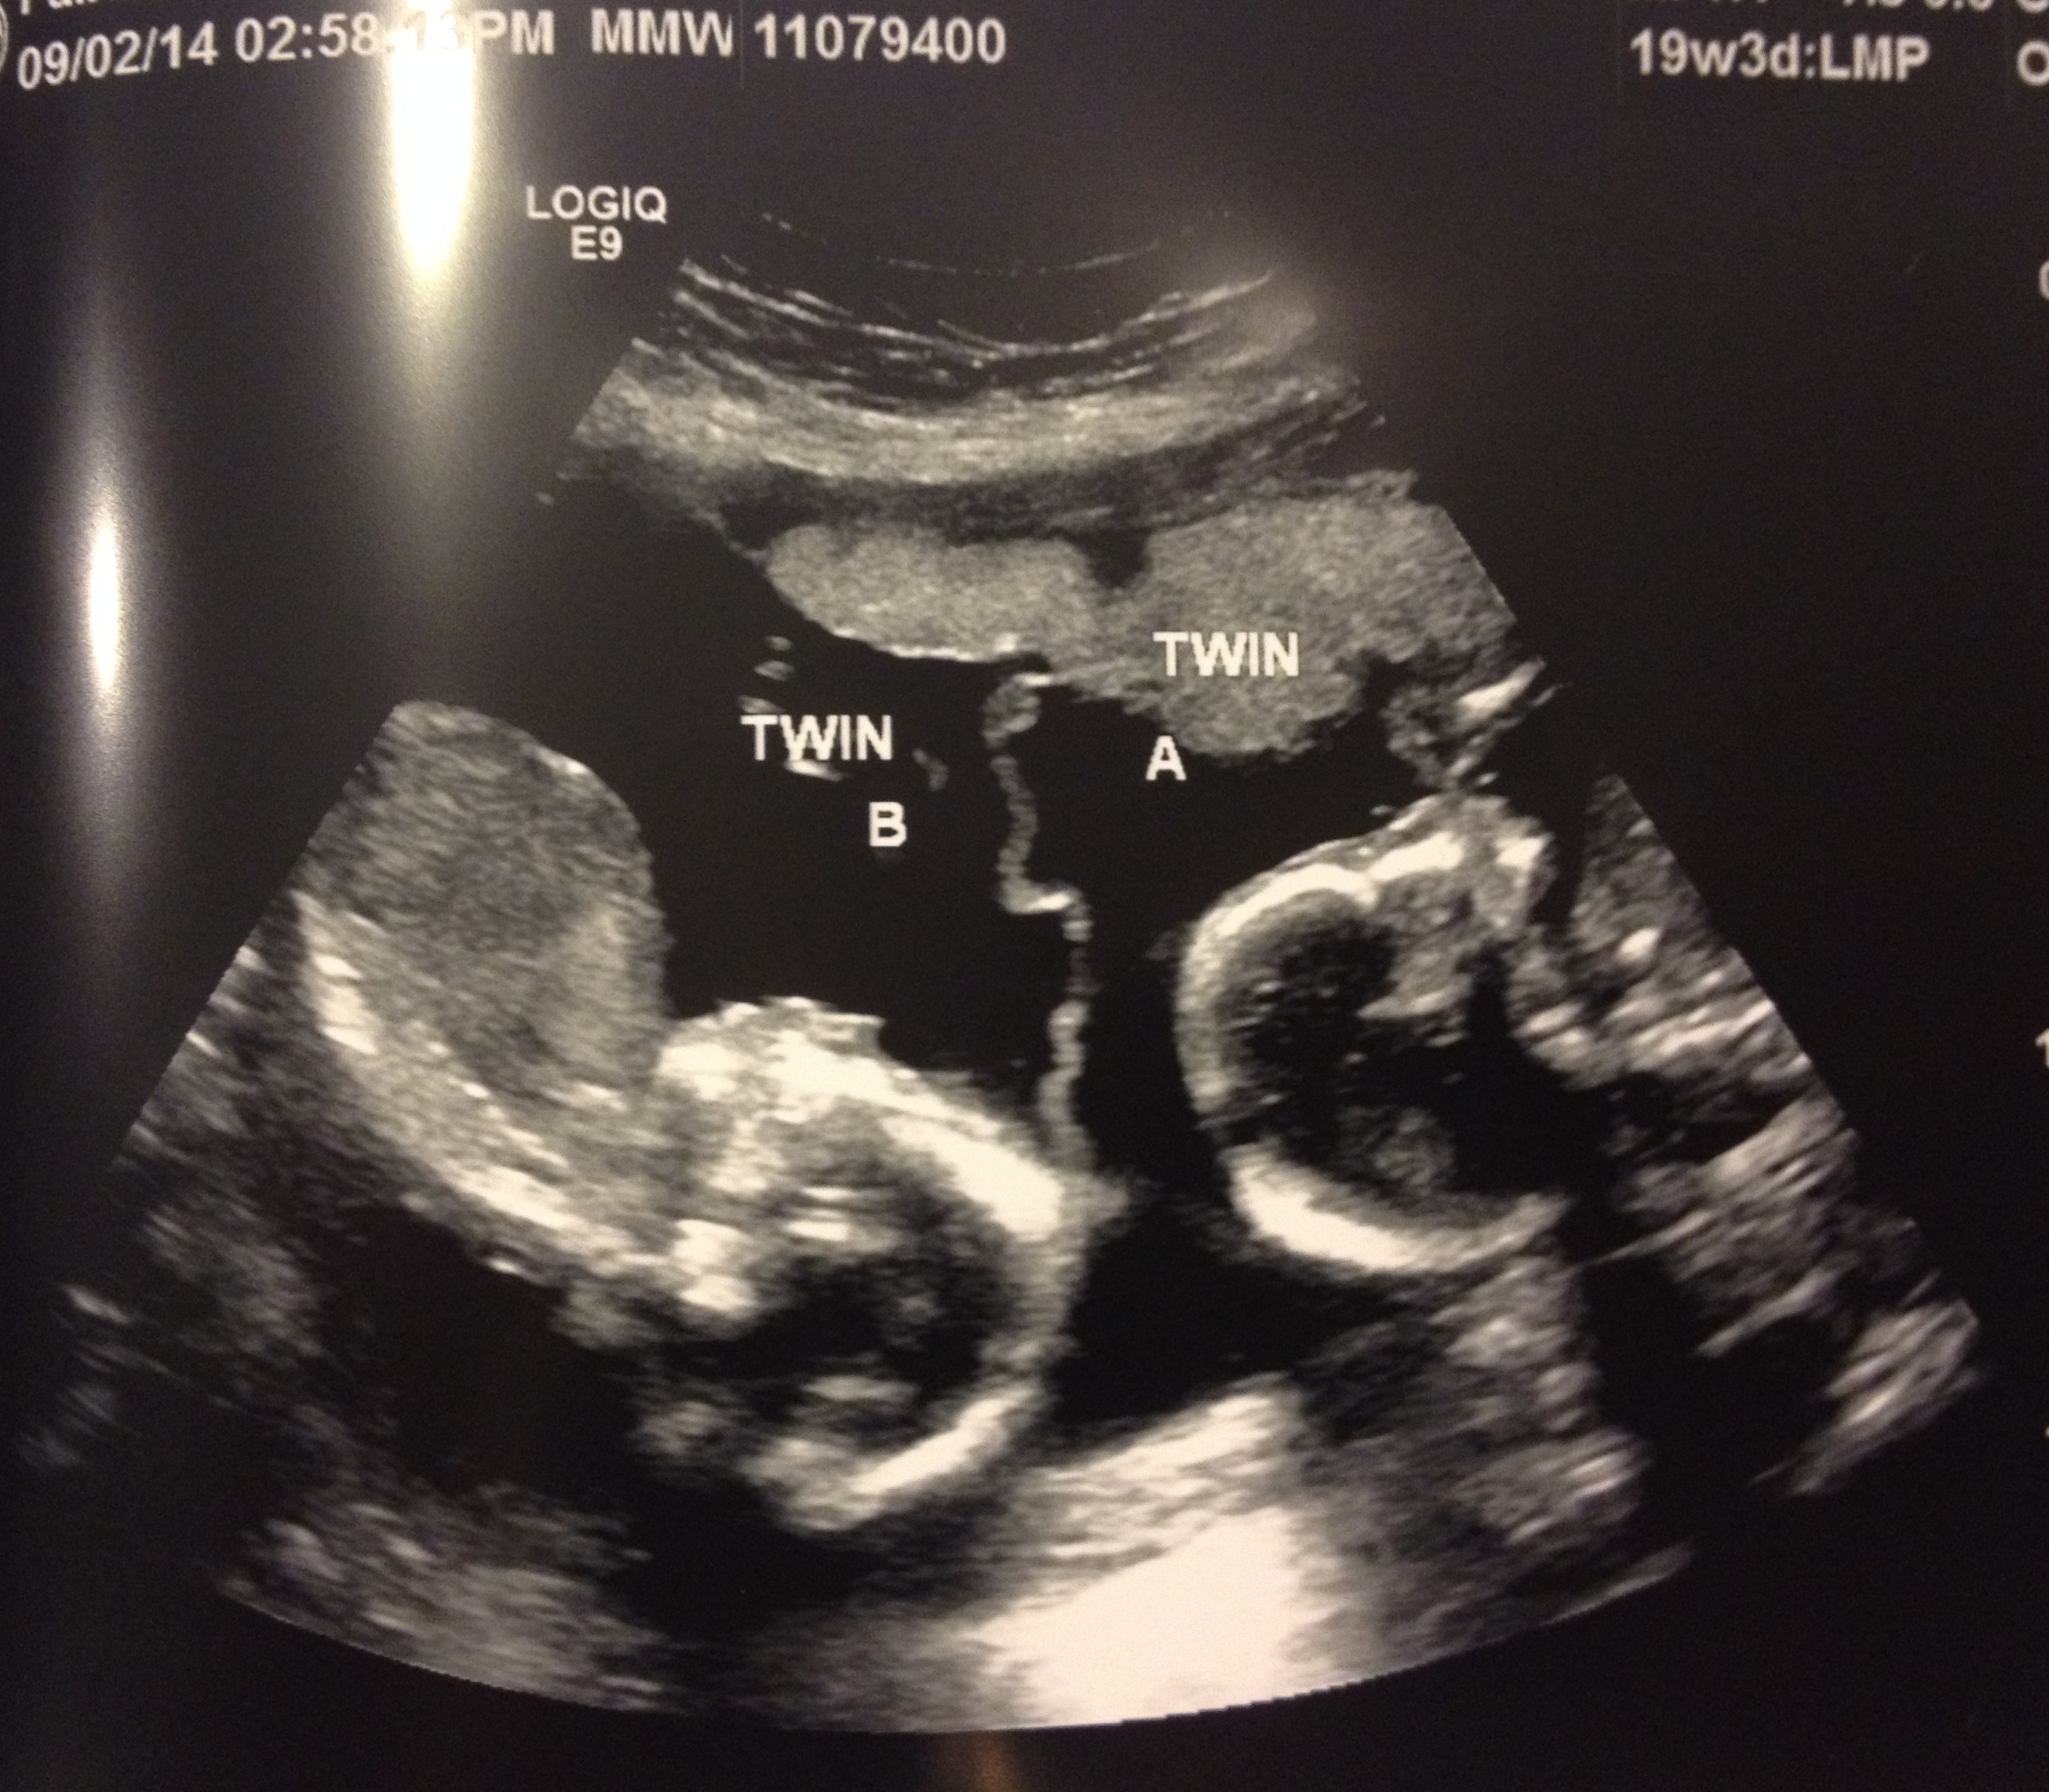
Ultrasound at 19 weeks – I love seeing my babies!

Starting at 20 weeks, I started seeing a maternal fetal medicine (MFM) doctor for ultrasound scans.  The extra monitoring is to try to catch pre-term labor before it happens and any other complications that may arise.  At my last appointment, they told me I could be the poster child for twin pregnancy.  Both babies are growing on track (for singletons!) and my cervix is the length of a singleton pregnancy – woohoo!

Although my babies and cervix are measuring at the singleton status, my baby bump (or officially “fundal height”) is definitely not. At 21 weeks, I was measuring as a 28 week singleton pregnancy. A whole 7 weeks ahead.  My doctor told me that I will be having all the same aches and pains that someone who was 28 weeks pregnant with a singleton would feel.  So basically, I just entered the “third trimester” early and will be in it for a long, long time! (That is the hope at least…I want these babies to stay cooking for a lot longer)

I just recently hit 24 weeks pregnant which is a huge milestone since it is the point of viability.  If I was to go into labor now, my babies would have a 50% chance of surviving.  Before this point they would not have been able to survive outside of the womb. In addition to it being the viability point, it is also when my OBs have started to be restrictions on me… no more exercise and no travel.  Since the risk of pre-term labor is so much higher with twins, they don’t want you doing anything that can cause contractions and trigger labor.  The no traveling is mainly because if you go into labor out-of-town, your babies will be in the NICU in that place until they can be released – which could be weeks or months.  I am going out of town this weekend at 25 weeks but it will be my last trip before being banished to Virginia until the twins are born. No holiday travel for the Maibes.
Another unique thing about twin pregnancy is that my doctors will not let me go past 38 weeks.  If I have not already had the babies at 38 weeks, they will induce me or schedule a c-section (depending on the babies positions – both have to be head down for a vaginal delivery).  This is the standard practice with twins because the degradation of the placentas happens earlier and more rapidly in twin pregnancies (mono/di and mono/mono twin pregnancies go even earlier).  On average, twins are born at 35 1/2 weeks gestation.  For me, that happens to be Christmas Eve/Christmas Day.  I’m hoping to make it past the holidays but the most important thing is for the twins to be healthy.


Now that you have had your full on medical information about the twins, I will get to the fun stuff. We found out we were having one girl and one boy about 5 weeks ago (at 19 1/2 weeks pregnant)!  We did not have the technician tell us, but instead had her write it down and put it in an envelope.  My sister-in-law was staying with us that evening and bought some unfrosted cupcakes on the way home from work.  We gave her the envelope and she got to work.  She made pink and blue frosting and put it inside the cupcakes.  She frosted the tops white.  Jim and I each had a cupcake for Baby A and Baby B.  We took a bite of the cupcakes together – there was pink for Baby A and blue for Baby B!


Gender reveal - one girl and one boy!!

Gender reveal – one girl and one boy!!

We are currently working on names, but those will be a surprise until the twins are born.  We’ve also planned out the nursery but haven’t started working on it yet (we had a basement to finish).  My mother-in-law threw a fabulous surprise baby shower for me last weekend.  Our house is filling up with baby gear and I am loving every minute of it.

For our loyal readers, don’t worry, this DIY Blog is not going to all of a sudden turn into a pregnancy blog.  I will be updating the blog with remodeling of the nursery, etc as well as some updates about the pregnancy and twins. Since we have babies on the way, we will not be starting any big home projects soon, so I will post about what I can.  This whole baby-making thing is a project in itself, just a little different then tearing down a few walls and rebuilding a room from scratch. I am just growing two lives from scratch…well scratch and DNA…and it is amazing.

Basement Reveal!!

Posted on

Here is another overdue post.  The basement has been fully functional since July.  There were some finishing touches that we only recently completed, so I was waiting for that before doing the “reveal” post.  We have been using the basement regularly since July though and I can tell you, it is awesome.

In my last post, we had just completed putting the lament wood floors down.  We needed to complete the moulding in the laundry room.  We did that next before installing the utility sink in the laundry room.  A little plumbing was needed to hook everything up, but all in all, it went smoothly.

Molding in the laundry room

Molding in the laundry room

The supply line and drain pipes waiting for the sink to be installed

The supply line and drain pipes waiting for the sink to be installed

Jim installing the sink!

Jim installing the sink!


After the sink was installed, the majority of the basement was complete.  We had the carpet guys come and install the carpet in the second half of the basement.  We already had the TV hooked up and a new couch.  We went to IKEA and got a media stand that Jim figured out how to install against the wall (so it is “floating”).  Jim also worked on installing his heavy punching bag to hang from the ceiling so that it would be as quiet as possible while he worked out.  Once all of these things were finished, we took a few months off.

The finishing touches had to do with the railing and guard rail by the stairs.  We needed to install a railing on one side and guard rail on the half wall.  Jim didn’t want nails to show on the railing and it took some time to figure out the best way to install the guard rail.  This is part of the reason we didn’t finish it right away – the other part was the laziness of summer.  Installing the long railing wasn’t too difficult and just required a lot of measuring and some painting.

Railing before the paint

Railing before the paint (sneak preview of the carpet too!)

After much debate, Jim decided to use screws to install the guard rail.  He decided to drill a large hole before the screw, so that he could cover up the screw by placing a wood cover over the hole.  It worked even better than we could have imagined.  The guard rail went up securely and there were no visible screws anywhere.

Two of the holes where the screws secured the railling

Two of the holes where the screws secured the railling

The other hole for another screw

The other hole for another screw

Railing in place

Railing in place

Full view of the guard rail

Full view of the guard rail

Wood covers in place and painted - no screws in sight!

Wood covers in place and painted – no screws in sight!

Hole be gone!

Hole be gone!

Posts up and painted - it was Jim's idea to use the dark gray for the posts - looks amazing of course!

Posts up and painted – it was Jim’s idea to use the dark gray for the posts – looks amazing of course!


Now what you have all been waiting for…the reveal!!


From the top of the stairs, looking down the tunnel to the basement

The old stairway looking from the top of the stairs into basement

New view from the top of the stairs - a lot brighter! (Not to mention the less squeaky, more secure stairs underneath the carpet)

New view from the top of the stairs – a lot brighter! (Not to mention the less squeaky, more secure stairs underneath the carpet)

The original stairs, take note of the carpet on the sides

Old view from the bottom of the stairs – notice the ugly carpet

New view from the bottom of the stairs!

New view from the bottom of the stairs!

Another view - we created the half wall which opens up the space a lot more

Another view – we created the half wall which opens up the space a lot more

It also allows for the amazing new railing

It also allows for the amazing new railing

The hallway leading towards the laundry room

Old  hallway leading towards the laundry room – we completely got rid of these walls to open up the space

View 2 of room #1

The basement used to be split up into two rooms – this was a view from the first one from the hallway

Room #2

This was a view of the second one from the hallway

Doors to the laundry room and room #2

This was the end of the hallway to the laundry room – now all completely different!

This is the old "first room" - now the lounging area of the basement

This is the old “first room” – now the lounging area of the basement

View of the "second room" - still from the bottom of the stairs. Without the hallway, the whole room is open. This is our gym section of the basement

View of the “second room” – still from the bottom of the stairs. Without the hallway, the whole room is open. This is our gym section of the basement

A view from the gym

A view from the gym

Another view

Another view

The new doorway to the laundry room

The new doorway to the laundry room

View into the laundry room

View into the laundry room

The basement is bright, new, and a place you want to spend time in now!  I did not do a full reveal of the laundry room because there are still things we need to finish in there that are not high priority (drop ceiling, closet doors, closet racks, etc).  Once we get around to it, I will do a new post just for the laundry room.  I also want to give credit where credit is due – in May, Jim became very motivated to finish the basement. This was about the same time that we found out I was pregnant.  While I struggled through first trimester exhaustion and nausea, Jim spent many hours working alone in the basement.  We are a team through our DIY projects but Jim really picked up all of my slack towards the end of this project.  He is so talented and amazing, it is not surprising we ended up with such an incredible result!