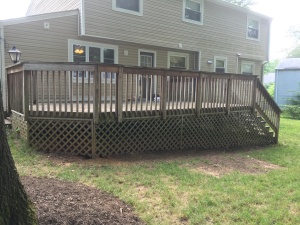
As the spring arrived this year, the twins and I started to spend more time outside in the backyard. My parents got them an awesome water table for Christmas that they loved playing with. I set it up on our deck and we spent a lot of time out there. Although the twins were already walking, when they went used the stairs, on the deck, they needed to crawl up or down them. We also had a play date with other twin friends who were not walking yet and the failings of our deck quickly became apparent. The deck’s wood was in bad shape. There were splinters (or potential for splinters) everywhere. Some of the boards were popping out which made for prime tripping hazards. There were also some nails that no longer laid flat against the wood which was another safety issue. Jim and I had already talked about how the deck needed to be replaced at some point but it now seemed like the right time to undertake this task.
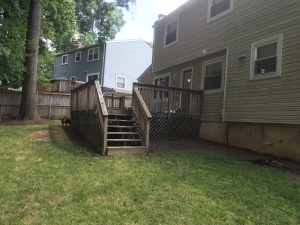
The old deck – view from the yard
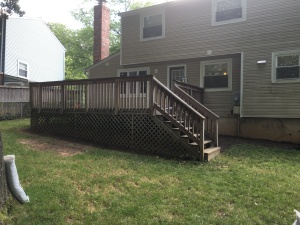
Another view
Third view
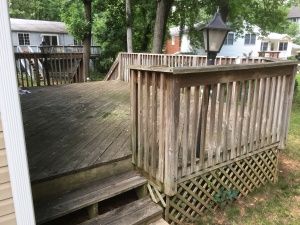
The side stairs – you can see the stains on the deck and just the overall bad quality
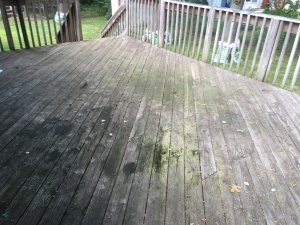
Look closely for boards sticking out
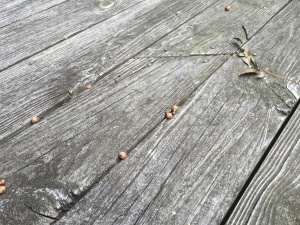
Close-up of the splinter maker
As you know from our previous projects, Jim and I normally do our big house projects together. Jim often is the mastermind behind the project (he makes the designs…with my input, researches the how-to, and plans out the steps) but I am there every step of the way to help and get my hands dirty. We knew that the deck project could not work out this way. Although we started talking about redoing the deck in the spring, the project did not get under way until the summer. In addition to having to watch the twins, I was already pregnant with baby number 3 before the project began. Therefore, I had zero energy to help when the twins were sleeping. Jim was going to do this project 100% solo. Part of the reason it took so long to decide to undertake the deck remodel was because of the time commitment it required. Jim would only be able to work on the weekends and after the twins went to bed on the weeknights. I would also be watching the twins by myself almost 100% of the time. It was a lot to consider but in the end, we decided it was better to do it now before the third baby came.
The original plan (or “pitch”) that Jim presented involved only replacing the decking boards and the railings. We would keep the frame of the deck and therefore, it would not take very long to replace the decking board with new boards (we decided to use Trex boards). Jim also pitched expanding the deck and adding a built-in bench. I worried how much more time this would add to the project (a.k.a. how many more weekends will I be without him to help me with the twins). He designed the plans and figured it would only require him adding 2-3 new support posts which wouldn’t add much time to the project at all. I (hesitantly) agreed. As “d-day” (demo-day) started to approach, the plans started to shift. Jim looked at the current foundation of the deck and questioned whether it followed code. There was more overhang per post than there should be. He also wasn’t even sure if the current posts were in cement. It may be a better idea to just demo the whole deck and start over…
This is a common theme in our DIY projects. So many of them start with simple plans that won’t take long or cost too much. Then Jim (who I love so much and appreciate all that he does) takes a closer look and changes the plan. He is a perfectionist and working off of someone’s else’s work doesn’t fly for him most of the time. It is better to blow it up and start over so it can be perfect from the bottom up. I know that every project we have done is quality because of this, but man does it take extra time. Jim still framed the deck tear down in a way that it wouldn’t add too much time to the project. He could rent a two-person auger (fancy term for a hole digging machine) and get a friend to help him dig the holes for the posts. The two-person auger could create bigger holes which meant larger posts and therefore fewer posts would be needed.
Well, plans don’t always go as…planned. D-day began Fourth of July weekend. Jim started taking down the deck on Friday. The hope was to have it completely demoed by the end of the day. He also needed to set up a bunch of strings to figure out the exact locations of the posts. He hoped to have the strings set up by the end of Friday as well. Jim’s friend Andrew was coming to help out on Saturday, so they could get the two-person auger and dig the holes if everything was set in place by the time he got there. By the end of Friday, the deck was not gone. A lot of it was demoed, but nowhere near all of it. The nails on the boards were rusted and didn’t come up easily. Jim had to cut some of the boards with a saw just to take it apart. None of the deck just “came apart” easily. Andrew came over on Saturday and helped Jim complete the demo of the deck. They also moved the old stairs of the deck over to the back door, so we could still let our dog out in the back yard. Sunday, Jim started working on the strings. There were no holes in sight.

Mid demo – Jim took this picture to show how rusted the nails were. This made demo so much harder. (Without me to take pictures…there are a lot fewer pictures than previous projects. I tried to stick my head out and remind him to take pictures every now and then but it wasn’t on the top of Jim’s to-do list)

Some of the demoed deck all packed up and ready to go (there was more that couldn’t fit in the dumpster bag)
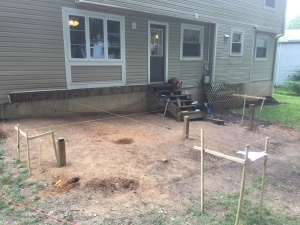
The string set-up (and no more deck)
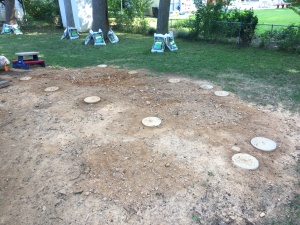
Unfortunately, Jim was unable to recruit another person to help him dig the holes. That meant renting a one-person auger. A one-person auger meant smaller holes and smaller posts. This also meant more holes and posts were needed. I think the number of posts required went from 7 posts needed to 11 posts. The holes were not easy to dig. There were rocks and tree roots that the auger had to fight through. The auger could only go to deep and so wide, and Jim had to shovel the rest of the holes himself. Three of the holes had cement from the old posts (they were in cement) that Jim had to jackhammer through. The holes needed to be 2 feet deep and about a foot wide. The depth of the holes was very important because it had to be below the point the earth would freeze in the winter. If the cement was above the freezing point, when the earth froze, the cement could shift. This could cause the posts to shift and therefore cause the deck to be unsteady. The cement needed to be deeper than the freezing point so that there was no risk in it shifting.
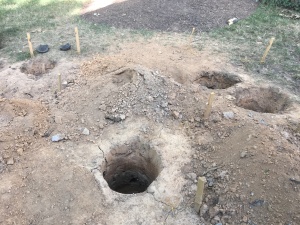
Holes
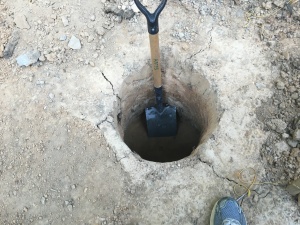
Close-up of how deep they were
After a long time and a lot of hard work, Jim had all the holes dug. Jim then put all the strings up again so he could determine the extra location the posts should be secured in the holes. He added the cement to the holes and placed screws in the exact locations determined by the strings. Once the cement dried, he screwed brackets into the screws. He was finally ready to add some posts.
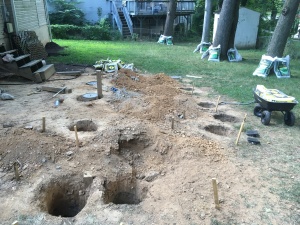
Some of the holes with cement finished
Cement in place!
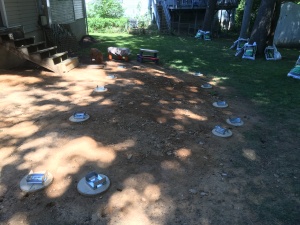
Ready for posts!
The holes being completed was something Jim had hoped to finish the first weekend. This took about two weeks to complete. We were in for the long haul.