Now that all the waste and drain pipes were removed from the bathroom, Jim and I needed to focus on installing new pipes. Most of you probably do not know that there are two types of plumbing pipes; one made out of ABS (Acylonitrile-Butadiene-Styrene) and the other out of PVC (Poly-vinyl Chloride). ABS is black and PVC is white. I am sure there are many minor differences between the two types of pipes, but they function the same way. The biggest difference is that when connecting ABS pipes, you only have to use one type of cement but when connecting PVC pipes, you need to use a primer and glue (one is clear and the other purple, so the joints look like they have purple paint spilled on them). An important detail about ABS and PVC pipes is that they cannot be directly connected. There is a special type of joint one must use in order to go from an ABS pipe to a PVC pipe. Have you learned something new yet?
You may remember from the pictures in the previous post that we had white (PVC) and black (ABS) drain and waste pipes in the bathroom. The toilet waste pipe was primarily PVC while the drain pipes for the shower and sink were ABS. They attached in one area with the special joint that is required and continued throughout the rest of the house to the sewer as ABS pipes. While planning for our replacement pipes, it made the most sense for us to use entirely PVC pipes mainly because it was the only type of pipe Home Depot carried and therefore the easiest to buy. This would mean we would need a special joint to connect to the pipe leading to the sewer and the vent pipe (did you know all your drain/waste pipes are connected to vent pipes?).
The majority of the task of putting together drain and waste pipes is like putting together a very precise (and sometimes frustrating) puzzle. We measured out where we wanted the new shower drain to be located and the new toilet (we moved the shower drain to the front of the shower, so you no longer have to stand on a center drain while showering). We also plan on creating a half wall for the shower that the toilet will back up against. Throughout the pipe planning process, we had to continually account for things that were not in the room while measuring (things like the drywall, the half wall, how far the toilet will go back to the wall, etc). In situations like this, two brains are definitely better than one. It always helps to have someone checking to make sure you are accounting for all the details needed to get the exact measurement. Once we had the markings in place for the waste pipe and shower drain, we had to fit the puzzle pieces of pipe to fall exactly where we wanted it to go. There was a lot of fitting and refitting of pipes. Also a lot of measuring and cutting pipes to the perfect size. Many plans were started just to be adjusted along the way. Unfortunately, there aren’t a lot of pictures to take while planning for where the pipes WILL go, so bear with me until we get to the pictures.
The most trouble we had was with this was connecting the PVC pipes to the existing ABS pipe. The ABS pipe was cut a little bit under the wall and subfloor, so it was not easily accessible. This meant it was difficult to connect pipes and also there was no leeway in the existing pipe. We originally were going to do PVC pipe up until that pipe, but there was no way we were going to be able to successfully attach the special joint in the small space that was provided. This meant that we needed ABS pipe. We needed a corner pipe to turn the pipe to face in the right direction and a regular pipe to attach to the special joint. In the search of ABS pipes, we learned that almost no one sells them anymore. Jim went to a specialty plumbing store and was told that everyone was getting rid of their ABS pipe supply. Luckily, Jim was able to find ABS pipes at Lowes.com (it was like we were cheating on our Home Depot store)! Since we had to order the pipes, we had to wait a few days before finishing the pipes. With Jim’s volleyball league, EMT shift, and Valentine’s Day, it worked out alright to take a few weeknights off. We definitely made up for it over the weekend.
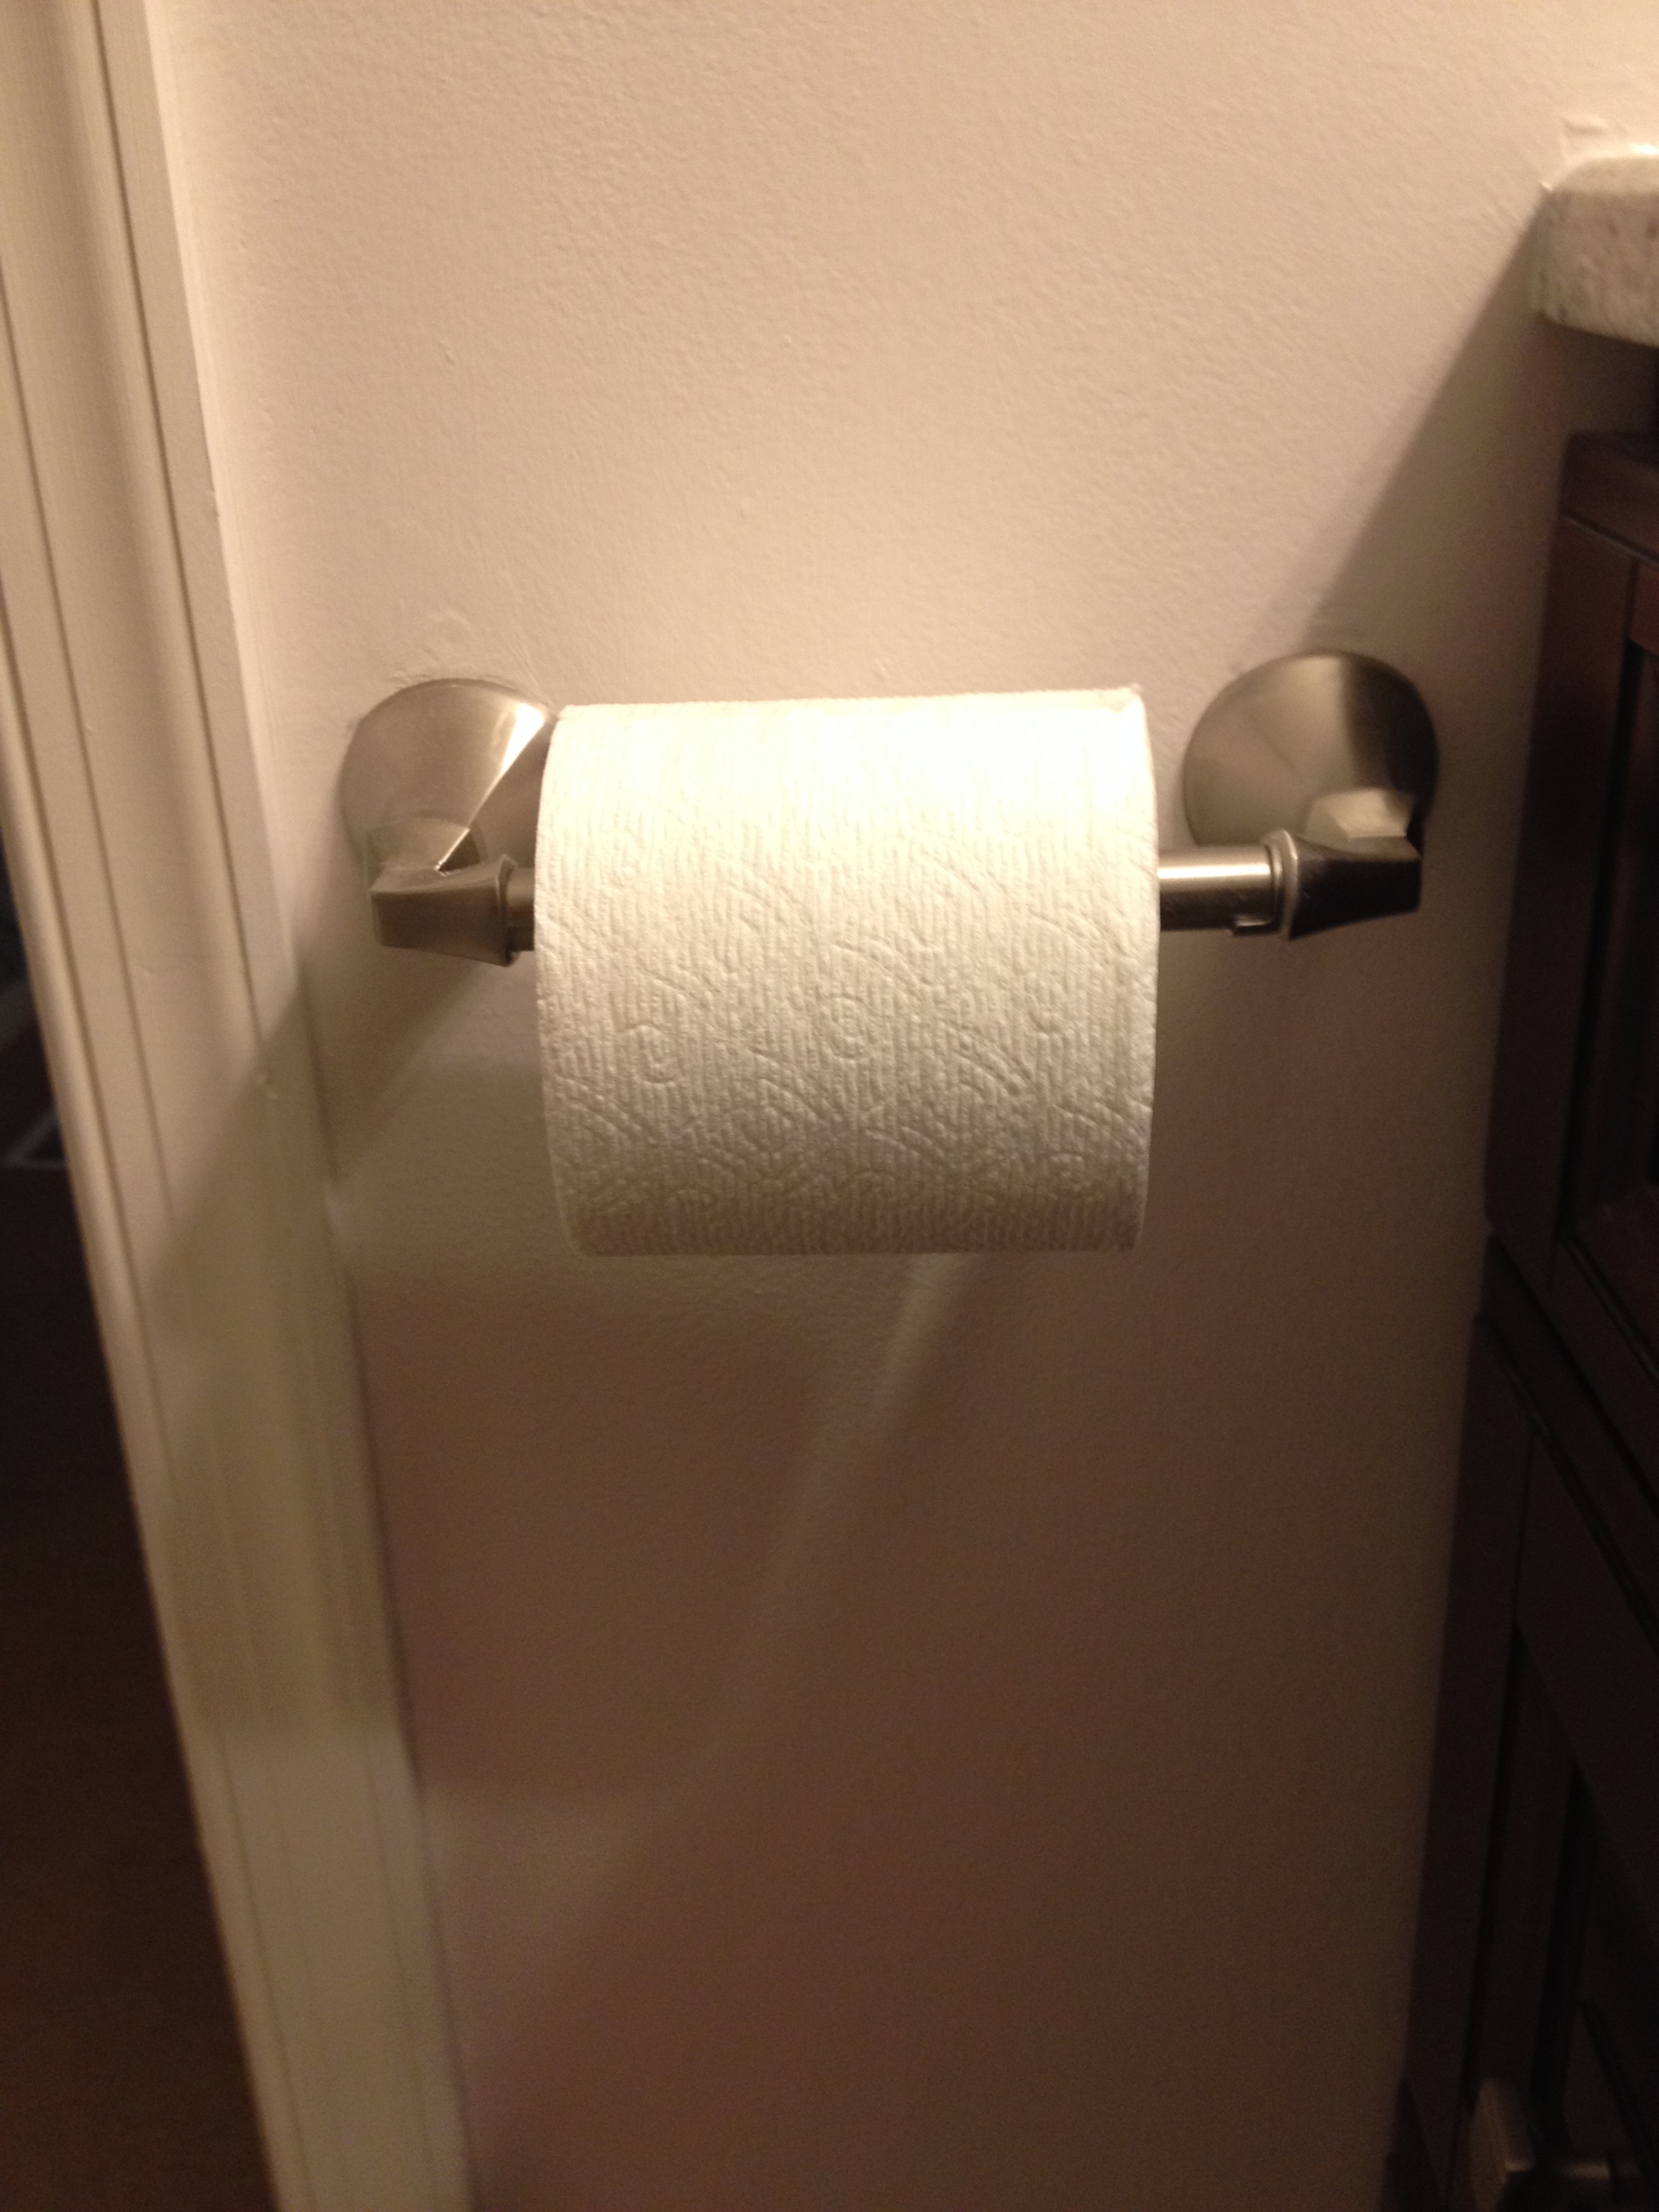
While many of my coworkers left work on Friday with plans to travel for the three-day weekend, I prepared for a working weekend. We took Friday off so we could celebrate Valentine’s Day by going out to dinner. Saturday morning was spent meeting with a man from Thompson Creek to get an estimate for new gutters (our gutters have been leaking and just aren’t great overall). We didn’t realize that would end up being a 2 1/2 hour affair (they told us to have 1 hour available). Luckily, we ended up getting a huge discount on clog-free gutters but it was a lot of time taken out of our day. We got started on the bathroom immediately after lunch. We planned to get all the pipes set and in place for good. The ABS pipes had arrived from Lowe’s the previous day, so we had everything we needed. Or so we thought. When Jim opened the box, he realized one of the ABS pipes was the wrong size. The connector was fine, but the regular straight pipe was wrong. We needed a 3″ pipe and they sent us a 2″ pipe. Jim checked the order slip and saw he ordered the correct item, so it was an error with the packaging. After a quick call to Lowe’s, they decided to send us another one but it would not ship out until Monday (no one would pick up the package on Sunday and it was too late in the day on Saturday already). It looked like we were not going to be able to finish the pipes that day. We did however, continue to fit and measure the pipes. Jim used a 3″ PVC pipe in place of the ABS so we could get our measurements set. While arranging the pips, we decided to move where the sink drain pipe comes out of the wall. Here is a picture of how the pipe used to look:

The black pipe is the sink drain pipe, it is coming out of the side of the wall
If you look under most sinks, you will see that the drain pipe normally leads into the wall behind the sink. It is rare indeed to find a drain pipe coming through the side of the wall, yet this is how our sink’s drain pipe was originally set up. It took up space in the previous vanity, but since the vanity did not have drawers, it did not overwhelm the open space. Our future vanity has two drawers on the left side and we are pushing back the vanity about 4 inches; that meant if we left the drain the way it was, the open space of the cabinet would be overwhelmed by the drain pipe. Therefore, moving the drain pipe was the best decision. Since the water supply pipes were in the way if we wanted to run it straight from where it was, we ran the pipe through the studs at a lower point. Then we had it turn where the supply pipes turn so it could come through the back wall. It took a little maneuvering to make the right holes and get the pipes in place, but Jim managed to do it perfectly. While Jim was working on that, I put in new insulation in the wall facing the front of the house. The previous insulation looked ratty and gross and since it is easy enough to replace it, we did that. Jim helped me attach a vapor barrier with plastic sheeting. All of that work took much longer than you may think. After about 5 hours of work, we called it quits for the night.

New insulation (sorry for the bad lighting)!

More insulation (this picture was taken today, so ignore the new subfloor, that hasn’t happened yet in this blog post)
Sunday morning we were back in the bathroom by 9:30 am. We decided we were going to work on the cold water supply line that day. This meant we had to turn off the water supply (i.e. no toilets, faucets, etc). We prepared by filling up a huge jug of water for us to drink. We also filled up the bathtub, so if we needed to use the bathroom, we could flush and then scoop water from the bathtub into the tank so it could be flushed again. You may think that is an extreme measure, but we did not know how long this was going to take and if we did not have water for the entire day, we would be happy we took these precautions.
There were a few changes we needed to make. We wanted to move the location of the cold water supply lines for the toilet and sink, and also put caps on both the supply lines for the shower so we could remove the shower head (no more being rained on). We wanted to move the supply line for the toilet so that it came out of the new half wall we plan to build. Since we will be changing the direction of the toilet, the supply line will still be behind the toilet once we moved it. The cold water supply line for the sink needed to be moved back to where we moved the hot water supply line. We also realized the hot water supply line we did the other day was poking up a little bit at the turning point. It would not be able to fit behind the drywall if we did not fix it, so we had to alter that as well. The cold water supply line was more complicated over by the sink because it broke off to supply water to the shower for our hallway bathroom. We had to do a lot of planning to make sure we had the lines exactly right to supply water to all the appropriate places. We did a lot of measuring and cutting of pipes. Once everything was perfect, we started attaching the pipes. By 2 pm, we had finished and turned back on the water supply. It was a success!! No leaks or problems anywhere. Phew. We didn’t need our precautions after all.

Cold water supply, gone!

Cutting out the pipes!
I forgot to take pictures after we finished the piping (I blame being tired and hungry), so the following pictures were taking recently and have some other updates in them that we will get to.

Shower supply lines capped off

The toilet supply line moved to where the new half wall will be
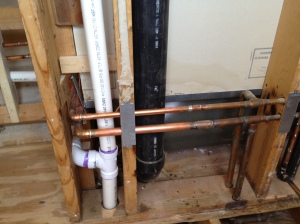
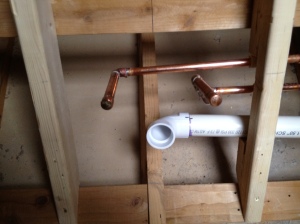
New supply lines (you can tell the new pipes by the bright copper color) – the drain pipes are already in place in this picture but they weren’t at the time in the blog post

New pipes (the drain pipe and new wall are in the picture but neither of them were there yet when we did the piping)

Close-up of the new, complicated piping
After a lunch break, we went back to work. The next plan was to take down the rest of the wall behind the sink and then build the new wall a few inches back. This took a lot of measuring and maneuvering because we had to make sure the wall was cut at the right angle to lay flat on the inclined floor joists. We also had to figure out exactly how tall to make the 2 by 4’s so that when we put the wall in place it would be level and create the right depth for the future vanity to fit.
After everything was measured and cut, we moved all the 2 by 4’s into the bathroom to build the wall. We would build a frame and then add two additional parallel 2 by 4’s to add support and create a place for a medicine cabinet to be screwed into. Jim did all the measuring and hammering for making the wall. I helped him by standing on the 2 by 4’s when he hammered so they didn’t go flying…so it was still a team effort. Before we could put the wall in place, we had to cut out part of the first 2 by 4 so the supply lines and drain pipe could go through it. Once we got the places marked for where the cuts should be placed, we called it a night. It was already after 8:30 pm and we had been working since 9:30 am. Time to shower and eat.

The frame of the wall, sitting on the floor (next to Jim), waiting to be installed
For Monday, we decided to honor President’s Day by working on the bathroom (big deal right)? Before we got started, we wanted to get wood for the subfloor and the new drywall we would need when we were done with the plumbing and electrical work. Of course the wood and drywall are too big to fit in either of our cars, so we had to rent a truck from Home Depot to get the stuff home. I had to run on an errand, so Jim handled all of this on his own. It took way longer than expected because of a line at Home Depot, finding all the supplies, loading them, and then unloading them. It was already about 11:30 am when we were finished with that ordeal. We had lunch, then started working in the bathroom. We had to finish the new wall before we could put the subfloor in place because the wall was lying across the floor. Jim cut out the pieces we marked the night before on the 2 by 4 and we were ready to put the wall in place. Jim already installed 2 by 4’s across the bottom so all the parts of the wall would have a place to rest on. In addition to that, Jim decided to attach another piece of wood that would stick out a little bit to support the wall as we put it in place since it was unlikely I could hold the weight by myself. It worked just as planned, but because the support wood stuck out, it made it more difficult to lift the wall over it. With a lot of effort, we managed to get the wall in place. We made sure it was level and then screwed it down. New wall up!

Bottom board in place ready for the wall

New wall up!

A little further down the wall

Bottom of the wall where we had to attach it on an angle
Once the wall was up, we decided to get the new subfloor cut to fit in place. We were not going to nail it down yet, since we still had to do the pipes, but since we made the wall, we did not have the 2 by 4’s we had been using to walk around the room anymore. It actually took a few tries to get it to fit in the right space since the cut-off of the old floor was not perfectly square. We eventually got it and it is nice to have a floor to walk on again!

New subfloor!
Next, we moved onto electrical. Unfortunately, it was starting to get dark, but we left the lights on in our bedroom (it is on a different circuit than the bathroom) and plugged in a huge work light we have to give us something to work with. We shut off the power for the bathroom and undid the outlet, light switches, and the light over the shower (we already removed the light over the sink when we removed that drywall..and the wall itself). We plan on making a lot of changes regarding electricity in the bathroom. We will still have lights over the sink and shower, but the ones over the shower will be small recessed lights. We also plan on putting them on the same light switch instead of being on two separate switches. Then we will be adding an exhaust fan on its own light switch. The last electrical change is that we adding heated floors to the bathroom. Both the tile and the shower will be heated. The rest of Monday was focused on planning for the electrical changes. The only noticeable difference was that we put the electrical box in place on the new wall and a box for the future outlet. It was late and we were tired (again). The rest of the electrical work would have to wait.

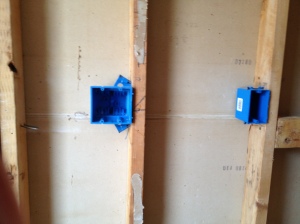
New electrical box in the new wall (no wires connected yet)

Wires all labeled and ready to go, plus the new box for the outlet
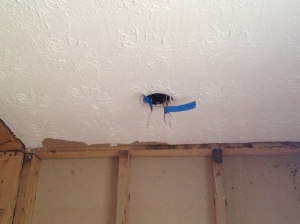
The light above the shower is gone and the wires are labeled
By Wednesday of this week, we received the correct ABS pipe from Lowe’s! After work (as in the work we get paid for), we got to work (our own inflicted pain) on the piping. We could set them all in place now. This was mainly a one person job, but I helped out Jim whenever possible. Because of a slight difference once it was in place, Jim had to cut a few new pipes to make everything fit perfectly. We didn’t finish but we were getting close.

The ABS pipe connected to the PVC pipe

In the process of being put together

Jim connecting the pipes
Thursday morning, while taking a shower, Jim noticed that the faucet for the tub in the hallway bathroom was pushed out from the wall. Upon further investigation, we realized it was because the supply line pipes in the master bathroom were being pushed out by the second wall joist of our newly created wall (we only cut the first joist right next to the pipes). Therefore, Thursday evening, Jim got right to work by cutting the second joist so the pipes could spring back to place. Luckily that allowed us to push the tub faucet back in place. Jim added silicone around the faucet to seal it from water. In addition, Jim continued to glue the rest of the pipes in place. It was really a one man job again, so I got the night off and made dinner for the two of us while he worked.

The cuts that we originally did in the first joist (with the pipes already in place)
The second joist cut for the pipes

All the piping glued and in place

Neither of us wanted to do much Friday night, so we decided just to go to Home Depot and plan out some things about the shower. Jim had a lot of shifts volunteering as an EMT almost the whole weekend, so we would not be able to get much done. Luckily, we did get a little work done Saturday morning before Jim left for the station. The supply lines for the sink needed to turn so they could come out of the wall and also be at the same height. Jim did a lot of twists to bring the cold water supply line to be level with the hot water supply line – very impressive. Of course we had to shut off the water again and solder the pipes, etc, but it is not as big of a deal for us now. Jim also put in a new electrical box for the light switches. He had to remove a 2 by 4 that was in the way in order to have the box fit. Although we did not get anything else done this weekend, I am sure we will try to make up for it through the week.

The supply lines (and sink drain pipe)
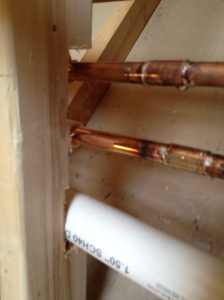
Looking at the lines straight on – they are at the same height!

A close-up from above so you can see the fancy pipe work Jim did
New electrical box in place!