Tag Archives: DIY

Tear It Down

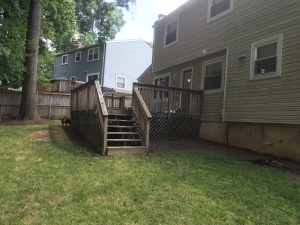
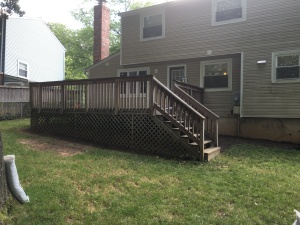
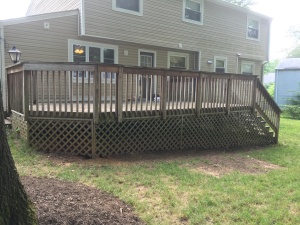
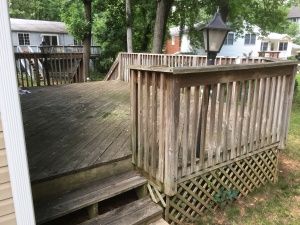
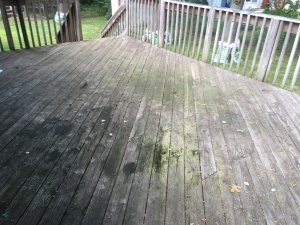
As the spring arrived this year, the twins and I started to spend more time outside in the backyard. My parents got them an awesome water table for Christmas that they loved playing with. I set it up on our deck and we spent a lot of time out there. Although the twins were already walking, when they went used the stairs, on the deck, they needed to crawl up or down them. We also had a play date with other twin friends who were not walking yet and the failings of our deck quickly became apparent. The deck’s wood was in bad shape. There were splinters (or potential for splinters) everywhere. Some of the boards were popping out which made for prime tripping hazards. There were also some nails that no longer laid flat against the wood which was another safety issue.  Jim and I had already talked about how the deck needed to be replaced at some point but it now seemed like the right time to undertake this task.

The old deck - view from the yard

The old deck – view from the yard


Another view

Another view


Third view

Third view


The side stairs - you can see the stains on the deck and just the overall not good shape it is in

The side stairs – you can see the stains on the deck and just the overall bad quality


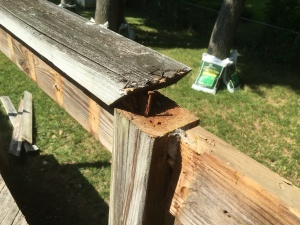
Look closely for the board sticking out

Look closely for boards sticking out


Close-up of the splinter maker

Close-up of the splinter maker

As you know from our previous projects, Jim and I normally do our big house projects together. Jim often is the mastermind behind the project (he makes the designs…with my input, researches the how-to, and plans out the steps) but I am there every step of the way to help and get my hands dirty. We knew that the deck project could not work out this way. Although we started talking about redoing the deck in the spring, the project did not get under way until the summer. In addition to having to watch the twins, I was already pregnant with baby number 3 before the project began. Therefore, I had zero energy to help when the twins were sleeping. Jim was going to do this project 100% solo.  Part of the reason it took so long to decide to undertake the deck remodel was because of the time commitment it required. Jim would only be able to work on the weekends and after the twins went to bed on the weeknights. I would also be watching the twins by myself almost 100% of the time.  It was a lot to consider but in the end, we decided it was better to do it now before the third baby came.

The original plan (or “pitch”) that Jim presented involved only replacing the decking boards and the railings.  We would keep the frame of the deck and therefore, it would not take very long to replace the decking board with new boards (we decided to use Trex boards). Jim also pitched expanding the deck and adding a built-in bench. I worried how much more time this would add to the project (a.k.a. how many more weekends will I be without him to help me with the twins). He designed the plans and figured it would only require him adding 2-3 new support posts which wouldn’t add much time to the project at all. I (hesitantly) agreed. As “d-day” (demo-day) started to approach, the plans started to shift. Jim looked at the current foundation of the deck and questioned whether it followed code. There was more overhang per post than there should be.  He also wasn’t even sure if the current posts were in cement. It may be a better idea to just demo the whole deck and start over…

This is a common theme in our DIY projects.  So many of them start with simple plans that won’t take long or cost too much.  Then Jim (who I love so much and appreciate all that he does) takes a closer look and changes the plan. He is a perfectionist and working off of someone’s else’s work doesn’t fly for him most of the time. It is better to blow it up and start over so it can be perfect from the bottom up. I know that every project we have done is quality because of this, but man does it take extra time.  Jim still framed the deck tear down in a way that it wouldn’t add too much time to the project. He could rent a two-person auger (fancy term for a hole digging machine) and get a friend to help him dig the holes for the posts. The two-person auger could create bigger holes which meant larger posts and therefore fewer posts would be needed.

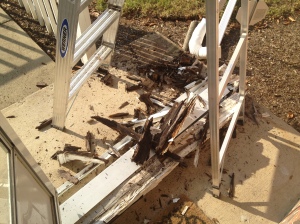
Well, plans don’t always go as…planned.  D-day began Fourth of July weekend. Jim started taking down the deck on Friday. The hope was to have it completely demoed by the end of the day. He also needed to set up a bunch of strings to figure out the exact locations of the posts. He hoped to have the strings set up by the end of Friday as well.  Jim’s friend Andrew was coming to help out on Saturday, so they could get the two-person auger and dig the holes if everything was set in place by the time he got there.  By the end of Friday, the deck was not gone.  A lot of it was demoed, but nowhere near all of it. The nails on the boards were rusted and didn’t come up easily. Jim had to cut some of the boards with a saw just to take it apart. None of the deck just “came apart” easily.  Andrew came over on Saturday and helped Jim complete the demo of the deck.  They also moved the old stairs of the deck over to the back door, so we could still let our dog out in the back yard. Sunday, Jim started working on the strings.  There were no holes in sight.

Mid demo - Jim took this picture to show how rusted the nails were which made demo so much harder

Mid demo – Jim took this picture to show how rusted the nails were. This made demo so much harder. (Without me to take pictures…there are a lot fewer pictures than previous projects. I tried to stick my head out and remind him to take pictures every now and then but it wasn’t on the top of Jim’s to-do list)


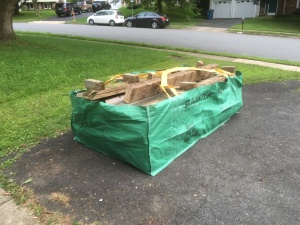
Some of the demoed deck (there was more that couldn't fit in the dumpster bag)

Some of the demoed deck all packed up and ready to go (there was more that couldn’t fit in the dumpster bag)


The string set-up (and no more deck)

The string set-up (and no more deck)

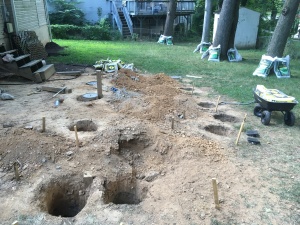
Unfortunately, Jim was unable to recruit another person to help him dig the holes. That meant renting a one-person auger. A one-person auger meant smaller holes and smaller posts. This also meant more holes and posts were needed. I think the number of posts required went from 7 posts needed to 11 posts. The holes were not easy to dig. There were rocks and tree roots that the auger had to fight through. The auger could only go to deep and so wide, and Jim had to shovel the rest of the holes himself. Three of the holes had cement from the old posts (they were in cement) that Jim had to jackhammer through.  The holes needed to be 2 feet deep and about a foot wide. The depth of the holes was very important because it had to be below the point the earth would freeze in the winter. If the cement was above the freezing point, when the earth froze, the cement could shift. This could cause the posts to shift and therefore cause the deck to be unsteady. The cement needed to be deeper than the freezing point so that there was no risk in it shifting.

Holes

Holes


Close-up of how deep they were

Close-up of how deep they were

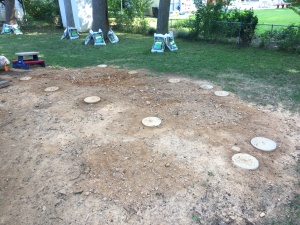
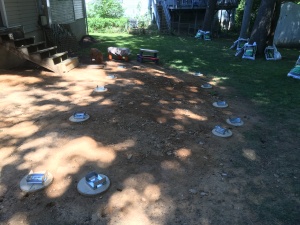
After a long time and a lot of hard work, Jim had all the holes dug. Jim then put all the strings up again so he could determine the extra location the posts should be secured in the holes.  He added the cement to the holes and placed screws in the exact locations determined by the strings. Once the cement dried, he screwed brackets into the screws.  He was finally ready to add some posts.

Some of the holes with cement finished

Some of the holes with cement finished


Cement in place!

Cement in place!


Ready for posts!

Ready for posts!

The holes being completed was something Jim had hoped to finish the first weekend. This took about two weeks to complete.  We were in for the long haul.

Long Time No Write

Posted on

Oh, hello there, Internet. Nice to see you again.  It has been over TWO YEARS since I last posted. I know, it is pathetic.  To be fair, I have been a little busy for the last 22 months raising twins.  In that time, Jim and I have also been slacking a little bit on home projects.  But I am back, which can only mean one thing…a new project!

Before I get into the nitty-gritty of our new project (I’m using “our” loosely here, Jim is doing the work 100% solo while I watch the kids), I will tell you about the small projects we have completed over the past two years.

The Nursery

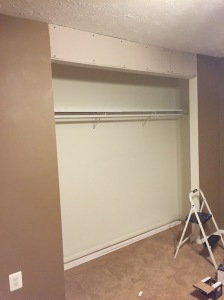
The first small project was the twins’ room.  You may remember when we painted our bedroom, we had to add a header to our closet. The old closet doors went from the floor to ceiling and we would have to get custom-made closet doors for that size. Instead, we added a header and got normal closet doors.  We ended up needing to do the same thing in the twins’ room (and we will need to do it again for the other three rooms on the second floor).  Since I was pregnant and huge – Jim did all of the work on his own.  After some of the other projects we have done, this was pretty simple.  He needed to build the frame of the header, install it in place and then add the drywall.  Once the drywall was in place, he needed to apply the spackle, wait for it to dry and sand it. Then the header was done! Jim also added molding for a more finished look but first, he painted the room.

A few pictures of the room before it became the nursery


View from the doorway
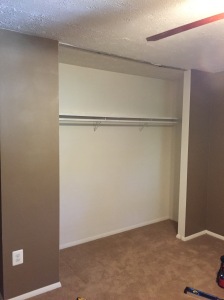


The closet before...

The closet before…


The header in place (without the spacke and paint)

The header in place (without the spackle and paint)

I had picked out a gray and white nursery color scheme with touches of pink and blue. I had a very specific theme in my head. Jim and I went through our swatches and picked out a gray color for the room. Since we have painted so many rooms, we have a pretty good system down for dividing and conquering any paint job but since I was pregnant, Jim painted solo. He also closed the door to keep the fumes out of the house (so sweet).  The problem with that is when he opened the door (and was 95% done), I saw the color and hated it.  It was a shade of gray (I guess)…but it had a blue undertone to it. When I looked at it, it looked like a bluish gray.  I almost cried.  Actually, I think I did cry. This was my one crazy pregnant lady experience. It was not the gray I wanted and I wasn’t going to be happy until it was. Needless to say, Jim thought this was ridiculous and he was not pleased.  Luckily, he indulged me and we found a REAL gray to paint over the blue-gray.  It was so much better.  The nursery could become what I had imagined.

The first paint job...see how it is a greenish/blue grey? Not what I had imagined...

The first paint job…see how it is a bluish gray?


Another view of the first paint job

Another view of the first paint job


Last one...look how blue it is in this!

Last one…look how blue it is in this!


The final paint job! A beautiful grey!

The final paint job! A beautiful gray! (looks a little darker in this picture since it was taken at night)


The header all spackled and painted!

The header all spackled and painted GRAY!
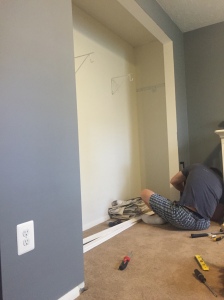
 

Jim working on the molding

Jim working on the molding


Jim had to cut out some of the old molding to add the new molding around the closet

Jim had to cut out some of the old molding to add the new molding around the closet

Closet completed (with pink and blue handles)!

Closet completed (with pink and blue handles)!


Cribs all set up and in place - the letters to their names hang from the knobs glued above the cribs

Cribs all set up and in place – the letters to their names hang from the knobs glued above the cribs


Not the next picture with lighting, but another view with the glider and ottoman

Not the best picture with lighting, but another view with the glider and ottoman


View of the double glider, ottoman, and dresser

View of the double glider, ottoman, and dresser


Closet completed (with pink and blue handles)!

Closet completed (with pink and blue handles)!


We added a decal to the wall also!

We added a decal to the wall also!

Nursery Crafts

I did some little DIY crafts for the nursery as well.  I got letters to spell out the twins’ names and painted them white with zig zag stripes (pink for Amelia’s and blue for Austin’s). I tied ribbon around the letters and we glued knobs to the wall to hang the letters by.

I also made some size dividers for the clothing in the closet.  A little paint and glue and I ended up with these:
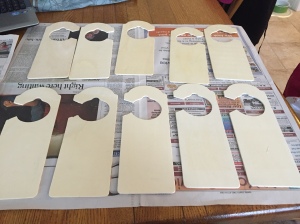
These were door knob signs so I had to cut them a little so they would fit like a hanger

These were door knob signs so I had to cut them a little so they would fit like a hanger

All painted gray
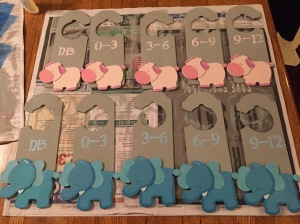
All painted gray

Finished!

Finished!

Close-up View

I thought they were cute but after having infants, I would say they aren’t really necessary. You go through sizes relatively fast and I took out the small outfits as the babies grew. But still…cute.

Knobs and Levers

Another little project I did by myself involved the upstairs hallway bathroom. This is the one bathroom we haven’t redone yet and I hate it. It needs some serious updating. We aren’t ready to tackle another bathroom yet, so it is not on the immediate to-do list.  One thing that was really bad about the bathroom was the shower knob. It is the kind that you have to pull out from the wall and then you twist it right or left to adjust the water temperature. It is the sweet old fashioned kind that looks like it is trying to be a crystal ball or something.  Exhibit A:

I forgot to take a picture of the original knob…it was a worse version of this

The ugliness of the shower knob is not the problem (the rest of the bathroom isn’t cute either, so I just have to suck it up and deal until we…er Jim…wants to redo that bathroom). The problem was that it was incredibly hard to pull the knob from the wall to turn on the shower.  This bathroom is our guest bathroom, so we often had guests try to turn on the shower for a while before calling for our help. Many were fearful they would pull the knob from the wall because they had to pull so hard.  If we tightened the screw in the knob, it would get better but still not be good and would loosen again. I decided to replace the knob. I figured this was a job I could do on my own and surprise Jim with my DIY skills.  I went to Home Depot and got two kinds of shower knobs; another crystal ball type one and one that was a lever.  I took the old knob off and cleaned the area behind it. I saw that the piping had been pushed back a little which was contributing to the problem with the old knob. The piping must have shifted when we were redoing our master bathroom. The two bathrooms share a wall and all of the plumbing. I pulled the piping up a bit and put the new lever on but when I pulled the piping up, the tub faucet’s piping pulled up and caused it to poke out from the wall. I knew this was a problem, but I thought we could fix it with some silicon for waterproofing between the space and the wall. Once the new lever was on, I tested it by trying to turn on the water. No water came out of the faucet. The problem with the lever was that it could not be pulled out  from the wall to turn on the water and it only twisted back and forth to control the temperature. Terrified I broke the shower, I quickly un-did the new lever and put on the new crystal ball knob I bought.  Luckily, it worked!  I was so relieved. It was a lot easier to use the knob and I figured the problem was solved!

After taking the old knob off, I realized I should take a picture!

After taking the old knob off, I realized I should take a picture!


Jim was somewhat impressed I fixed the knob situation but not so impressed that I caused the tub faucet to stick out from the wall. He was able to fix the problem by taking off the faucet and cutting back part of the piping and then reattaching the faucet. He then added silicon for waterproofing. A little bit more complicated than the just add silicon solution I had thought of, but luckily it was fixed!

New knob! Not super different than the old one in the looks department, but at least it works better now (also a whale cover over the faucet...not a permanent addition!)

New knob! Not super different than the old one in the looks department, but at least it works better now (also a whale cover over the faucet…not a permanent addition!)

Stair Banister:

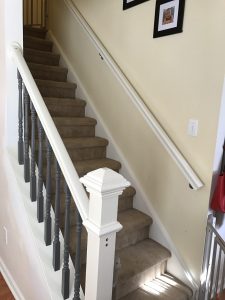
As the twins became mobile, it was clear we needed to think about baby proofing. My biggest fear had to do with falls that would lead to serious injuries. This led me to the stairs.  The stairs that lead to our second floor had an opening overlooking the living room without any banister. Even when we bought the house, we knew this was not the safest set-up. Being grown adults who know how to walk up and down stairs, fixing it was not our number one project. Now it was. Without a banister, there was also nothing to attach to a baby gate. This meant that not only could the twins try to go up the stairs on their own, they could also fall off the side opening of the stairs while attempting to crawl up the stairs.  Jim had already installed a banister on the basement stairs when we redid the basement. It was a very similar procedure to add the banister to the first floor stairs. He had to undo some of what was already in place in order to make the banister work. He did an awesome job and we were able to install a baby gate at the bottom of the stairs!  This baby gate is seriously a life saver keeping the twins on the (baby proofed) first floor.

Stairs before railing and banister (see the big opening at the bottom of the stairs)?

Stairs before railing and banister (see the big opening at the bottom of the stairs)?


Unpainted banister!

Unpainted railing in place!

Finished railing!

Finished railing!

Finished banister!

Finished banister!

Another view

Another view

One more with more of the stairs

One more with more of the stairs

Basement Permit:

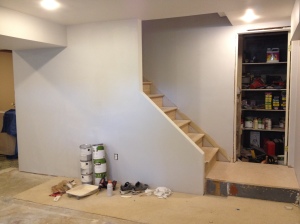
Another project we (uh, Jim) completed had to do with the basement. We had previously tried to close our permit for the work on the basement with one last inspection from the county. Unfortunately, we failed this inspection because we needed to install a GFCI outlet by the washer and dryer  (that type of outlet automatically shuts off if exposed to water) and because we had to drywall under the stairs. The GFCI outlet was a simple fix that I did myself within a week of failing the inspection. Drywalling under the stairs was going to be time-consuming so it got put off…for a while.  Drywalling can be annoying because of the need to cut all the pieces perfectly and then spackle and then sand the dried spackle and then sometimes need to repeat the spackling and sanding. Drywalling is even more annoying if it is for an area that is going to be used as a storage closet and it has an angled ceiling.  After months and months of ignoring the open permit, Jim finally decided to get the drywall up and close the permit. He also decided to add some nice floor padding (we didn’t finish the floors under the stairs) and really spruce up the storage area. It was similar to any other drywalling effort though and we passed the inspection without issue. Permit closed.  We still have a few more things we need to do to truly “finish” the laundry room, but that will come with time.

Drywall all completed for the closet under the stairs!

Drywall all completed for the closet under the stairs!

Trying to get a picture of the nice floor Jim put down (it was already covered by a bunch of things and I didn't feel like cleaning it out...)

Trying to get a picture of the nice floor Jim put down (it was already covered by a bunch of things and I didn’t feel like cleaning it out…)

Ceiling Fans and Lights:

When we first moved into the house, we painted all the rooms on the second floor, added in new carpets, and updated two of the four ceiling fans. The two ceiling fans we replaced we really old and did not have lights on them. So we added modern ones with lights. The ceiling fan in our room was new with lights, so we left it alone.  The reason we did not update the last ceiling fan was because it was not connected to the light switch and therefore it didn’t seem to make sense to add a ceiling fan with lights. It was also in a room we weren’t using as a main guest room, so we figured down the line we would come back to it.  Well it is down the line.

On a side note – when the twins were 3 months old, the air conditioning broke.  We discovered this during a random heat wave in April. Our whole A/C unit needed to be replaced. With better A/C, it was much more noticeable how poorly it worked on the second floor.  In order to remedy this situation, it was suggested to add more insulation in our attic (which is basically just a crawl space). You may remember our attic is a nightmare to go up to from when Jim installed the ceiling fan and overhead lights in our master bathroom. Therefore, we decided before we put more insulation in the attic, we would do anything we could think of that might require Jim going into the attic. This encouraged us to install a new fan that was attached to the light switch in one room and also had a ceiling fan with lights to the room in the office.  Outside of having to go up into the attic, these weren’t too complicated of projects.  Jim had to cut some dry wall out-of-place by the light switches so he could connect the new wire to the light switch and feed it up through the ceiling. For the old fan, he ran the new wire to where the old fan’s wires were and hooked everything up.  We have installed new fans before and if the wiring is in place, it is pretty easy-peasy.  For the new fan, Jim also had to cut a hole in the ceiling and feed the wires in addition to installing the new fan.  The fan in the office first made some burning smell and we decided to bring it back and exchange it for a new fan. With the exchange, the problem was fixed.  Now every room on the second floor as a ceiling fan with lights that is controlled by a light switch!

Old fan in the extra bedroom

Old fan in the extra bedroom

The new fan to replace the old fan (lights on)

The new fan to replace the old fan (lights on)

Same fan with the lights off!

Same fan with the lights off

No fan or overhead light in the office

No fan or overhead light in the office

New fan with lights in the office (lights on)!

New fan with lights in the office (lights on)!

Same fan - lights off

Same fan – lights off

In addition to adding the fans in the ceiling, another ceiling project we wanted finished before adding the extra insulation in the attic involved the upstairs hallway bathroom.  The only light fixture in that bathroom was above the sink.  Whenever you took a shower in that bathroom and pulled the shower curtain closed, it got incredibly dark in the shower.  We wanted to add ceiling lights above the bathroom so brighten up the room (especially for showers).  Jim had to cut the holes in the ceiling as well as run the wiring from the existing light fixture to connect over the bathtub. In also had to install housing for the lights before hooking up the actually lights.  The first lights he ordered ended up being way too bright, so he exchanged them for ones that were softer on the eyes.  The lights are great and really help for bathtime with the twins and whenever someone showers in the bathroom! (It also helps me see all the imperfections of this bathroom better…we really need to get on redoing it…)

Holes in the ceiling with the wires coming out (Apparently I was really bad at taking before pictures during all of these renovations…)
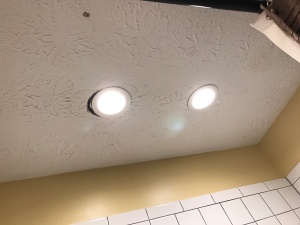
 

New lights over the bathtub (lights on)!

The new lights over the bathtub (lights on)!


Same lights with them off (you can see we need to fix the drywall...but that is not a "priority" right now)

Same lights with them off (you can see we need to fix the drywall…but that is not a “priority” right now)

I *think* those are all the projects we have done in the past two years.  There may be a post where I throw something else in I remember later on…but I doubt it. These were the pictures I had and all I can remember!  Now on to that new project…
A Long Overdue Update

Posted on

This is a long overdue post.  There were some reasons for my delay in posting, one was that we went on an amazing trip to Australia in April which took up a lot of that month. Then we had to wait a while before we got the right people in to spackle the drywall so it would be finished and seamless.  It wasn’t until May before we really started making progress again…but now we’ve made a LOT of progress so we have a lot to catch up on.

Once the walls and ceiling were spackled, we were able to start painting.  We needed to prime every, thing before painting, so it took some time.  We pick a gray color for the main room and a yellowish white for the laundry room.  After painting, we saw a lot of little areas that needed some retouching with the spackling.  It took time to spackle all the areas, let it dry, sand it smooth and repaint.  Once it was all done though, the rooms both turned out great.

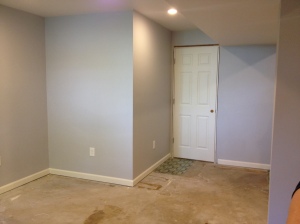
The painted walls

The painted walls

I took pictures of the different angles

I took pictures of the different angles

Another

Another

A few more of the main room...

A few more of the main room…

IMG_2785

IMG_2786

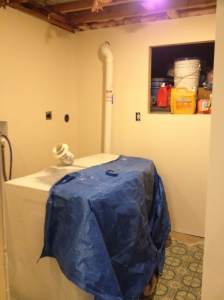
The laundry room (this is bad lighting and makes the wall looks more yellow than it is)

The laundry room (this is bad lighting and makes the wall looks more yellow than it is)

More laundry room

More laundry room

Last one

Last one

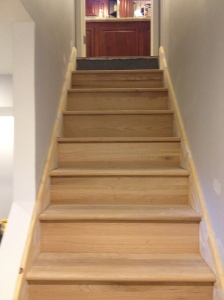
After the painting, moulding needed to be added along the walls, door frames, and the post.  This meant measuring each moulding exactly right, nailing it in place, covering the nails with spackle, and then painting the finished product.  We plan to put moulding in the laundry room, but focused on the main room for now.  Moulding also needed to be put along the stairs.  This had to be custom-made for our custom-made steps.  Jim took all the measurements and planned carefully for the mouldings.  It came out perfectly. It fits snug up against the stairs and helps to finish the look.

The stairway with the unpainted moulding

The stairway with the unpainted moulding

Close-up of the moulding

Close-up of the moulding

The other side

The other side

One more full view

One more full view

The moulding along the walls

The moulding along the walls

More moulding

More moulding

Crown moulding along the post

Crown moulding along the post

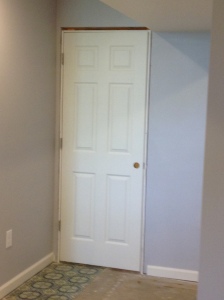
We also needed to install the new door and door frame between the main room and the laundry room.  This was not as easy as it should have been.  When we would make one adjustment to line up the door, a corner would pop out or the door wouldn’t shut correctly.  After a lot of frustration and tries, Jim was able to maneuver the door in a way that made it fit perfectly.  After the door and moulding, Jim installed the staircase post (actually known as a newel).  He needed to drill into the cement in order to securely attach the newel to the ground.  He also secured the newel to the staircase using creative means.  It is very sturdy and looks like it has always been there.  Once the newel was in place, Jim added a finished board to the top of the half wall we cut out in the stairs. This helped finish the stairway as well as lays the foundation for stair posts and a railing.  Some other finishing touches included putting new vent covers on the a/c vents and installing a new vent for the dryer.

The door installed

The door installed


Close-up

Close-up

The newel with the finished board on the half wall

The newel with the finished board on the half wall (and painted moulding)!


The biggest update of all has to do with the floor.  Half of the basement is going to be the gym area and the other half is going to be for lounging and hanging out.  We decided to do different flooring for the two sections.  The gym and laundry room would both have lament wood flooring while the lounging and stairway would have carpeting.  On Memorial Day, we went to Lumber Liquidators and picked up some awesome flooring.  That week, we started looking on getting it installed.  The type of boards we bought were what is known as, “floating.” This means there is no nailing or gluing to install the floor boards. The boards “float” over the subfloor and connect to each other by interlocking the pieces.  Before putting down the floor boards, we needed to put down a moisture barrier that would protect the floor boards from moisture and mold. We got a thicker kind that would also help even out the floor if there were any imperfections (like where we couldn’t get the old vinyl floor up in the laundry room.  The moisture barrier went down pretty smoothly other than the fact that it rolled out the opposite direction it was supposed to be installed.  We figured it out though and were ready to start the floors.

Moisture barrier in place

Moisture barrier in place

Another view

Another view

Jim decided to get the flooring done as soon as possible. I was going out-of-town for my niece’s first birthday, so Jim stayed home and did the floors solo.  When I got home, I was amazed at how awesome it looked.  He had started the flooring before I went out-of-town and was having some trouble with the boards interlocking straight.  He got half of the gym floor done before undoing it all to make sure everything was interlocked perfectly so he wouldn’t have trouble later down the line.  He figure out a method of using a laser from one of the levels to determine if the boards were straight.  Although it was time-consuming, it worked and the floors turned out awesome. Jim needed to leave a space between the walls and the floor boards in order to allow for fluctuation in the size of the boards.  To cover up that space, he added quarter moulding along the floors to give an extra finished look.

IMG_2927

The start of the flooring

The gym section

Finished! The gym section

More of the gym

More of the gym

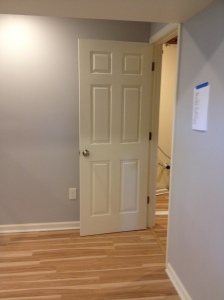
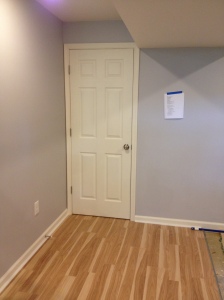
A shot of the finished door with the finished floors

A shot of the finished door with the finished floors

Showing how well it closes

Showing how well it closes

The laundry room

The laundry room

More laundry room - please excuse the unused mouldings

More laundry room – please excuse the unused mouldings

Threshold moulding (not sure if that's the real name...but it looks good either way, right?)

Threshold moulding (not sure if that’s the real name…but it looks good either way, right?)

The main section of the basement is almost complete.  We even mounted our new television and set up the new couch. Those pictures can wait for the big reveal.


One Step at a Time…Literally

Posted on

The steps to the basement were carpeted before we started the demolition.  We plan to keep the stairs carpeted, but we wanted to change how the carpet looked.  Here is a picture of the original staircase:

The original stairs, take note of the carpet on the sides

The original stairs, take note of the carpet on the sides

You can see that the carpet goes up on the sides of the stairs.  This is very unusual.  Jim absolutely hated it. I didn’t like it, but never really thought much of it.  On top of the weird carpet, the stairs were very creaky.  Jim figured he would take the carpet off and fix some of the creaks but adding some new nails and making it more sturdy.  Well, when the carpet came off the stairs, we saw that the stairs were no good.

The steps without carpet

The steps without carpet

Close-up to get a better idea of what bad shape they were in

Close-up to get a better idea of what bad shape they were in

These are not finished stairs.  These stairs were installed when the basement was unfinished and the look of the stairs didn’t matter.  Instead of having normal stringers to hold the stairs in place, these stringers had grooves in them to slide the stairs in.  These meant that the sides of the stairs that are normally uncovered would have grooves and be unfinished.  Jim and I brainstormed the many different ways we may be able to fix this problem.  Jim’s first thought was to re-do the stairs completely.  I came up with many different options that unfortunately would not look as good.  In the end, Jim won.  We were going to learn how to build some stairs.

Jim figured out all the measurements to make the steps work.  He had to work around the support beam in the basement which is located right at the very first step of the stairs. He also had to make the stairs end before the door to the tool closet at the base of the stairs.  He had a design and measurements worked out.  On one of our March snow days (because we did have more than one), we decided to start working on the stringers.

The wood all ready to be cut

The wood all ready to be cut

Jim's design

Jim’s design

The stringers are the skeleton of the staircase. It holds everything in place.  The cuts on the stringers are the most important part to getting the stairs to be even and level.  After measuring out what needed to be cut on the stringers, Jim used a circular saw to cut each step in the stringer.  Unfortunately, circular saws do not all the way through because they are, well, circular.  So after doing all the cuts on one side, we flipped the wood on to its other side to cut out the stairs there.  Then a little piece was left that we needed to use a hand saw to get rid of.  It took some time.  Once we had one stringer done, we used it has a stencil for the next two stringers.

The outlines drawn on the wood

The outlines drawn on the wood

One of the finished stringers!

One of the finished stringers!

Using the finished stringer as a stencil

Using the finished stringer as a stencil

Two weekends ago, Jim decided to tackle the stairs.  I had been sick that week and unfortunately was no help (outside of taking pictures and handing Jim things no and then).  He tore down the old staircase and got started on the new one.  He put a ladder in place so he could still come upstairs when he needed to.

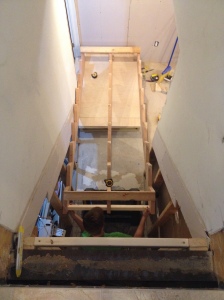
The view from upstairs

The view from upstairs

View from downstairs...Derby was really upset the stairs were gone and that Jim was stuck down there

View from downstairs…Derby was really upset the stairs were gone and that Jim was stuck down there

Jim got to work figuring out where the stringers would go and also installing the support beams for the stringers.  Jim quickly realized some of his original calculations were off.  The stringers fit in place, but the stairs were incredibly slanted.  He had to rework all of his calculations and that took a lot of time.  He eventually ended up taking away one of the stairs and increased the height of the platform at the end of the stairs so that everything would be level and even.  Luckily, he did not have to do completely new stringers and just altered the ones we already cut.  Once all the measurements were corrected, Jim attached the stringers at the base and the top and then put them in place. Jim also had the foresight to add drywall to the sections of the wall that had been previously covered by the old stairs that would no longer be covered by the new stairs.  He saved us a lot of time from cutting out triangles of drywall to install.


The new wood on the platform step to increase its height

The new wood on the platform step to increase its height

Support beams in place, Derby still uneasy about the missing stairs

Support beams in place, Derby still uneasy about the missing stairs

Jim moving the stringers in place

Jim moving the stringers in place

Stringers in place!

Stringers in place!

The next step was to add the risers and the treads.  Treads are the part of stairs you step on while the risers are the vertical part that rests between the treads. Risers prevent you from putting your foot through the stairs and they add support to the treads you walk on.  Luckily, we were able to order finished treads and risers. The treads have round edges which make them look really nice.  Jim add wood glue and hammered them into place.  Before you know it, we had a brand new staircase!

Before the top step was put in

Before the top step was put in

All done!

All done!

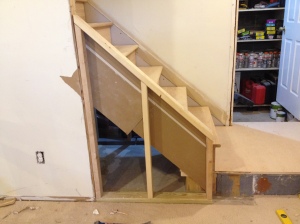
With the staircase finally in place, we were able to build the half wall by the end of the stairs.  The stairs originally were tunneled in to the end of the staircase but we decided to open it up.  We needed to build a wall frame for the new half wall.  Jim was checking his measurements and had me figure out some of it as well.  We were building the wall frame with an angle in it, so we had to pull out our cosine, sine, and tangent knowledge.  I even searched for my high school graphing calculator, which unfortunately, was no longer working.  The math was done and the measurements worked out.  We also finished the last of the drywall and we are ready for the drywall guys to come in and finish the seams.  The basement is getting so close to being complete!

Using a string to help with measurements

Using a string to help with measurements

The wall frame in place!

The wall frame in place!

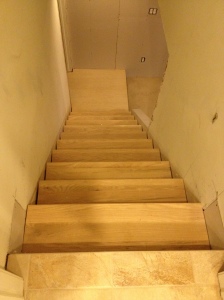
Beautiful stairs

Beautiful stairs

Last one of the amazing stairs

Last one of the amazing stairs

Functional Bathroom

Posted on

Since the completion of putting the tiles in place, we have made some big strides towards finishing the master bathroom.  The first thing we tackled was putting our shower panel in place.

You may remember that this shower panel gave us a lot of headaches with the permit inspector.  In the end, we won the battle with the inspector, so it was fine to put the panel in place.  We knew that the panel needed to hang on brackets that are screwed into the wall, so before we put the drywall up, we installed a horizontal 2 by 4 at the heights we would need to screw in the two brackets.  Now that the tile was in place, we need to drill through the tile in order to screw in the brackets.  Drilling through tiles requires a special type of drill bit.  We needed to do this in the last bathroom remodel when installing the pedestal sink. We bought the perfect size drill bit (a little wider than the screw because we learned through experience that tile does not give like wood does) and got to work.  Drilling through tile is long and tiring.  Jim did the majority of the heavy lifting while I sprayed water on the tile during the drilling (trying to recreate a wet saw type drill).  We ended up putting three brackets in place (two on the top, one on the bottom), so ensure the panel stayed in place on the wall.  We also had to hook up the hoses to the water supply and make sure there was no leaking. At first, we did this before screwing on the brackets (so we could see exactly where the brackets needed to be.  The problem was the panel had to be away from the wall while we drilled.  We came up with an apparatus to hold the panel in place.  After the first bracket, we disconnected the shower panel to screw in the rest.   The grout we used on the tile has a special grout boost that is not supposed to get wet for 10 days after installation.  Therefore in order to test the shower panel, we grabbed a bucket and a bunch of towels.  It worked!  Success!

The panel with all the knobs and body sprayers!

The panel with all the knobs and body sprayers!

Close-up of the panel!

Close-up of the panel!

Rain shower head

Rain shower head

Hand-held sprayer (we haven't screwed in the holder for it yet)

Hand-held sprayer (we haven’t screwed in the holder for it yet)

Most of the panel I could get in a picture (the space is limiting for picture-taking)

Most of the panel I could get in a picture (the space is limiting for picture-taking)

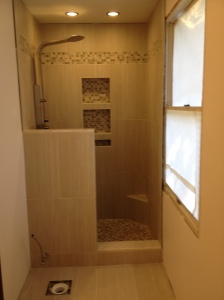
View of the shower - it just needs the glass door!

View of the shower – it just needs the glass door!

Last one!

Last one!

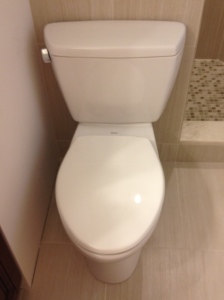
The next step towards a functional bathroom was installing the toilet.  We bought the same toilet we installed in the downstairs bathroom since we liked it.  Therefore, putting it together was pretty easy.  The only hiccup we encountered was that a regular size wax ring (what you put between the toilet base and waste pipe to make an air tight seal) was too short.  With the extra height of the mortar and tile, the wax ring was not sealing.  Luckily, Home Depot sells extra large wax rings which worked perfectly.  After a few easy steps, the toilet was installed and working!

Toilet all set up!

Toilet all set up!

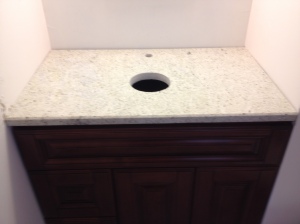
We already had the vanity in place, but we needed a counter top.  We had decided on a vessel sink which we already had, so we had planned to get a granite counter top.  Since it was such a small space, we thought we could get a discount on the granite slab we needed.  If it was extra granite from a previous job, the company wouldn’t have much use for it.  We also believed we could install it ourselves, so all they had to do was finish one side and cut out two holes.  After going to two places and getting really high estimates, we went back to the place that did our kitchen counters (I’m not sure why Jim wanted to try the other places first since we had a good experience in the kitchen).  They gave us a granite counter top for more than half of what the other places quoted us.  We also liked the color granite better.  A few days after we ordered it, we were able to pick it up.  The literal picking up of the granite wasn’t super easy, but between Jim and me, we were able to get the granite out of the trunk of his car and up to the master bathroom.  Next came the hard part.  The available space above the vanity is 36 1/8 inches. Therefore, Jim had the granite guys cut the slab to 36 inches.  This gave us some wiggle room, but too much space that there would be a huge space between the wall and the granite.  Well…we thought it gave us some wiggle room. Turns out, an 1/8 inch doesn’t leave much room to wiggle.  The problem was that the walls were not perfectly straight, so the granite did not just slide into place.  It took a lot of effort to get the granite on top of the vanity.  The wall ended up taking a serious beating.  Every time we had to shimmy the granite one way, the wall would get ripped up a little.  The granite slab got stuck a few times, but Jim was able to dislodge it every time.  After about 30 minutes, we got the granite slab in place.  We had a counter top!!  The wall was hurting a little, but with a little TLC (spackle, sanding, and paint), it would be like new again.

The counter top on the vanity!

The counter top on the vanity!

Another view

Another view

Picture from up high!

Picture from up high!

The walls all beat up

The walls all beat up

Wall scrapped up on the other side

Wall scrapped up on the other side

Once we had a counter top, Jim was able to get to work installing the vessel sink, faucet, and sink plumbing.  It took some effort tightening the pipes under the sink to make sure there was no leaking, but overall, Jim didn’t have any problems.  The sink was now completely functional!

Installed!

Installed!

Close-up of vessel sink and facuet

Close-up of vessel sink and faucet

Trying to get a picture of the whole vanity

Trying to get a picture of the whole vanity

The sink with medicine cabinet and lights!

The sink with medicine cabinet and lights!

We are getting close to finishing the master bathroom!  Can’t wait for the final reveal!

Front Yard Facelift Part Two!

Posted on

Since Jim and I maibe crazy, in addition to working on the master bathroom, we have also been working on the front yard.  I last wrote about our front yard facelift was back in March.  We had begun to build the retaining wall and were close to finishing.  Since the slope in our front yard is so noticeable, we weren’t really sure what to do with the retaining wall at its ending point.  We didn’t want to continue it along the side of the house since that part of the house is level and leads up to a fence.  We played with the idea of having it gradually decrease in height.  This is how we left it at the writing of the last post:

We aren't sure if we are definitely leaving the end like this, but it is the working model right now

The wall back in March

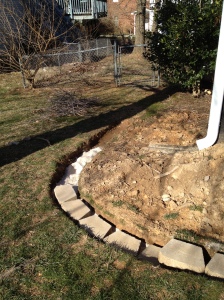
Well, we decided not to keep the wall like this. We decided to have it round its way back to the house.  That meant more trench digging and leveling of the bottom stone.  We took a long break from working on the front yard.  The weather was going back and forth from cold to warm and we were just pretty focused on the bathroom.  Finally, in May, we decided we better get moving on the front yard again.  At one point, the wall collapsed since we had not filled in dirt behind it to keep it in place.  It was only at the curve, but it meant Jim had to re-level that entire area.

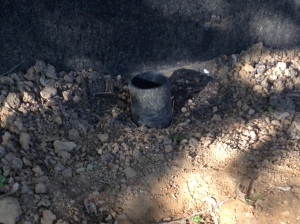
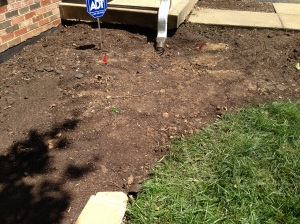
While Jim worked on the trench and the retaining wall, I worked on getting up all of the grass that was in front of the old fence.  We planned to extend the plant bed out about 5 feet from the walkway, so all of that grass needed to be gone.  Also while Jim focused on the wall, I extended the plumbing pipe that pokes out of our front yard.  I am not really sure what it is for, but I notice it in front of a lot of people’s houses, so it is pretty standard.  It is probably a way for plumbers to access the pipes, but who knows.  We didn’t think it would be good to bury it under all the dirt we planned to had to the plant bed though, so we extended it.  It was ABS piping, so we had already ordered the extra pipe we needed.  I was proud of myself because not only did I attach the plumbing pipes, I used the miter saw to cut the pipe to the right size!  I’m pretty scared of saws, so Jim normally handles that end of the DIY stuff…but I did it all by myself!

New trench for the wall

New trench for the wall

Base layer of stones laid down!

Base layer of stones laid down!

All the grass up!

All the grass up!

All the grass I dug up!

All the grass I dug up!

I thought I took a close up of the pipe before we cut it, but I didn't!  You can see it in this old picture from march though. It is a black pipe sticking up from the ground under the window

I thought I took a close up of the pipe before we cut it, but I didn’t! You can see it in this old picture from march though. It is a black pipe sticking up from the ground under the window

The pipe after it was cut (Jim did that part)

The pipe after it was cut (Jim did that part)

The new extended pipe!

The new extended pipe!

Another alteration we had to make was with the one downspout that ended in our future plant bed.  Since we were trying to level out the area, tha downspout would be under all the dirt if it wasn’t raised. Luckily, Thompson Creek (our gutter guys) came out for no charge and raised up the down spout.  Jim still wanted the water to be let out farther away from the house and the plant bed, so we invested in some downspout extenders.  The plan was to have the extender go to the retaining wall and then release the water at the end of the wall.  Jim decided to cut one of the stones in half so there would be a place for the extender to go.  It worked out great.  We plan on getting a grate to cover that part of the wall, but we haven’t yet.

The little hole in the wall for the gutter extender to drain out of. This is where we will add a grate!

The little hole in the wall for the gutter extender to drain out of. This is where we will add a grate!

The next weekend, Jim had a lot of shifts at the Rescue Squad, so I decided to be productive while he was gone. We wanted to put landscape fabric on the inside of the retaining wall to help prevent soil from seeping through the cracks.  I did that and then I started to fill the plant bed with soil to help level out the area.  I didn’t end up finishing because we ended up needing 62 bags of soil in all.  I also went to a nursery that weekend to buy the shrubs we planned to install in the plant bed (we decided it with the help of our awesome friend Kate).  Once the soil was down, the plant bed was ready for the plants!

The night before the plants arrived, Jim decided to make one more alteration. The other downspout in the front of the house also led right into our plant bed. It had a bulky, cement block to help funnel the water that was just in the way of our plant bed.  Jim decided to use extenders to have the downspout empty at the end of our plant bed.  He dug a trench and then buried the downspout extender underneath it.  It really clean up that section of the plant bed.

The downspout with an extender before

The downspout with an extender before

The spout out of the way!

The spout out of the way!

You wouldn't even know it was there!

You wouldn’t even know it was there!

Memorial Day weekend, the plants were delivered. We paid to have planted and for them to put landscape fabric down beforehand (to help prevent weeds from growing).  They mulched around the plants but we decided to do most of the mulching ourselves.

Plants in place! (no mulch yet)

Plants in place! (no mulch yet)

Another view

Another view

Last shot

Last shot

This past weekend, we finished up the front yard.  Jim worked on the capstones while I mulched the plant beds.  The capstones needed to be cut at the curve so they fit nicely and also they needed to be glued down.  Jim did an awesome job.  In addition to mulching the plant bed, I also added landscape fabric and mulch to the two trees in our front yard, the bush covering an electrical box and the mailbox flower bed. I needed to weed a little bit before putting in the landscape fabric too. You may remember planting the mailbox flower bed last year. We planted lavender plants and dahlias and it was adorable.  Little did we know that lavender plants get really huge.  They also apparently need to be pruned?  Dahlias are annual plants, so we took them up with they died over the winter. In order to save a little money, I planted dahlia bulbs in April so they would grow and bloom in place.  This flower bed turned into a disaster. The lavender plants started to overtake everything.  After a little research, I decided to give the lavender plant its “early summer” pruning.  I’m not sure if I did it correctly, quite honestly, I may have killed the plants.  The dahlia plants have started to sprout and they have grown very tall but have not blossomed yet.  I think I maybe didn’t plant them deep in the ground which is why they are so tall.  The area looks a little silly.  It is definitely a work in progress.

Awesome job with the capstones

Awesome job with the capstones

Perfect cuts

Perfect cuts

The last thing we needed to do to complete the front yard facelift but to plant some annual plants around the skypencil shrub.  I decided to go with 5 marigold flowers.  I planted them around the skypencil and it looks pretty cute.

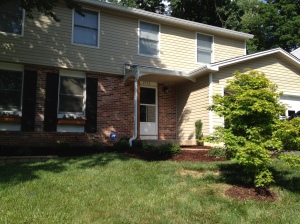
Yard work is a lot of hard work. In the end, it was completely worth it.  We love the new look of our front yard and we definitely upped the curb appeal to our house.  Now we just have to remember to water all those plants…

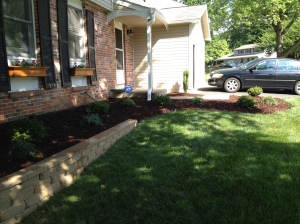
View of the front

View of the front

Another view

Another view

IMG_1238

Another view (no marigolds yet)

Another view (no marigolds yet)

The mulch and capstones in place!

The mulch and capstones in place!

A different view

A different view

Trying to get good shots!

Trying to get good shots!

I just love it!

I just love it!

Cute marigolds around the skypencil!

Cute marigolds around the skypencil!

The new pipe all buried under dirt and mulch!

The new pipe all buried under dirt and mulch!

Our silly mailbox flower bed...it is a work in progress

Our silly mailbox flower bed…it is a work in progress

A little bump of mulch for our Japanese Maple

A little bump of mulch for our Japanese Maple

Weed free with mulch!

Weed free with mulch!

Here is a BEFORE picture from last summer:

Work needed to be done!

Work needed to be done!

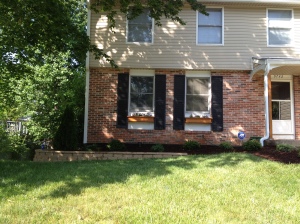
The new and improved front yard!

The new and improved front yard!

Two Year Anniversary

Posted on

Today is our two-year anniversary of becoming home owners!!  On May 31, 2011, Jim and I did one last walk-through of the house, sat down to sign a lot of papers, and then write the biggest check of our lives.  Our DIY projects started on day one of homeownership.  Immediately following closing, we went to the house and started to rip up the carpet in the living room and dining room.  Refinishing the wood floor on the first floor was our first of many projects.  Since then, we have re-painted every room in the house except the basement and second floor hallway bathroom.  We have replaced 3 ceiling fans.  We have replaced every electrical outlet and light switch on the first and second floors (minus the hallway bathroom).  We have replaced all the doorknobs and door hinges on the first and second floor – even the doorknobs on for the outside doors! We got new wall-to-wall carpeting on the second floor.  We spent 5 months (starting after only two months of marriage) without a kitchen as we tore down the former kitchen to the studs and rebuilt the room from scratch.  We remodeled our first floor bathroom. We have improved the curb appeal of our house by adding a plant bed with a retaining wall (more to come on that in my next post!). We are currently in a 3 month project remodeling our master bathroom – another endeavor in which we tore the room to the studs to build it from scratch.

Things have changed in our lives as well.  When I signed that paperwork on May 31, 2011, I signed it as Kerry Ann Cooney. We were one of the first in the group of our friends to become homeowners. Jim was working from home and I was miserable at the school I taught at.  Now, we have been married for almost two years, many of our friends are homeowners or in the process of becoming homeowners, Jim is back to commuting and I love the school I work in.  We have learned a lot through all of our projects in this home of ours.  We both look forward to more lessons and more memories to be made in all the years to follow.

Jim and me on the day we became homeowners!

Jim and me on the day we became homeowners!

Shower Prep

Posted on

Progress has been slow in the recent weeks with our bathroom renovation. This mainly had to do with conflicts in our schedules that made it difficult to work on the bathroom.  After my most recent post, Jim and I went to Rehoboth Beach, DE for a few days since it was my Spring Break from work.  It was nice to relax (even though it was cold at the beach) but it took away many days we could have worked on the bathroom.  We got back on Easter and celebrated the holiday with Jim’s family.

The Monday after Easter, we got back to work.  We needed to prime the new drywall.  We took to our standard painting jobs and that went off without a hitch.  During the week, we continued to work on the bathroom but were thwarted by volleyball, CPR certification, and dinner plans. One night Jim attached the light fixture above the sink – which looks great. Another night, we painted the ceiling and got the walls in the shower area ready for water proofing.

Light fixture above the sink!

Light fixture above the sink!

Ceiling painted and complete!

Ceiling painted and complete!

Close-up of recessed light covers

Close-up of recessed light covers

All primed!

All primed!

Another view with the ceiling

Another view with the ceiling

Wall primed and ready to go!

Wall primed and ready to go!

Friday night, we put together the cabinet for the sink.  Getting the cabinet has been an ordeal.  We ordered from a “ready-to-assemble” retailer online.  This is what we did for our kitchen cabinets and it worked out well, so we did not think it would be a problem. We did not go with the same company just because we liked a cabinet from another company better. We first ordered the cabinet at over a month ago (maybe two months). We started to put it together and the bottom piece of the cabinet did not fit into the grooves on the sides of the cabinet. Jim contacted the company and after supplying proof (pictures with a tape measure up to the grooves and bottom cabinet), they sent us a new bottom piece.  When the bottom piece arrived, we quickly realized it was the exact same size as the previous bottom piece – which did not solve the problem. At first, Jim was determined to shave the piece down to make it fit but I was able to talk him out of it.  He contacted the company again who said they would send us an entirely new cabinet (again after we supplied proof of the pieces not fitting). It took another week for the cabinet to arrive and it had the SAME problem.  We could not believe it. We were ready to just return both cabinets and be done with this company, but the woman convinced Jim to give them one more chance and promised they would check to make sure the pieces fit before sending the cabinet (that is, after we sent more proof that the cabinet pieces didn’t fit in the most recent one). We finally received the cabinet this past week.  Luckily, the pieces FIT! Turns out, the grooves on the side pieces were too small and the bottom piece was the right size.  The only problem with the new cabinet was that they clearly put the cabinet together beforehand and did not worry about scratches while taking it apart.  We did have three cabinets to choose from though so we just picked the best pieces out of the bunch.  Building the cabinet was relatively easy, although the directions left more to be desired. It was basically just a few pictures of the pieces of the cabinet going together. There was no text and absolutely no pictures of the 20+ different screws involved. We were left with about 8 screws at the end of assembly, but we are pretty sure we did everything right.  We did have to make a slight alteration of the bottom back of the cabinet to make sure it fit in place in the bathroom. Remember we pushed the wall by the sink back a few inches? Well the very bottom part of that wall is slanted, so the cabinet needs to be cut at an angle to go up against the wall. Jim is a math genius who figured out all the angles perfectly and cut the cabinet without issue.  We aren’t ready to put it in place yet, but it is now ready for when we need it.

The cabinet!

The cabinet!

Saturday morning we went to pick up the tile we ordered.  It did not take too long and got us prepared for the rest of the day’s work – prepping the shower for tile. Since showers are often wet (I know, you learn something new every day), you need to waterproof the walls of a shower. There are different methods of doing this like using cement board, etc, but we decided to use the Schluter-KERDI Shower Systems.  There are different materials you can order from the company. We got the shower base which already has a built-in slope to the drain, a shower step (think of that step you always have to go over when entering a shower), and its polyethylene waterproofing membrane (a big orange waterproofing sheet). The shower base also come with a drain as well.  In addition to adding the KERDI, Jim made sure to apply silicon to all of the sections the KERDI won’t cover (the tile redi built-in shelves, the shower step, and water supply valve box).  In order to keep the KERDI in place, you must first apply mortar to the drywall and then spread the KERDI on top of the mortar.  We knew we would need a step stool to get to the top areas of the shower and did not want to put the step stool on the shower base. The shower base is made of this unusual material – sort of like a very strong styrofoam.  Therefore, we started with the top walls of the shower and then installed the base.  It was relatively uneventful although Jim quickly discovered that applying mortar to a wall is not as clean as on a floor because gravity takes the mortar off of the trowel and brings it to the floor.  Before setting the shower base in place, Jim connected the last bit of PVC pipe to the drain and shower waste pipe.  Everything went pretty smoothly.

First section of mortar

First section of mortar

Smoothing the KERDI in place

Smoothing the KERDI in place

Again

Again

First day of KERDI in the shower

First day of KERDI in the shower

Shower base in place with the KERDI on it

Shower base in place with the KERDI on it

The step going into the shower - no KERDI on it yet.

The step going into the shower – no KERDI on it yet (that hole in the wall is for the shower step we are going to add).

We stopped working around 4pm on Saturday because Jim needed to volunteer at the Rescue Station that night.  He had not been feeling well that day or the night before so he decided to take a nap before his shift.  While napping, he took his temperature and saw he had a pretty high fever.  He called in sick to the Rescue Squad and has been recovering since. Yesterday he went back to work (the paying kind) so last night we got back to work on the bathroom (our own self-inflicted kind).  Jim did the majority of the work on his own because I was weeding and planting some dahlias in the front yard by the mailbox.  Jim almost finished the rest of the KERDI. We will definitely be done at our next opportunity and then we all ready for tile!

The view of the shower (see the shaving step we added? pretty cool!)

The view of the shower (see the shaving step we added? pretty cool!)

Inside the shower - you can see the water supply lines that are ready for the shower panel

Inside the shower – you can see the water supply lines that are ready for the shower panel

Another close-up shot of inside the shower

Another close-up shot of inside the shower

Front Yard Facelift

Posted on

As March quickly passes by (is it seriously already the 20th?), Jim and I knew that we needed to take a detour from our master bathroom remodel to focus on some yard work. You may remember some posts about smaller projects we have done over the past year to try to increase our house’s “curb appeal,” but we still have a long way to go. The last update about the front yard involved ripping up some of the ugly bushes in the front of our home in order to prepare it for future, nicer shrubbery.  Well, it is now about the right time to start adding that shrubbery since late Winter, early Spring is one of the best times to plant.  Also, working outside in the summer time in VA is horrible.

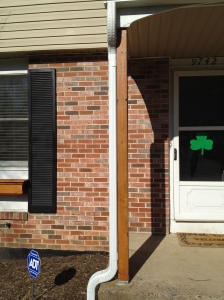
Before I get into the new project we started, there is another project Jim completed back in the Fall that I never wrote a post about. It took only a few days and Jim did all of it by himself which is why I forgot to mention it earlier.  We have a little front stoop that has part of the roof covering it. Part of the support of this roof is a large beam that goes from the stoop to the roof.  Throughout the summer, we noticed what bad shape this beam was it. I knocked into it sweeping once and all of the molding around the bottom of it crumbled away.  The beam was surrounded with a white plastic cover but it was clear that underneath it was rotted wood.  Jim was concerned that if we received heavy snowfall, the beam would provide no support and the roof over the stoop would cave in so we needed to replace it.  After Jim took off the covering, he was able to see how bad the rotting really was. He was able to put his fist through the wood beam and it just fell apart.  The roof currently had no real support.  Jim bought a strong metal base to screw into the stoop and a large, wooden beam to replace the old one.  He struggled a little bit screwing in the metal base, but eventually got it.  He also decided to stain the wooden beam the same color as the mailbox and the planter boxes we added in front of the house.  After some finagling, Jim was able to get the new beam up and in place.  It looks great now and we know it can support the weight of the roof.

The old beam - look how rotted away it is!

The old beam – look how rotted away it is! (I don’t have any good pictures of the old beam before Jim took it down, so this will have to do)

No more beam - the roof just hanging out by itself

No more beam – the roof just hanging out by itself

The metal base

The metal base

Full view of the new beam!

Full view of the new beam!

View of the new beam from the house

View of the new beam from the house

Now back to the current project…

Our good friend, Kate, has a family owned and run nursery in Ashland, VA (right outside of Richmond). When we were trying to figure out what type of shrubbery we would want in the front of the house, we contacted Kate for help.  She went above and beyond what we could have asked for!  She had us describe what we were looking for, send her measurements and pictures, and she did the rest.  She put together this amazing drawing of what we could do for the front yard, along with suggestions of what size shrubbery to start with.  She was so incredibly helpful and knowledgeable!  If you live in the Richmond area – go check out Colesville Nursery (www.colesvillenursery.com) if you ever need any sort of plants or planting advice.  You will find really helpful,  informed people, and wonderful plant options too!

I wanted to upload the drawing but I’m having issues with it – so just imagine an accurate and awesome drawing with lots of well placed shrubbery.

Here is a picture of what the front of the house looked like before we started working:

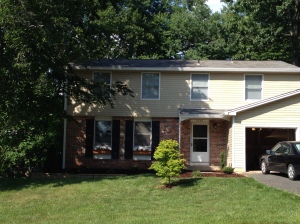
View of the house (most of it)

View of the house (most of it)

Front view of the current "plant bed" (no plants there)

Front view of the current “plant bed” (no plants there)

A little close up of the plant bed

A little close up of the plant bed

View of the side of the house (some old, ugly shrubbery is still there, but that is going to go)

View of the side of the house (some old, ugly shrubbery is still there, but that is going to go)

As you can see in those pictures, our front yard slopes downward from the front door to the side of the house.  This would make for a very uneven plant bed if we chose to keep it this way.  Instead, we decided we would build a retaining wall to keep in extra earth so we can make the plant bed even.  Turns out, building retaining walls are a lot of work.

Before we could start working on the retaining wall, we needed to get rid of the white fence in front of the front stoop. Jim always hated it when I didn’t care either way about it. Once we added the new beam with the stained color though, it looked out-of-place and I was ready to get rid of it.  With a few (hard) swings of the sledge-hammer, Jim got most of the fence up.  We had to dig deep to get the posts of the fences out, but before we knew it – the fence was gone!

The fence, right before we tore it down

The fence, right before we tore it down

Another view

Another view

Bye bye fence!

Bye bye fence!

Once the fence was down, we had to measure out the flower bed.  We decided to measure out 6 ft to give our future bushes room to grow.  We also used a hose to help outline the area.  We used shovel to dig out the outline so the bed would be clear to us.  Next, we had to figure out how tall the retaining wall would be.  Since the land is sloped down, the wall will be taller in the areas where the land is lower.  We used stakes (and sticks once the stakes became too short),  string, and string levels to get an idea of how tall the wall would be.  The height of the wall determined how low we had to dig the trench for the wall.  Shorter parts of the wall (1-3 stones), only require a trench that covers part of the bottom stone.  You also need to put down a sand base in the trench that for shorter walls only need to be about 1 inch deep.  The stones are 4 inches tall, so for the shorter parts of the wall, the trench didn’t have to be deeper than 4 inches.  For taller parts of the wall (4 or more stones), we would need 4 inches of sand for the base AND the first stone needs to be completely covered by earth, which means the trench needs to be at least 8 inches deep.  Due to the sloping nature of the wall, some parts needed to be even deeper to accommodate the different levels.  Once everything was all measured, we started digging.  It was NOT fun.  Luckily, it was a beautiful day outside (yes, we actually had a few “Spring-like” days in March).  It would have taken us quicker to finish the trench, if it were not for roots from a tree near the front of the house.  This trees roots were covering the area our retaining wall needed to go.  It took a lot of effort to cut into the roots and keep digging.  After many hours of exhausting work, we got the majority of the trench done.  There was about 2 ft more on the side of the house we needed to do, but we hadn’t decided about the side of the house just yet, so we held off.  We were exhausted and called it a night.

You can see the dug up grass as the outline of the bed

You can see the dug up grass as the outline of the bed

Outline

Outline

The trench!

The trench!

Look at how defined and deep that is

Look at how defined and deep that is

Another view

Another view

The rest of the week, we worked when the weather was nice.  One night, I had a birthday dinner to attend and Jim decided to work while I was out.  He was adding the sand to the trench and leveling each stone.  The stones needed to be level front to back and side to side. They also had to be level with each other.  Needless to say, this was very difficult and time-consuming.  When I came home from dinner at 9pm, Jim was in front of the house, with a flashlight, in freezing weather, still working. I could not believe it.  He had finished almost the entire first row.  He is just amazing.

First row of stones, you can see the sand underneath them

First row of stones, you can see the sand underneath them

View from the side -you can't really see the beginning of the deeper part of the wall

View from the side – you can’t really see the beginning of the deeper part of the wall

Close-up of the deeper sections

Close-up of the deeper sections

The next opportunity we really had to work on the wall was last Friday.  I had a (staff) basketball game that night (it’s ok if you are laughing thinking about me playing basketball right now), so I could only help until 6 pm.  Since the first layer was down, it was much easier to add the additional layers.  The first layer is level, so the stones on top will continue to be level.  I piled the stones while Jim finished the last bit of the first row.  We also decided to add a cap stone to the wall, so I ran to Home Depot to get the rest of the capstones.  Jim continued to work a little bit past me that night and when he finished, he came to watch me embarrass myself….I mean play the game.  The weather took a turn for the worse this week and we have not done much since.  We still have all of our planting left to do!

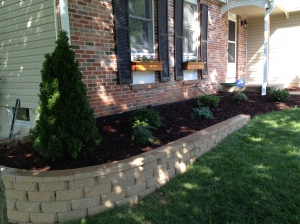
View of the wall!

View of the wall!

Another view - seeing the corner

Another view – seeing the corner

We aren't sure if we are definitely leaving the end like this, but it is the working model right now

We aren’t sure if we are definitely leaving the end like this, but it is the working model right now

View from the top - the capstones!

View from the top – the capstones!

Inspection Impossible

Posted on

I have been seriously slacking on updating the blog in the past two weeks.  My ending sentiment on my previous post was a hopeful send off of passing our inspection Monday morning.  Well, things didn’t go quite as planned.

The inspector approved all the electrical, plumbing work, and water supply, but had a question about the shower panel we planned to install.  He claimed that if the panel did not have the performance standard ASSE 1016 stamped on it, then we would have to install a mixing valve with the supply pipes.  The point of the mixing valve and the ASSE 1016 is that it prevents the hot water from scalding someone when taking a shower. Jim and the inspector searched our shower panel and could not find the ASSE 1016 stamp. It was clear there was a stopping mechanism so the shower could not get too hot and the manual stated the maximum temperature to be 100 degree Fahrenheit, but that was not enough for the inspector.  He failed us based on the shower panel (not ANY of the work we did).  He told Jim that we could install the floor and put up drywall in other areas of the bathroom though, since all of the work we did was in compliance.

So Monday night, Jim installed the subfloor while I started to measure and cut out pieces of drywall.  Jim also added two by floors in between some wall joists so we would be able to hang up the shower panel when it did get approved (we were determined to come out on top in this situation). Tuesday, we did a little bit more drywall installation. Wednesday, we both had the day off due to the “snow-quester” storm.  We only received about 2-3 inches of snow, but finished installing a lot of the drywall.

Our failed inspection turned into a much bigger deal than we had hoped. After calling the company who makes the shower panel, Jim found out it did not have the ASSE 1016 certification, but it did in fact prevent hot water from getting pass 100 degrees Fahrenheit, which is what the inspector needed to know.  Jim started looking into adding a mixing valve with the supply pipes in case we really needed them without the ASSE 1016 certification.  The first time the inspector came out, he had told Jim that he could take some pictures of the shower panel and ask around to other inspectors what they thought of the stopping valve and if that was ok. Jim therefore prepared the shower panel to show it could not get hotter than 100 degrees Fahrenheit (he took off the knob to show the stopping mechanism). We scheduled another inspection for Wednesday, which was cancelled due to snow, and then rescheduled for Thursday morning.  I had a delayed opening for work, so I had the opportunity to meet with the Inspector while Jim went to work.

My goal was to kill him with kindness so he wouldn’t want to fail us. I tried to charm him, but shortly after his arrival, I realized that was not happening.  He came and continued to look for the ASSE 1016 label again. He mind was single-tracked and it was as if he had never told Jim that he could ask around for other people’s opinions on if it would be ok. He told me there was no way he could pass us with a shower panel without the label. I asked about the mixing valve he previously mentioned and then he told me he was wrong about that and we could not even add a mixing valve behind the wall because that was against code. That meant it was the ASSE 1016 or bust. Apparently, NO ONE in Fairfax County VA could have this specific shower panel in their bathroom. Nothing was good enough for this guy.  Then, while looking at the shower panel, he noticed the 6 small body sprayers on the shower panel. He stated he hadn’t noticed those before and any shower with 3 or more shower heads needed a 3 inch shower drain.  We had installed a 2 inch shower drain.  Now he was going to fail us because of that.

Please keep in mind, that Monday he had told Jim that we could install the floor and drywall in most areas of the bathroom because nothing was wrong with our work.  As I stated, we already did this work prior to the inspector coming out. This is all that we did:

The new subfloor in place with two hole cut out for waste drains!

The new subfloor in place with two hole cut out for waste drains!

Jim added two by fours so when we need to hang up the shower panel, we will have something to screw into

Jim added two by fours so when we need to hang up the shower panel, we will have something to screw into

One wall in place! (The drywall is blue because it is a special "mold resistant" drywall)

One wall in place! (The drywall is blue because it is a special “mold resistant” drywall)

Wall number 2 (the brightness of the snow is messing up this picture)

Wall number 2 (the brightness of the snow is messing up this picture)

The top view of wall number 2

The top view of wall number 2

The extension of wall number two

The extension of wall number two

Wall number 3 with tile-ready shower shelves! Nothing to bang your head on in this shower!

Wall number 3 with tile-ready shower shelves! Nothing to bang your head on in this shower!

Wall number 4

Wall number 4

Little fix in the ceiling where there wasn't drywall before.

Little fix in the ceiling where there wasn’t drywall before.

Wall number 5 - the area above the sink

Wall number 5 – the area above the sink

Wall number 5 continued

Wall number 5 continued

The bottom of wall number 5...I know it doesn't look finished but since it will be behind the vanity, it does not matter that there are openings

The bottom of wall number 5…I know it doesn’t look finished but since it will be behind the vanity, it does not matter that there are openings

Now he is trying to tell us that if we were able to get this shower panel approved, we would have to rip up the floor and redo all of our plumbing pipes so we could have a 3 inch drain for our multiple shower heads. It did not matter to him that the same two supply lines were all that was going to be providing the water. Without adding MORE supply lines, the shower panel would be limited to how much water could come out of it. He stated that in the future, someone could install a water booster and more water would come out and the shower would overflow (of course if someone did this in the future, THEY would have to get a permit and inspection and he could fail them then, but that didn’t seem to matter to him).  I got his supervisor’s information and updated Jim about the inspection.  To say Jim was displeased would be the understatement of the century.  Let’s just say it was probably good that I was there with the inspector and not Jim so brawl was avoided.

Jim called the inspector.  After a “heated” conversation that did not end well, Jim called the inspector’s advisor.  The advisor was much more willing to work with us. In the end, he told Jim that if the company that makes the shower provided written confirmation about the mechanism to prevent water from getting too hot AND confirmation that a 2 inch drain is acceptable for that shower panel, then we would pass the inspection.  The company was happy to give us that confirmation and after a lot of unnecessary stress, we officially passed our inspection.  This made Jim especially please since the inspector had told him repeatedly over the phone, “I am not passing you.”

One thing that the advisor seemed to realize that the inspector did not, is that we are DIYers.  Every time we have applied for a permit, it has been because of self-reporting.  We are good, honest people who want to do right by the county and ensure the integrity of our home, so we want to follow the laws and get permits but there is nothing to stop us from not getting a permit.  The county would not know when and if we made improvements in our home and they are not about to start searching every home for DIYers who don’t get permits.  The county makes a profit every time we get a permit and if the county is going to make us jump through unnecessary hoops in order to pass inspections, we will stop getting permits and the county will stop making a profit. Luckily, it all worked out in the end, but I do think we need to request a different inspector for the next time.

Last night, we finished the last of the drywall.  It has been a week since we passed the inspection, but we got side tracked by another project (update to come on the blog).  The bathroom feels like a real room again!

The drywall in place in the ceiling

The drywall in place in the ceiling

Last wall up and in place!

Last wall up and in place!